Here are some of the new Laowa lenses Venus Optics will announce next year (2026):
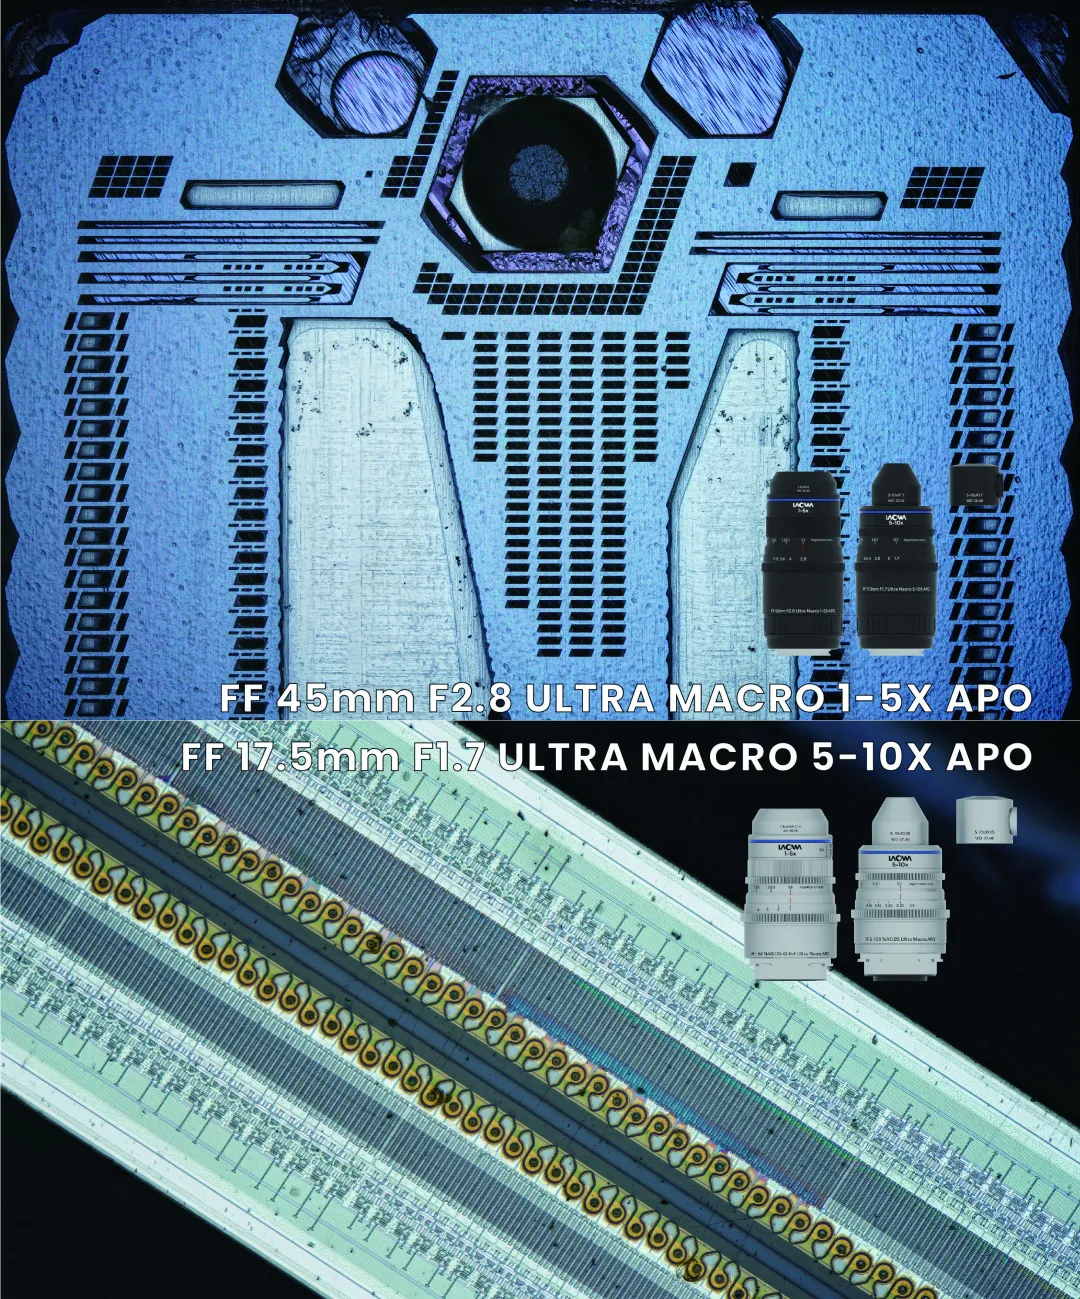
Laowa FF 45mm f/2.8 ultra macro full-frame 1-5X APO (11 elements in 9 groups)
Laowa FF 17.5mm f/1.7 ultra macro full-frame 5-10X APO (17 elements in 12 groups)
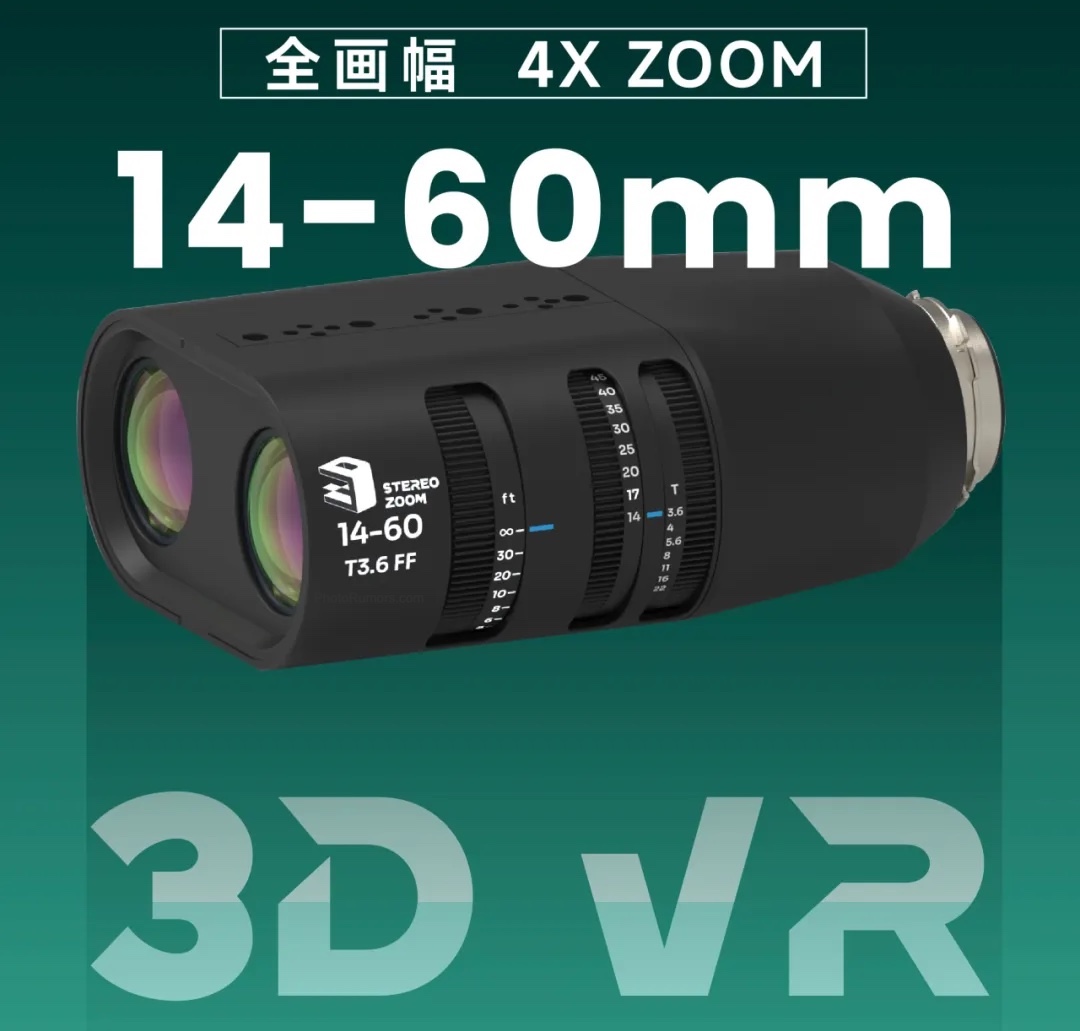
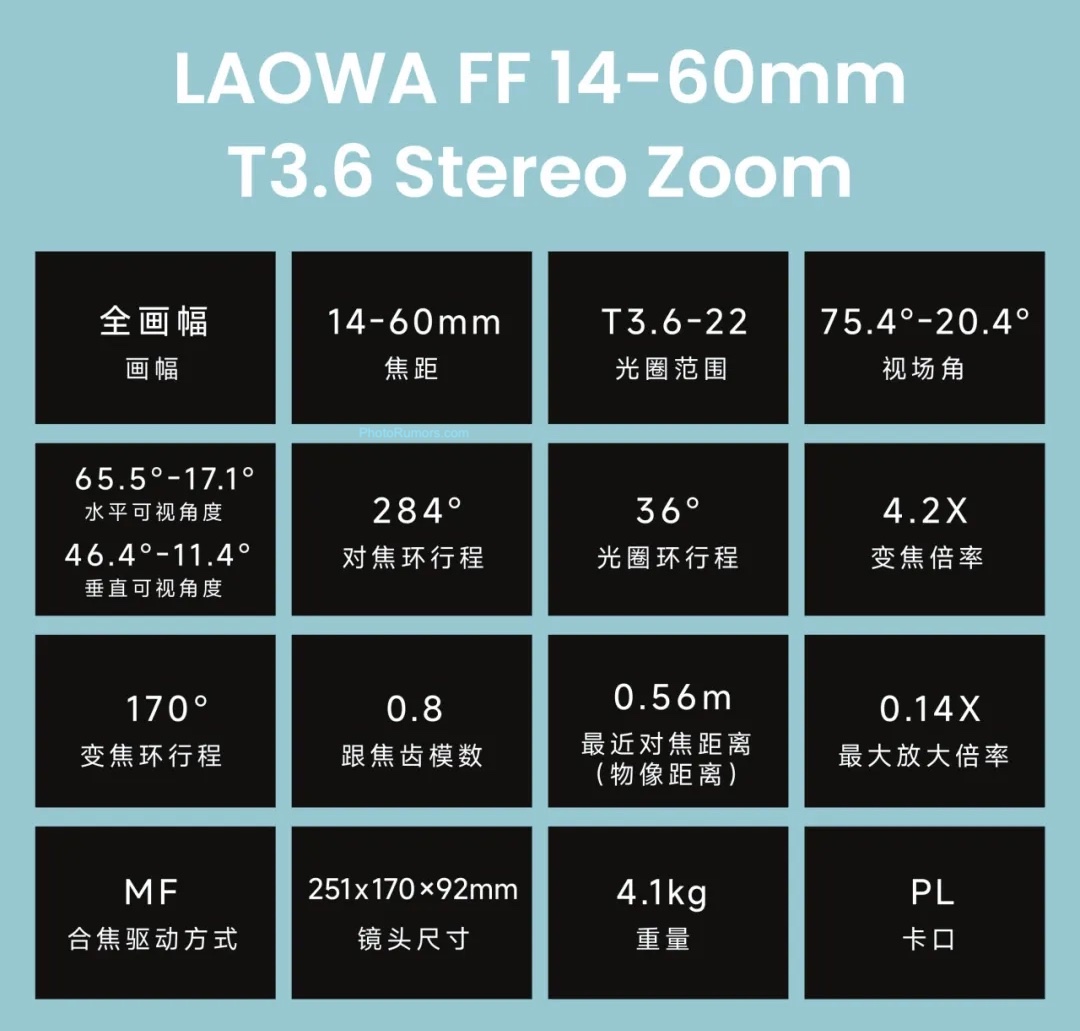
Specifications:
Full-range parfocal design throughout zooming (means the focus will not change as you increase magnification)
Coaxial illumination (means light goes through the lens, hits the surface, and comes back; the lens acts as a condenser and an objective – suitable for inspection)
Covers high magnification zoom from 1:1 to 10:1, filling the gap between a traditional macro lens and a microscope
Longer working distance (40.35mm/22.5mm) facilitates lighting setup
Adopts apochromatic (APO) optical design to effectively eliminate chromatic aberration, resulting in sharp images and accurate colors
Full-frame lenses compatible with multiple mounts (E/Z/L/F/RF/EF)
Meets the image needs of scientific research and commercial applications
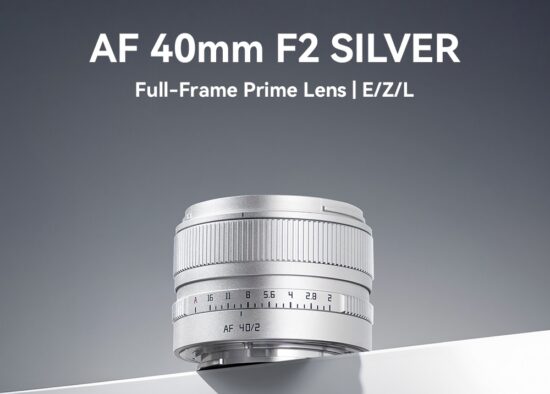
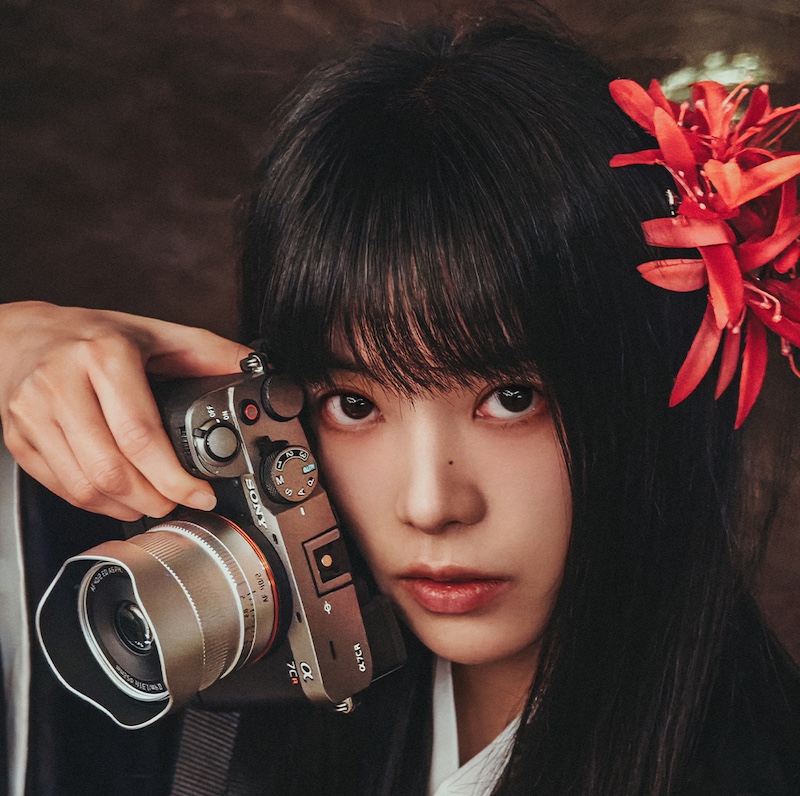
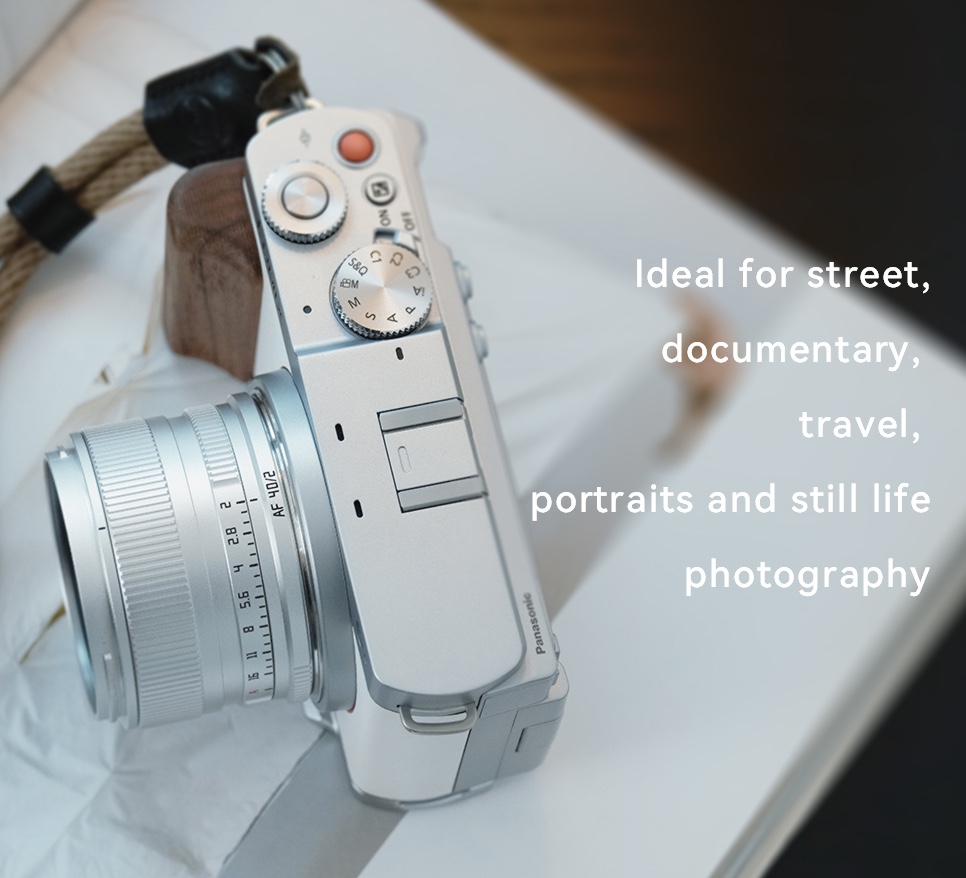
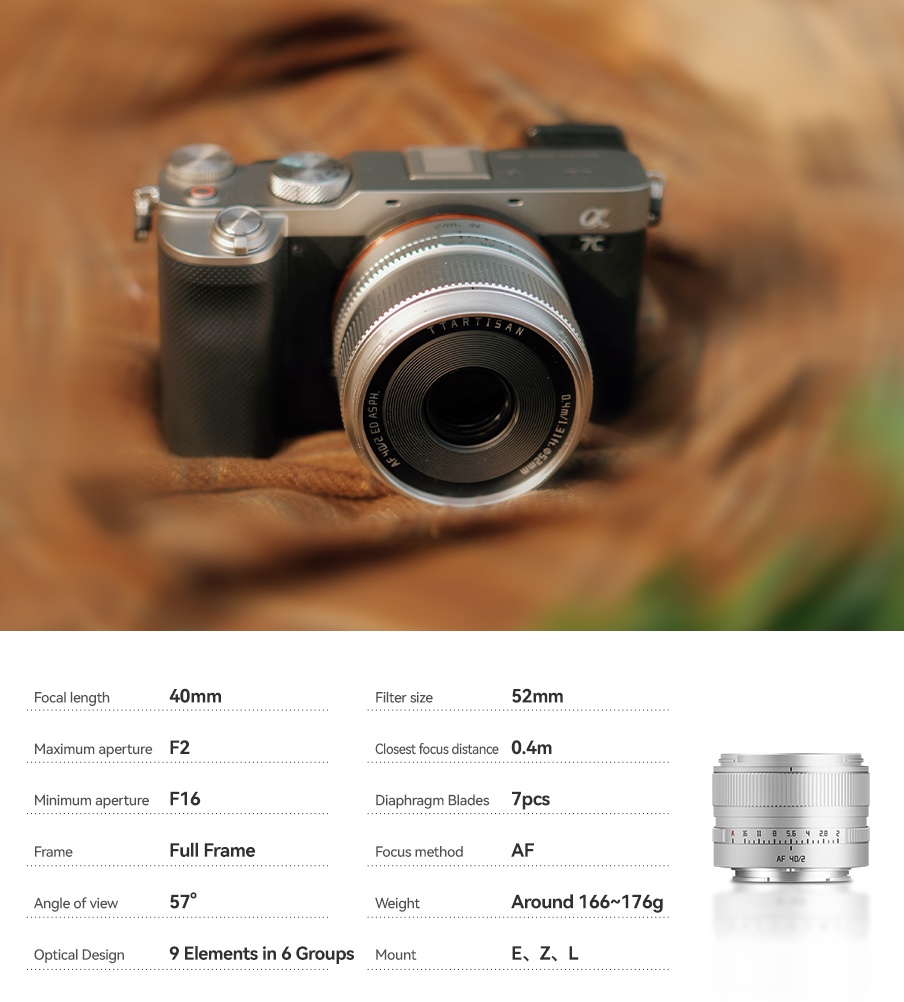
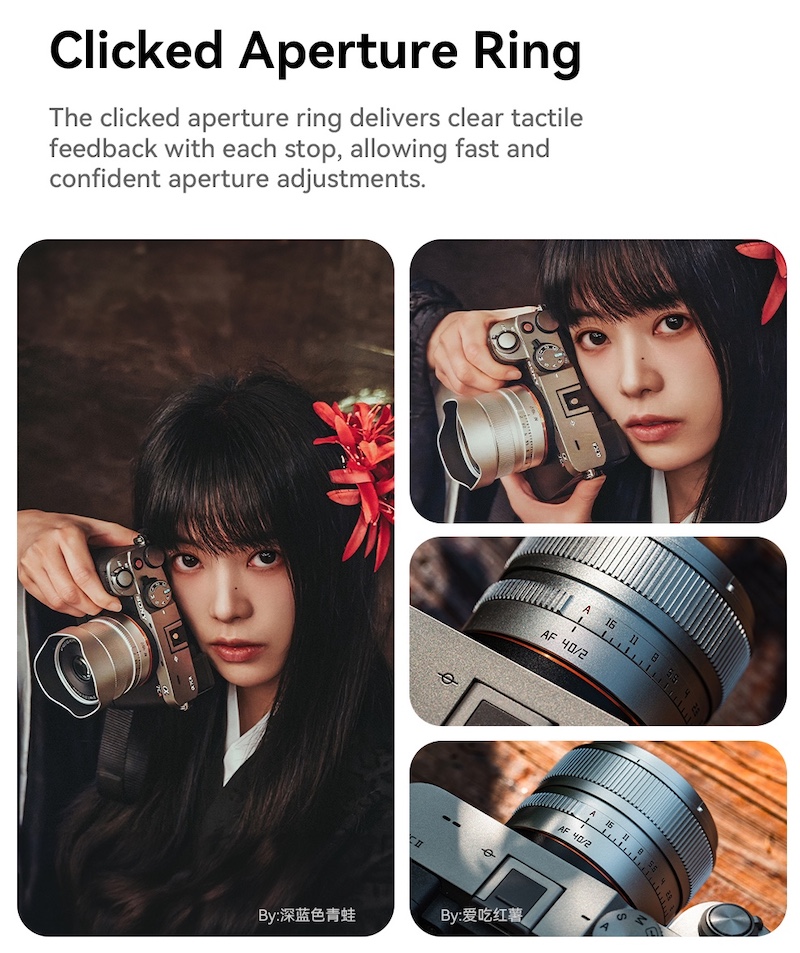
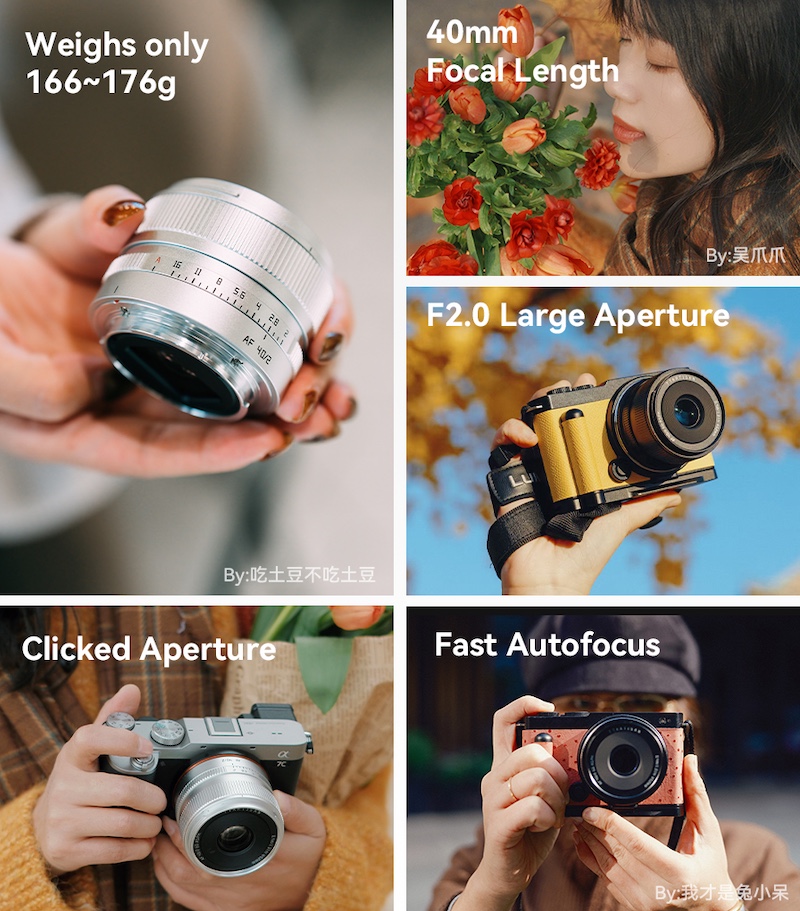
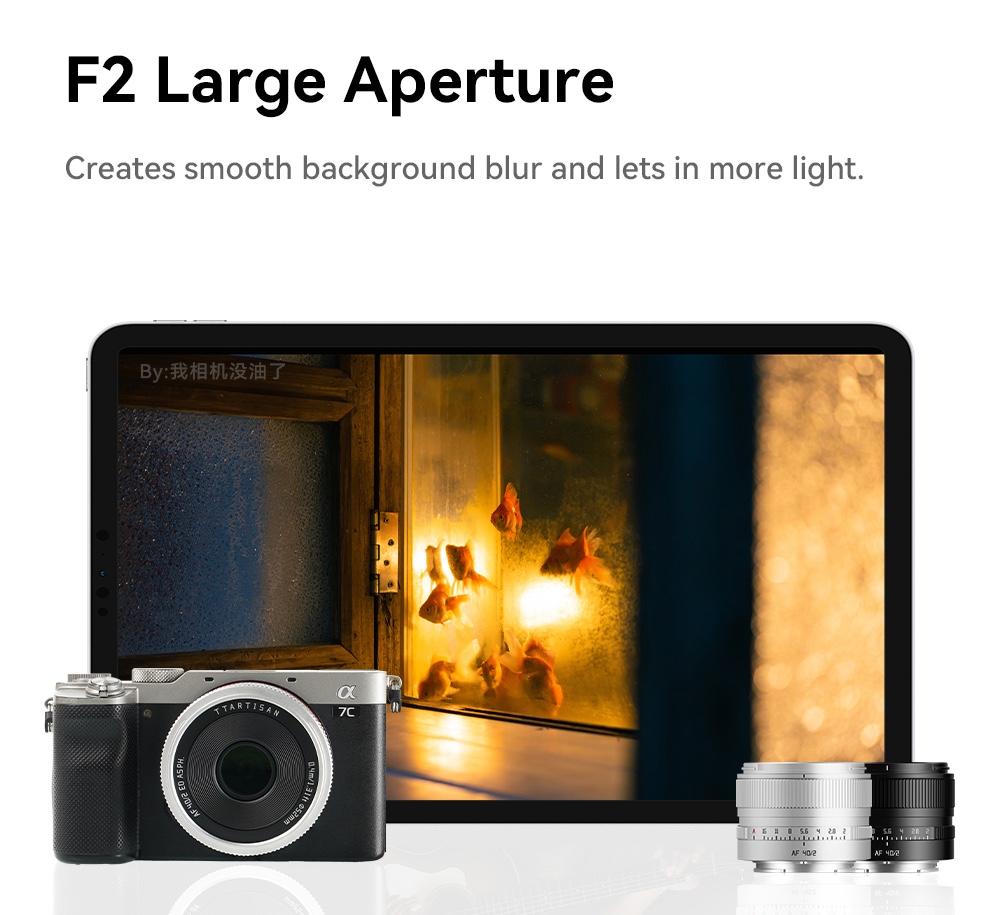
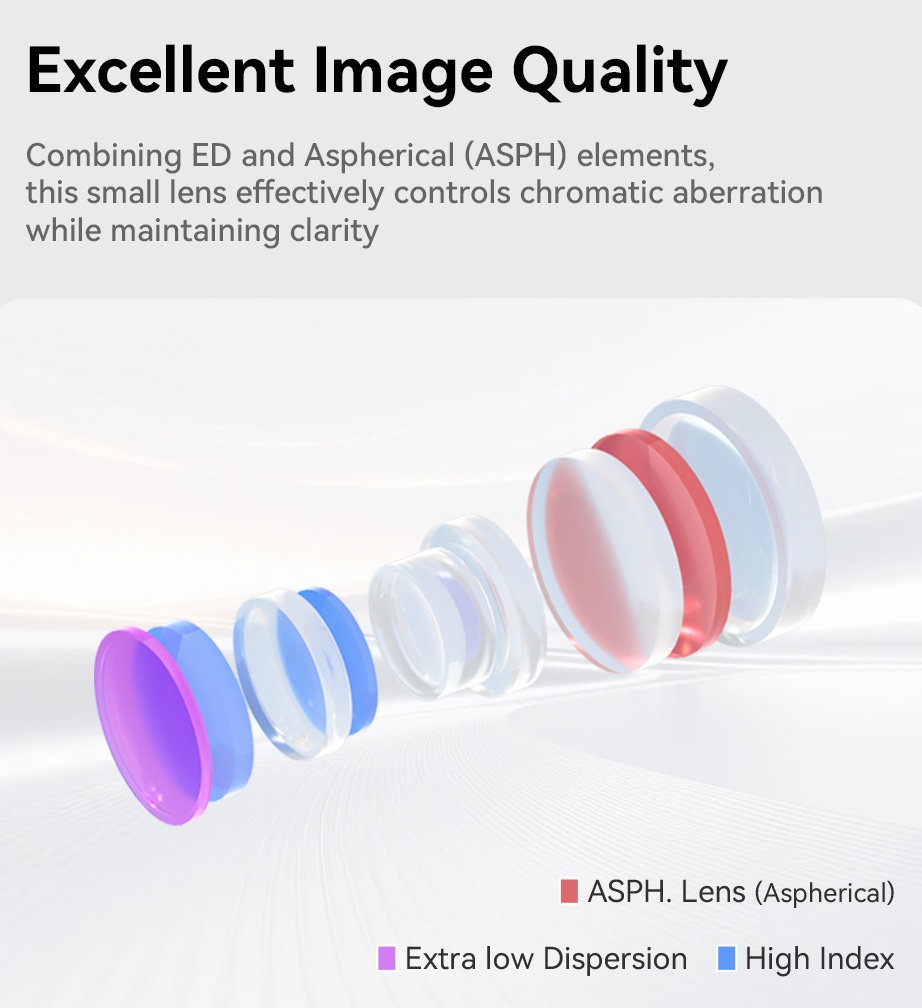
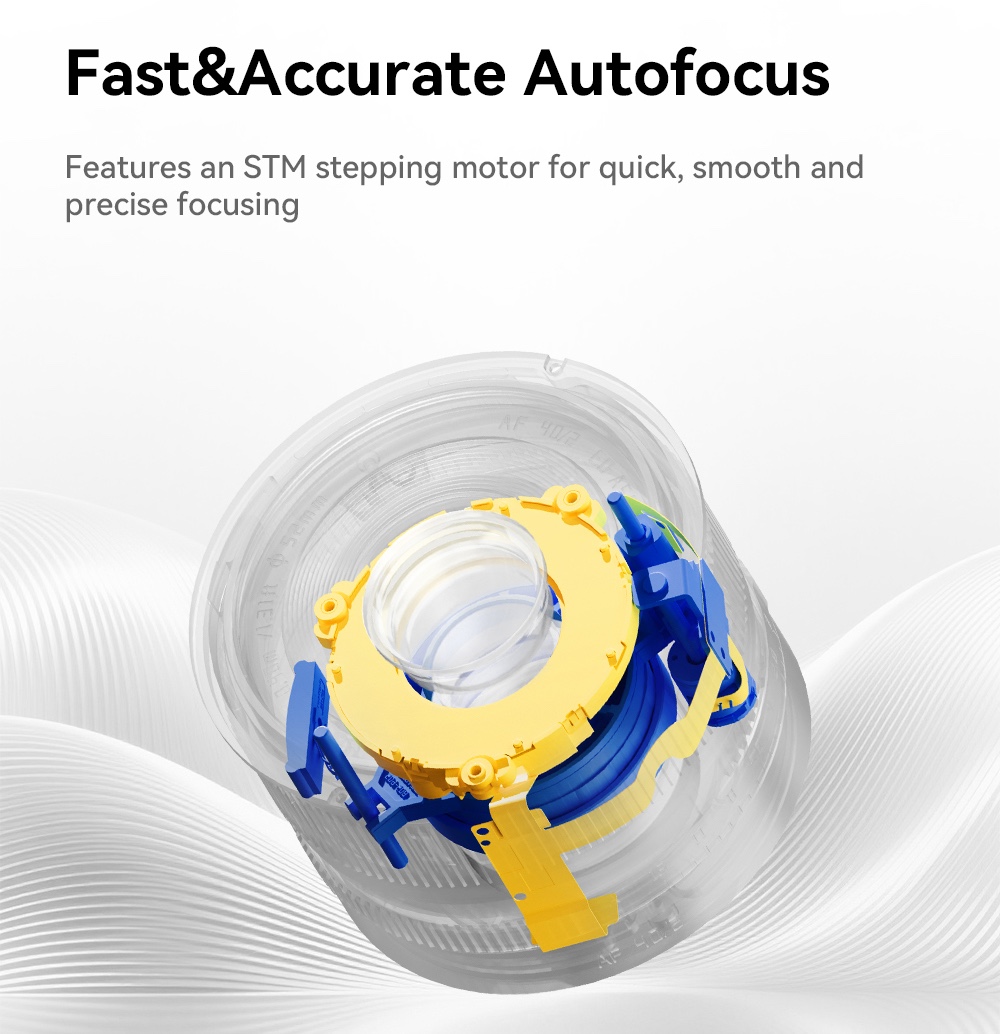
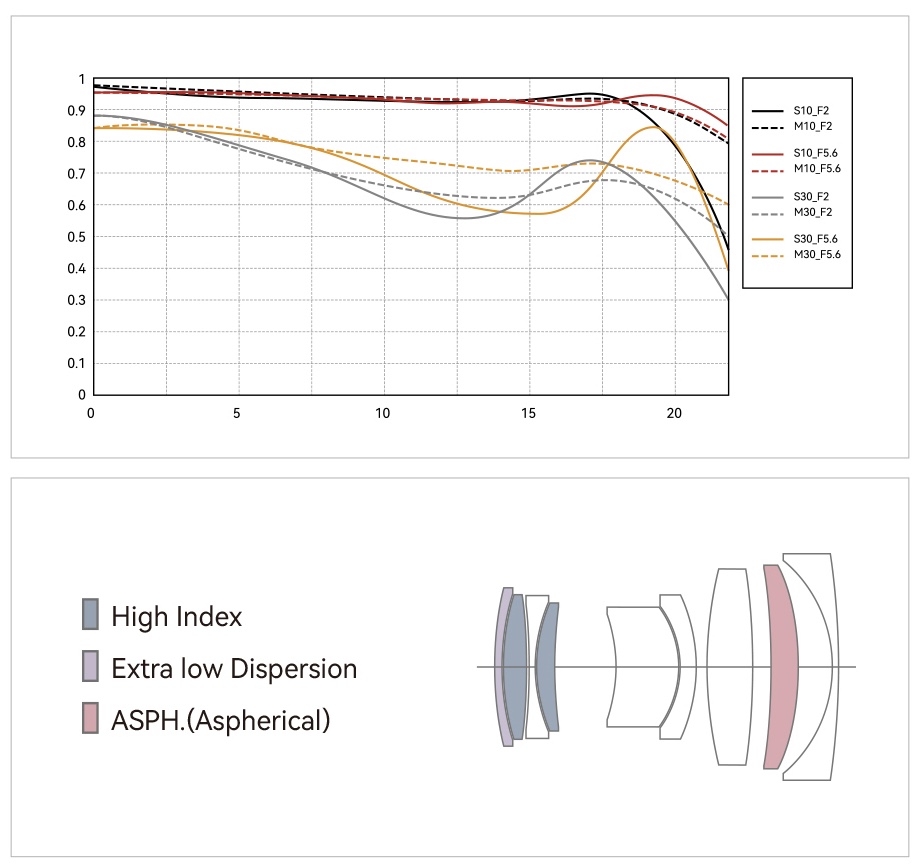
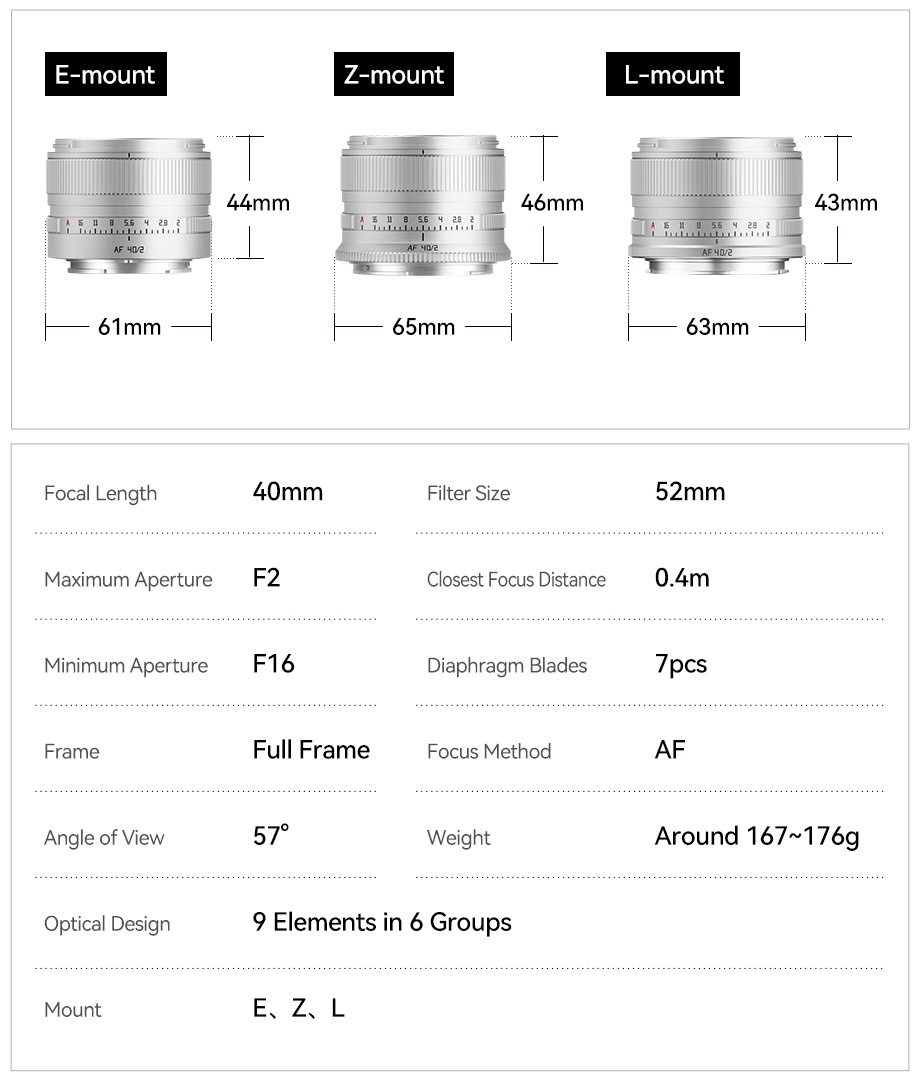
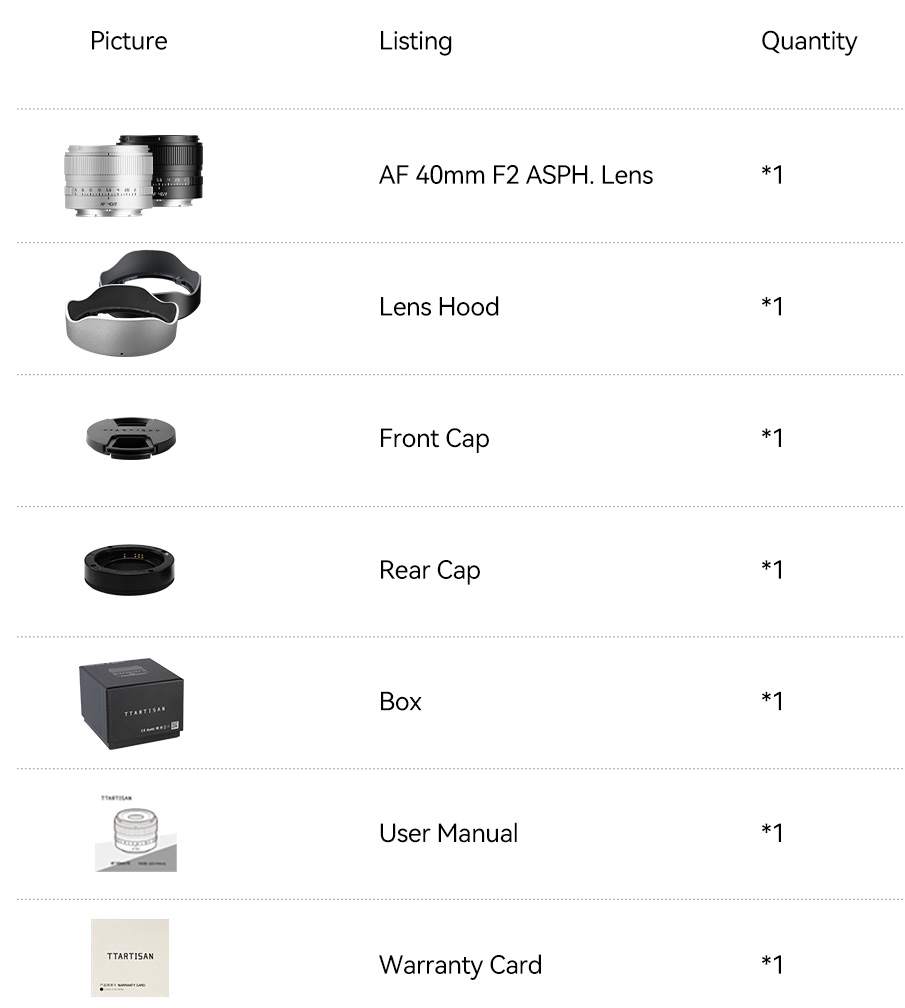
7Artisans is teasing a new line of APS-C LITE autofocus lenses. Three different focal lengths are expected. The weight of each lens will be around 180g.
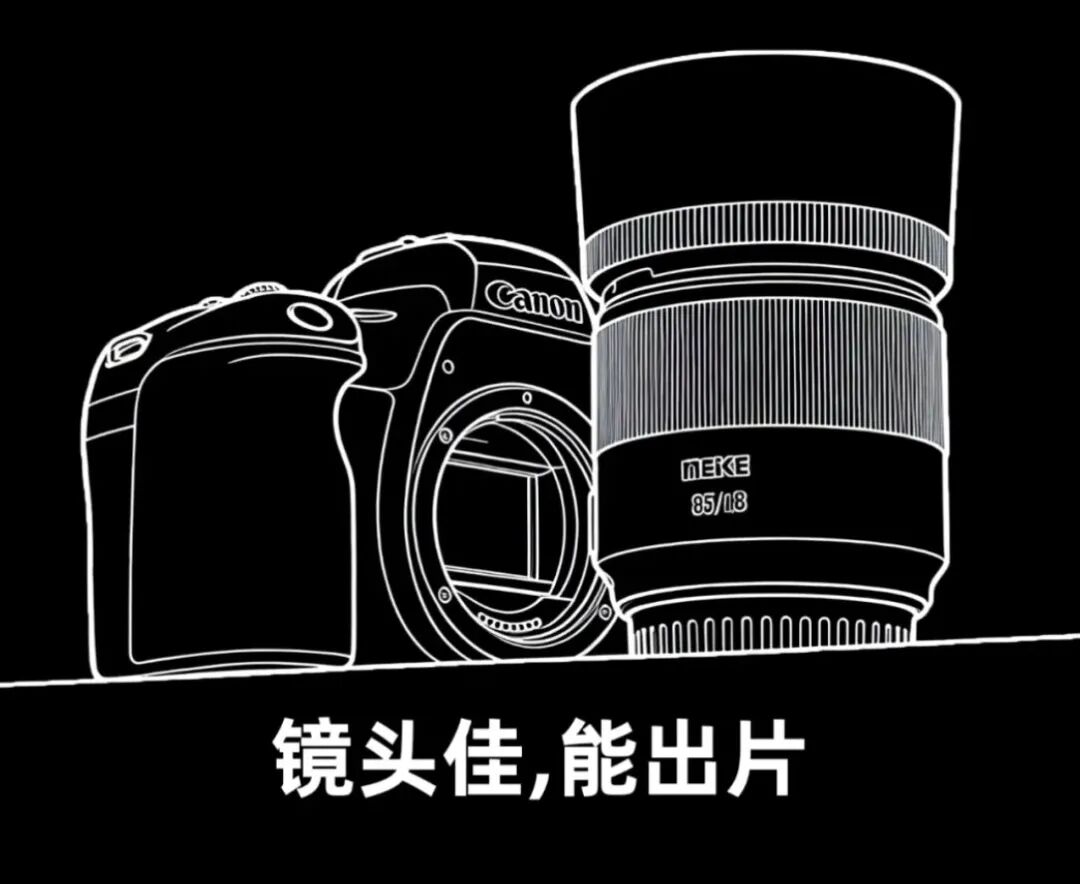
Meike is rumored to announce a new AF 85mm f/1.8 SE II lens for the Canon EF mount. This is a strange move when third-party lens manufacturers are trying really hard to get approval to produce mirrorless lenses for the Canon RF mount:
As previously reported, today the U.S. Federal Communications Commission (FCC) has implemented a rule adding foreign-made drones and critical components to its “Covered List” due to national security concerns. This effectively prevents the import and sale of new DJI drone models (and those from other foreign manufacturers like Autel) that require new FCC authorization. However, the rule is forward-looking and does not ban or ground existing drones: all previously FCC-authorized DJI drone models remain fully legal to own, fly, buy (from existing stock), sell, and use in the United States.
There are no recalls, remote disables, or restrictions on operating drones you already own or purchase from current inventory. Retailers can continue selling stock of previously approved models until it’s depleted.
Future unreleased or newly designed DJI models (or major new components) will not receive FCC approval for U.S. sale unless explicitly exempted by agencies such as the Department of Defense or Homeland Security.
This year saw the release of several extremely competent full frame hybrid cameras such as the Panasonic S1II, Canon EOS R6 III and Sony a7 V, show above. Photo: Mitchell Clark
As we come to the end of the year, it can be fun to take a trip down memory lane and look back at the year that will soon be in the rearview. What were the releases that we could've sworn happened forever ago? What were the stories that are still having an impact today? And what series are we looking forward to continuing into the new year?
January
Photo: Richard Butler
2025 started off with a bang, with the release of the Leica SL3-S – a full frame camera focused on speed, rather than resolution – and our review of the Nikon Z50II, an entry level APS-C camera designed for photo and video creators.
February was when things really picked up, and not just because that's when the camera industry gets together to hold the CP+ trade show.
OM System kicked things off with its announcement of the OM-3, a retro-styled mirrorless with a stacked Four Thirds sensor, which we were able to review by launch day. It also updated three lenses for its system. Panasonic also had a new camera; the high resolution, full frame S1RII, which aimed to be a solid offering for both stills and video shooters.
The Sigma BF is unlike any camera we've seen recently. It's also only one of the several things the company announced in February. Photo: Richard Butler
Things didn't slow down much in March, which kicked off with a ton of phone news coming out of the Mobile World Congress show. There were budget offerings from Nothing and Google, exciting concepts from RealMe and Xiaomi, and the continuation of a Leica partnership from the latter.
We also started releasing our interviews from the major manufacturers we got to talk to during CP+; OM System, Ricoh, and Fujifilm (which came in two parts).
Rounding out the month was a slate of announcements from Canon. The PowerShot V1 finally got a price and availability outside of Japan, and the company released three new products: a 20mm F1.4 prime in its full frame VCM series, the EOS R50 V, an APS-C vlogging camera, and a new wide-angle power zoom lens to act as its kit.
April
Photo: Mitchell Clark
Things calmed down a bit in April, with there being only one major camera release: Nikon's budget full frame offering, the Z5II. Which isn't necessarily a bad thing, as its price to performance ratio would end up earning it our Product of the Year award (but we're getting ahead of ourselves).
The bad news for value-oriented cameras, at least in America, was April's other big story: the US' launch of tariffs on imports from other countries. While things have (mostly) shaken out, the US government's ever-changing and arbitrary approach meant manufacturers and the market struggled to figure out how to price things for a few months, a story we tracked closely.
April also saw the release of Sony's 50-150mm F2 lens, a fast, full frame zoom offering. We also continued to cover the Sigma BF, through interviews with Sigma CEO Kazuto Yamaki, a deep dive on its UI and the potential implications for the industry, and Richard Butler's personal challenge to use it every day while on vacation holiday in the UK.
May
The Panasonic S1II may look like the rest of the company's second-gen S1 cameras, but its partially stacked sensor and the capabilities it brings make it one of the most well-rounded options out there for stills and video shooters. Photo: Richard Butler
After resting a bit in April, we and the camera industry were back in full swing in May. We finished our reviews of the Canon EOS R50 V, screen-less Camp Snap camera and the Sigma BF, with the latter including a deep-dive into its innovative (and completely unadvertised) implementation of the UltraHDR JPEG spec. We also published our final interview from CP+ 2025, where we met up with executives from Canon.
May also marked the beginning of us publishing regular educational articles, aimed towards beginners who are still figuring out the ins and outs of digital photography. We also launched a few new series:
A YouTube show where the team discusses camera and photography news
Of course, there were several launches in May, too. Panasonic came out with the S1II, a full frame hybrid camera designed to excel at both stills and video, and the S1IIE, which used the same body, but paired with a standard BSI sensor, rather than a partially stacked one. The company also released a 24-60mm F2.8 lens, to act as a budget (and back)-friendly alternative to the standard 24-70mm F2.8 zoom.
The X half remains a strange release, but it's hard to knock a company for trying something new. Photo: Richard Butler
On the other side of the photography spectrum, Fujifilm announced the X half, a compact camera with a Type 1 sensor and tons of quirky, fun features aimed at making photography fun for beginners. Ricoh also announced it was working on the GR IV, releasing a few tantalizing details for fans of its stalwart enthusiast APS-C compact.
Finally, DJI announced the fourth iteration of its Mavic Pro drone, though availability in the US was spotty, to say the least, as it wasn't supposed to officially launch in the country (a trend that would continue for the rest of the embattled company's products throughout the year).
June
The X-E5 ups the ante on the Film Simulation dial by letting you assign recipes to it, and brings the rangefinder-styled camera back upmarket with more programable command dials and milled aluminum top and bottom plates. Photo: Richard Butler
Summer is typically a relatively quiet time for the camera industry, but 2025's was arguably an exception. We saw two camera launches in June: Fujifilm's rangefinder-style X-E5, which came complete with the film simulation dial that's been making its way onto several of the company's products, and OM System's OM-5 II, a light refresh that brought updated menus and a USB-C port.
There were also a few interesting lenses released in June. Sigma released its super-fast APS-C standard zoom, the 17-40mm (26-60mm equiv.*) F1.8 DC Art, and Fujifilm released the XF 23mm F2.8 R WR, a 35mm equiv. pancake lens that emulates the one found on its still quite hard to find X100 series cameras.
The RX1R III was a bolt out of the blue. Photo: Richard Butler
July only saw one blockbuster release, but it was a big one: the Sony RX1R III, the company's full frame compact camera with a fixed 35mm F2 lens. It was released pretty much out of the blue, with very few rumors or teasers leading up to the launch.
The X2D II not only shoots HDR output files by default, but lets you preview them on a bright rear display. Photo: Richard Butler
We were hard at work on reviews in August, publishing them for the Sony RX1R III, Panasonic S1RII, and Nikon Z5II. We also covered the launches of the Ricoh GR IV, which was fully unveiled after being teased in the spring, and the Hasselblad X2D II, a medium format camera that goes all-in on HDR.
Our new community coordinator, Mathew Anderson, is here to act as a bridge between us at DPReview and our community.
We also made a big investment in our community, bringing on Mathew Anderson to act as our full time community manager. If you've spent any time in our forums at all, you'll almost certainly be familiar with him, as he's been working to make sure we keep in touch with what our readers and members need most.
* - 19mm equiv. on Canon
September
The Nikon ZR is an interesting release, but September belonged to the lenses. Photo: Mitchell Clark
An M series without a rangefinder? Is this blasphemy? Photo: Richard Butler
That lens, however, is initially only available kitted with the X-T30 III it was announced alongside, an entry-level mirrorless camera with an EVF and a film simulation dial. Leica also released a new camera: the M EV1, a camera that eschews the company's classic rangefinder mechanism for an electronic viewfinder. This prompted an excellent op-ed from Richard Butler on jargon and the semantics of "mirrorless," which we promise is more interesting than those descriptors may make it sound (or, to a certain type of person, is exactly as interesting as those descriptors promise).
As for reviews, we published our final thoughts on the OM System OM-5 II. That may make it seem like it was a quite month, but that's because we were gearing up for...
November
The EOS R6 III is a strong new entry in the very competitive midrange enthusiast marketplace. Photo: Mitchell Clark
... the Canon EOS R6 III, which was November's first big release, alongside the company's $470 43mm F1.2 lens (no, the price isn't a typo). Leica was also back this month, with the Q3 Monochrome, a – you guessed it – black and white version of its full frame compact with a 28mm F1.7 lens.
We also published our review of the Panasonic S1II, following a firmware update that brought dramatic improvements to its autofocus performance and cooling performance for video.
DPReview also got a big update in November, as we officially moved our forums onto a modern, sustainable platform. Come say hi!
December
The a7 V's faster, partially stacked sensor, brings a much-needed speed boost to Sony's mainline full frame entry. Photo: Mitchell Clark
While it's been a year full of news, reviews and buying guides, we've also been working on increasing our engagement with the community, featuring your work and thoughts on our homepage. We've done so through the monthly editors' photo challenges, and our question of the week series, as well as with events like our AMA. Look forward to even more of that coming in the new year!
While the EOS R6 III was our last review of the year, we already have our work cut out for us going into next year, with the reviews of the Sony a7 V and the Fujifilm X-T30 III. Stay tuned for those, as well as our coverage of the CP+ show in February and anything else that happens in the upcoming year.
We appreciate you reading our work in 2025, and look forward to bringing you even better coverage in 2026.
DJI's next drone likely won't be authorized for sale in the US. Image: DJI
The US government has placed a de facto ban on the import and sale of new drones and drone parts made outside of its borders, including ones from popular manufacturers like DJI. While people are still able to fly the drones they currently own and retailers can sell current models, it's a major blow to the drone market in the country.
A press release from the Federal Communications Commission, or FCC, predictably cites national security as the reason for the policy change. It acknowledges that "unmanned aircraft systems (UAS), otherwise known as drones, offer the potential to greatly enhance public safety and innovation," but goes on to say that "criminals, hostile foreign actors, and terrorists can use them to present new and serious threats to our homeland." It lists major events, like the 2026 FIFA World Cup and 2028 summer Olympics, as potential reasons to "safeguard" its airspace.
The policy isn't an outright ban on selling foreign drones
The policy isn't an outright ban on selling foreign drones. Rather, it makes it so the FCC can't authorize new drones or critical drone parts* if they're made in a foreign country. However, the end result is that any drone that doesn't currently have that authorization won't be able to be legally imported or sold in the US, without explicit approval from the Department of Defense or the Department of Homeland Security. Again, this doesn't impact drones that Americans currently own (except for, potentially, the availability of replacement parts).
This move has been a long time coming. The US government has been threatening to ban DJI's drones, which make up the vast majority of the market, in one way or another for years. Its most recent move was to require a security audit of the company's products before December 23rd, and to subsequently not carry out that audit, but the efforts have spanned all branches of the government, under multiple administrations.
A DJI spokesperson told Politico that it's "disappointed" in the new policy. The company has clearly seen the writing on the wall, though, as many of its recent products (drones or otherwise) haven't officially launched in the US. That's despite the company telling us that the Mavic 4 Pro had "all necessary approvals and clearances, including FCC certification, for sale in the United States."
Drones are obviously useful tools for photographers and videographers, but they've also become vital in other industries such as forestry, agriculture, industrial inspections and more. While the FCC's press release states that this move will "unleash American drone dominance," it's unclear what, if any, American companies are poised to take up the mantel of designing and manufacturing drones that are as affordable or easy to use as those available from DJI and its competitors.
* - Banning authorization of parts cuts off the obvious loophole of companies selling each part individually, and giving users instructions on how to assemble them
When you use DPReview links to buy products, the site may earn a commission.
Updated: December 22, 2025
These days, midrange cameras go for around $2500-3000, though in the US tariffs have made great deals in this price range a little harder to come by. For that money, you get something that's incredibly capable; our picks are high-spec options that are excellent for stills and video, and many have autofocus systems that come close to the performance of professional sports cameras.
Choosing a camera means committing to the ecosystem of lenses that are available for it, so we advise looking into the price and availability of your preferred kit. It's also worth noting that some camera manufacturers are more restrictive of what options third-party lens makers can provide, so be sure to consider that during your lens research.
Speaking of lenses, it's also worth considering that the latest lens designs for mirrorless cameras regularly outperform their older DSLR counterparts. If you have any lenses already, you may want to think about whether it's worth adapting them, or if you'd be better off selling them to help you buy modern equivalents of your most-used lenses. This option also gives you a path to switching brands, if you feel there's a compelling reason to do so.
Full suite of video recording modes and assist features
What we don't:
Overheating in ambitious video modes
Dynamic range isn't as strong as its best competitors'
Hitting buffer's limit slows camera down
The Canon EOS R6 III is a full frame enthusiast camera, with a 33MP sensor.
It earns top place on this list because it's such a complete package, with image quality, burst rates and autofocus capable of helping you tackle pretty much any subject. It's also a very capable video camera; no matter what your needs, its hard to imagine you'll find that the EOS R6 III holds you back.
It has plenty of customizable buttons and a decent range of settings for them. It's comfortable to hold, but its viewfinder and display aren't the nicest around.
The EOS R6 III has very dependable autofocus across its selection of tracking and subject recognition modes. It can shoot at bursts up to 40fps (though with reduced dynamic range), and supports pre-capture for up to 0.5 sec before you press the shutter.
The EOS R6 III isn't a "jack of all trades, master of none." It's a master of most.
Images from the EOS R6 III have very good levels of detail and pleasing colors. The camera's peak dynamic range can't match the best of its competitors, and it'll struggle a bit more in e-shutter mode, but it's good enough for most use cases.
The video quality from the camera's open gate, Raw and oversampled 4K modes is quite good at 24p, though its higher-framerate and subsampled modes suffer a bit. Its rolling shutter performance is great, and it's quite nice to use for shooting video. However, its overheating performance could limit its most ambitious modes in hot shooting environments.
The EOS R6 III is an abundantly capable camera for most kinds of stills and video shooting. It pairs great performance with excellent ergonomics and a refined user experience.
This widget is not optimized for RSS feed readers. Please open this article's permalink in a browser to view this content.
A tight race
Early 2026 is a great time to be shopping for a midrange camera, as fierce competition has lead to some strong options. Panasonic's S1II has more video features and longer record times than the EOS R6 III thanks to its built-in fan, but misses taking first place on this list because of its higher price tag and autofocus that isn't quite the best in class. Still, if you don't mind spending the extra and are enticed by the lens options available on L-mount, it's a great choice.
Sony's a7 V is also a compelling option, though we haven't fully completed our testing of it. While it doesn't offer every video option that serious videographers might want, it makes up for it with excellent thermal management and record times, as well as battery life that's head-and-shoulders above the others. Like the S1II, it uses its fast sensor readout times to achieve impressive dynamic range performance when using the mechanical shutter, which could be good news for landscape shooters.
Finally, there's the Nikon Z6III, which frequently goes on sale for around $2500, or even less. For those looking for a bargain, it's a compelling option, but at list price it has downsides – mainly slightly worse dynamic range performance and no Raw pre-burst capture option – that the competition doesn't. It's good enough that it was our pick in this category until recently.
The compact option: Sony a7C II
33MP BSI CMOS sensor | 4K/60p video with 10-bit color | Dedicated ‘AI’ processor for AF system
The Sony a7C II is a compact, full-frame mirrorless camera with a 33MP BSI CMOS sensor.
The a7C II's viewfinder is a little small and rather low resolution for this price, but it's part of what helps the camera stay so compact. Modern full-frame lenses are often so large as to make the difference in camera size fairly trivial but Sony's E-mount has the widest range of lenses available, so there are some relatively compact options.
The a7C II is impressively small for a full-frame camera. The addition of a front control dial improves handling significantly and brings it closer to its peers. A fully articulating screen anchors the back and features an extremely responsive touch interface. Unlike many cameras at this price, there’s no joystick control.
Autofocus performance on the a7C II is fantastic and is helped by having a processor dedicated to handling machine learning-derived algorithms. Subject recognition is quick, and the AF system tracks subjects tenaciously around the frame in both stills or video. 10 fps burst shooting with continuous AF results in a dependably high hit rate.
“The a7C II is a surprisingly capable camera for its size.”
The a7C II's 4K/30p video is downsampled from 7K, but with fairly high rolling shutter. There's also 4K/60p from an APS-C crop, all in 10-bit color. S-Log3 and S-Cinetone profiles provide flexibility in post, and the camera supports internal LUTs. Auto Framing mode punches in on subjects, keeping them framed and in focus. The camera includes mic and headphone jacks.
The a7C II is a surprisingly capable camera for its size. It essentially provides the same level of image quality, video capabilities, and AF performance as Sony’s a7 IV, but in a smaller package. In exchange for the small size, you make a few tradeoffs, like no AF joystick, but if compact size is a priority the a7C II will get you there with few compromises.
This widget is not optimized for RSS feed readers. Please open this article's permalink in a browser to view this content.
Should I buy the Sony a7 IV, a7 III or a7C?
The Sony a7 IV is tough to recommend in 2025, especially at its post-tariff MSRP in the US. Its viewfinder, ergonomics, and full mechanical shutter are improvements over the a7C II, but it's also larger, heavier and offers less effective image stabilization. If you're you don't care about compactness, it might be worth paying a little extra for the a7 IV's larger, higher-resolution viewfinder, but only if the price difference is small.
It's a similar story with the a7 III and a7C. These are from an older generation of products with less sophisticated autofocus, video and image stabilization. They also use an older, more awkward-to-navigate menu system, which we'd happily pay to avoid ever having to use again. The a7C lacks the version II's front control dial and features an even smaller viewfinder, so we'd strongly recommend saving up for one of the newer models.
What about APS-C?
We make most of our APS-C recommendations in our best cameras under $2000 buying guide, which covers cameras like the Fujifilm X-T5, Canon EOS R7 and Sony a6700. The latter two are the highest-end crop sensor cameras from their respective brands, but Fujifilm makes the X-H2S, which is historically one of the better video cameras on the market. However, cameras like the Z6III have arguably caught up in capabilities and framerate options, and while the X-H2S' global price is eligible for its list, in the US it's closer to $3000.
The wildlife option with reach: OM System OM-1 II
20MP Four Thirds Stacked sensor | 50fps continuous shooting w/AF, 120fps AF/AE locked | IBIS rated to 8.5EV
The OM System OM-1 Mark II is a high-speed Micro Four Thirds camera based around a 20MP Stacked CMOS sensor.
It's well-suited to wildlife photography, as the Micro Four Thirds system has several lenses that give you plenty of reach without being back (or pack) breakingly large, and its Stacked sensor gives it fast autofocus and incredible burst rates for shooting even the fastest subjects. It also has several computational modes that let it adapt to a wide variety of situations, and sports an IP53 rating for dust and water resistance, so you won't have to worry if it starts raining.
The body is quite rugged-feeling (while still being smaller than full-frame counterparts), with dials designed to be used with or without gloves, and has plenty of customizable control points. The viewfinder is relatively large and bright.
While we haven't put the OM-1 II through our full review process, we do have extensive experience with it and with the OM-3, that uses the same processor and sensor. We've found the autofocus to be reliable, though not class-leading, and it's a bit of a shame that continuous autofocus in its 50fps is limited to certain lenses. There's an image quality price to be paid for the smaller sensor, but, for Four Thirds, the OM-1 II's sensor provides good amounts of detail and the multi-shot modes can compensate for this in some circumstances.
While there are more all-round capable cameras at this price point, the OM-1 II fits into its niche quite well and is still quite solid for other kinds of photography. Its video capabilities aren't at the level that other companies provide, but if you simply want to record something, it's certainly up to the task.
This widget is not optimized for RSS feed readers. Please open this article's permalink in a browser to view this content.
Other Four Thirds cameras
The OM-1 II shares most of its DNA with the OM System OM-3, a smaller, more stylish and less expensive option that uses a smaller viewfinder to achieve its classic styling. Both are similar to the Panasonic G9II, though that's substantially larger, sharing its body with the full-frame S5II. All are Micro Four Thirds, which offers smaller camera/lens combinations at the cost of ultimate image quality. However, they can well worth considering if your photography requires the most compact kit available.
Best for vlogging: Nikon ZR
24.5MP full-frame 'partially Stacked' sensor | 7.5EV IBIS | R3D (NE) Raw video codec
The Nikon ZR is a video-focused mirrorless camera with a 24.5MP full-frame 'partially Stacked' sensor.
While its Red co-branding and three flavors of Raw shooting show its ambitions as a video production camera, the ZR has a lot of features that make it a great tool for vlogging, too. It has IBIS, Nikon's fairly effective autofocus system, and a 4", 3.07M dot display that can go up to 1000 nits, which should make previewing your image relatively easy, even if the camera is a bit far away from you.
It's also the first mirrorless camera with support for 32-bit float audio recording built-in, even on the 3.5mm input, which means you won't have to worry nearly as much about your audio gain levels when trying to capture the moment.
It can shoot compressed video at up to 5.4K/60, and is capable of 4K/120 for proper slow-motion, though going above 4K/60 will come with a 1.5x crop. In Raw, the ZR can record full-width 6K/60.
We'll be putting the ZR through its paces more in the coming weeks, but it's essentially a Z6III at heart, with a few more video features that should make it a very capable option if you want to go from vlogging to full-on production.
Why you should trust us
This buying guide is based on cameras used and tested by DPReview's editorial team. We don't select a camera until we've used it enough to be confident in recommending it, usually after our extensive review process. The selections are purely a reflection of which cameras we believe to be best: there are no financial incentives for us to select one model or brand over another.
An anhinga spreads its wings in a tree to dry at sunset in Everglades National Park in Florida. Unlike many birds in aquatic environments, anhingas don't have waterproof oil on their feathers, so they spend a lot of time with their wings spread to dry out. (Processed from Raw using DxO Photolab)
Photo: Dale Baskin
If there's one common thread that weaves through my photography this year, it's that I didn't do very much of it – at least not as much as I would have liked.
That may sound odd coming from a DPReview editor. After all, a big part of my job is testing cameras and shooting sample galleries. However, 2025 was an unusual year. Instead of running around with gear, I spent much of my time on infrastructure projects that will help lay the foundation for the site's future, including our new forum system and some other things you'll see in 2026. (Teaser!)
Add some unexpected events in my personal life, and I found precious little time for taking photos. A glance at my Lightroom library for 2025 is like looking at an empty cupboard. But one image that's special to me is the one at the top of this article: an anhinga spreading its wings to dry at sunset, captured during a trip to the opposite corner of the country.
For context, I'm a huge fan of national parks, not just in the US, but everywhere, and I've visited them all over the world. This year, I finally had the chance to visit one that's been on my list for a long time: Everglades National Park in Florida.*
I honestly wasn't sure what to expect from the Everglades. Living in the western US, national parks usually evoke visions of rugged mountains or grand vistas: Yellowstone. Yosemite. Mt. Rainier. In contrast, the highest point in the Everglades is about 3m (10ft) above sea level.
An American alligator lurks in the shallow waters of Everglades National Park. (Processed from Raw using DxO Photolab)
Photo: Dale Baskin
Contrary to popular belief, the Everglades isn't just a giant swamp. It is a slow-moving slough running from Lake Okeechobee to the Gulf of Mexico/America (circle your preference). This unique ecology makes it a fantastic environment for wildlife and wildlife photography. Unlike other regions where you often have to work incredibly hard to get close to subjects, here, the birds and aquatic species often walk right past you.
As with most wildlife photography, however, the hard part is still waiting. Waiting for your subject to be in just the right spot. Or, if shooting from a boat, waiting until you're in just the right spot. You still have to wait for just the right moment when your subject looks in your direction or starts moving in an interesting way.
"As with most wildlife photography, however, the hard part is still waiting."
During the time I was in the Everglades, I was testing the Panasonic GH7 for our review, paired with the Olympus 40-150mm F2.8 PRO lens, which provides an 80-300mm equivalent focal length and is one of my favorite lenses for the Micro Four Thirds format.
And that's the gear I used to capture the photo above of the anhinga, spreading its wings against the sky just as the sun was setting. Unlike many birds, Anhingas don't have waterproof oil on their feathers, so they spend a lot of time with their wings spread out to dry.
Hopefully, 2026 will be the year I get back out in the field more often, testing gear and shooting galleries. And I'm definitely planning to go back to the Everglades as soon as I can.
In the gallery below, you'll find a few more of my favorite wildlife shots from my Everglades adventure.
Sample gallery
This widget is not optimized for RSS feed readers. Click here to open it in a new browser window / tab.
*The photos in this article were actually taken during the last couple of days of 2024, but since I shot them after writing my 2024 photo of the year article, I'm considering them to be 2025 photos.
When you use DPReview links to buy products, the site may earn a commission.
Sample gallery
This widget is not optimized for RSS feed readers. Click here to open it in a new browser window / tab.
This week, we released our review of Canon's EOS R6 III. As is usually the case, in the process of testing it for the review, we took hundreds of pictures with a production model in a variety of situations. We've collected the best examples, shot with a variety of lenses and settings, into a sample gallery so you can judge how the camera performs for yourself.
Given that the Canon EOS R6 III is also a very capable video camera, we've also put together a sample reel of clips shot with it. If you want to see longer-form videos shot with it, you can also watch our videos about the Fujifilm X-T30 III, Sony a7 V and the Canon EOS R6 III, as they were filmed using it.
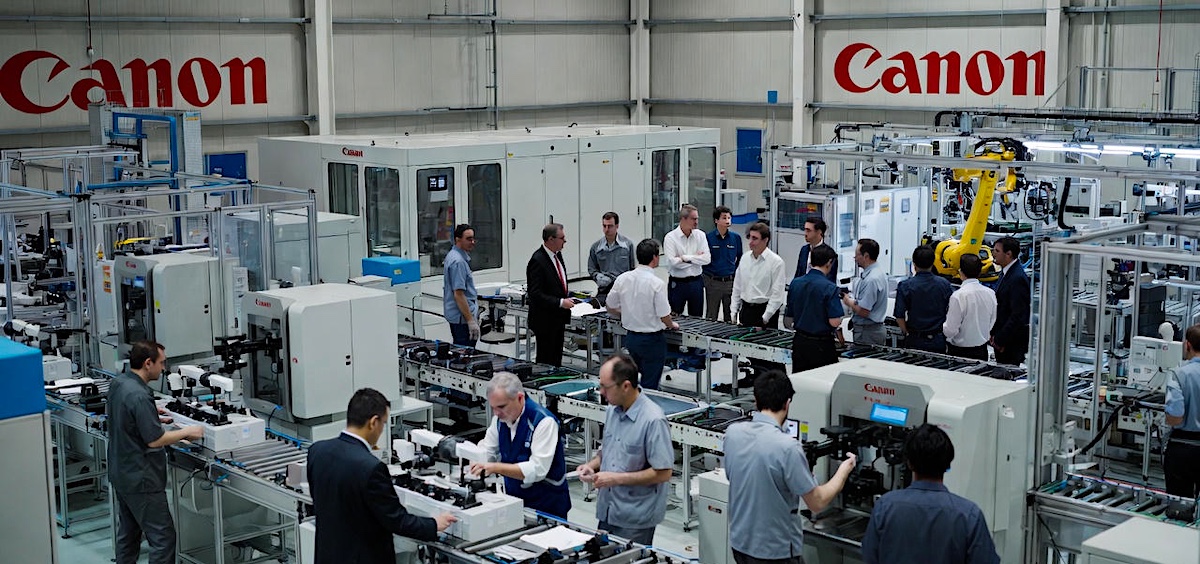
In a recent interview with Nikkei, Canon’s Chief Financial Officer stated that the company is considering outsourcing the production of lower-end (entry-level) product models to external partners. Cameras and printers could be among the products affected. This is part of a broader review of manufacturing and sales structures aimed at improving efficiency and profitability. The ultimate goal is to raise the company’s Return on Equity (ROE) to 12%. This represents a notable shift from Canon’s traditional emphasis on in-house production in Japan. As of late 2025, it’s still in the consideration phase, with no specific partners, timelines, or affected models announced.
Further reports, primarily stemming from a January 2025 Nikkei Asia interview with Canon Chairman and CEO Fujio Mitarai, provide more context and confirm this strategic shift:
Scope of Outsourcing – Canon is considering a “fabless” model (design in-house, manufacturing outsourced) specifically for lower-end digital cameras (e.g., compact/point-and-shoot models) and printers produced in Asia. This includes potentially outsourcing assembly processes to third-party manufacturers in other Asian countries.
Reasons:
Become more “asset-light” by avoiding fixed costs of maintaining own factories.
Better respond to fluctuating demand (e.g., recent rebound in compact camera popularity driven by social media trends and younger users).
Reduce geopolitical risks and supply chain disruptions.
Cut overall costs amid declining demand for traditional office equipment and entry-level cameras, impacted by smartphones.
Background – Canon closed its Zhuhai, China factory in 2022, which produced compact cameras, limiting its ability to ramp up production for the recent compact camera surge quickly. Outsourcing would allow flexibility without reopening or building new facilities.
What Remains In-House – High-end/flagship products, key components, design, development, and core technologies will stay in Japan (using Japanese factories as “mother factories”). Lenses and advanced sensors are unlikely to be outsourced.
Potential Impact – This could enable Canon to increase production/sales of compact cameras (e.g., PowerShot series) and possibly introduce new affordable models. It aligns with industry trends where competitors already outsource more extensively.
Financial Tie-In – The strategy supports broader goals of improving profitability and ROE, building on the CFO’s comments.
The United States is just days away from a DJI drone ban, driven by a provision in the Fiscal Year 2025 National Defense Authorization Act (NDAA). Section 1709 mandates that the US National Security Agency conduct a formal risk assessment of DJI (and Autel Robotics) by December 23, 2025. Despite DJI’s repeated requests for the audit, including formal letters to multiple agencies since early 2025, no agency has initiated or completed the review. If the deadline passes without action, DJI will automatically be added to the FCC’s “Covered List,” effectively blocking FCC authorization for new DJI products and halting their import and sale in the U.S.
⇒ This could be your last chance to get a DJI drone in the US: check Amazon and B&H Photo for their current availability and pricing.
Existing DJI drones already in the U.S. will remain legal to own, fly, and use, with no immediate grounding. However, future access to new models, official parts, repairs, and firmware updates could become limited or unavailable.
This outcome stems from national security concerns over DJI’s Chinese origins, including fears of data transmission risks or ties to the Chinese government, allegations DJI has long denied, pointing to independent audits showing no backdoors and features like offline data modes. DJI dominates over 70% of the U.S. drone market, powering critical operations for public safety agencies (over 80% of law enforcement drone programs), farmers, filmmakers, and hobbyists. Critics warn that an automatic ban, driven by legislative inaction rather than evidence, could disrupt these users without affordable American alternatives ready to fill the gap.
As we enter the New Year, we're looking back on our predictions for 2025. Were they firecrackers or duds? Photo: Mitchell Clark
Last year, some of the DPReview editorial staff sat down with a mission: figuring out what we expected camera manufacturers to do in 2025, and to make a list of things we wish they'd do, regardless of plausibility or even feasibility. Now that the year is coming to a close, we thought it'd be entertaining to revisit the list and see how well it's aged.
You'll also get to hear some of our predictions for 2026, as a sort of sneak peek at this year's version of the article. Hopefully, we've done a little better this year, though we wouldn't bet on it. These articles are mainly meant to be a wish list, rather than a report from our crystal ball.
DPReview community, we wanted to provide you with a brief update on various community-focused initiatives over the past year. Spoiler alert - a lot's been happening!
The health of our community means everything to us. Our team has built a bond with many of you through discussions of digital photography and our shared passion for geeking out about the latest camera gear. Our editorial team - Dale Baskin, Richard Butler, Mitchell Clark, Abby Ferguson, and I – all enjoy getting your thoughts on our articles. It's this community interaction that makes DPReview thrive, and one that I personally want to do whatever it takes to keep it healthy and lasting.
Supporting the community
For the past 25 years, the DPReview forums have operated in parallel to, but largely independently from, our editorial operations. The editors are dedicated to writing engaging articles, but the interest in interacting with you all also takes a significant amount of time. To support and grow our community properly in the long term, it became clear that we urgently needed a dedicated Community Manager. That's why I was brought on, so the team could have a person dedicated to forum moderation, developing engaging content, and ensuring that support requests are responded to promptly (to name just a few parts of my role here).
Being a Community Manager in any capacity is a wonderful experience (and great responsibility), but I especially couldn't pass up the opportunity to help you all out. As soon as I joined DPReview, I began working closely with the team and volunteer moderators to understand the community's interests.
As a Community Manager, one of my central tenets for building a thriving community is to work directly and openly with members to ensure their needs are met. The most important thing we can do is to be more communicative with all of you about what's happening at DPReview, and just as importantly, ensure you are comfortable sharing your thoughts with us about what matters most to you.
Updating the forum system
The forums serve as a central hub for community discussions, so they must remain accessible at all times. It's a massive system that requires constant attention on both technical and moderation fronts. After more than a quarter-century of the forums in operation, our custom-built, proprietary solution had become too complex and expensive to maintain. If we wanted to keep the forums going, we had to find a solution that DPReview could viably preserve into the future.
In deciding what to do, the team had spent months researching individual software solutions that could address the current challenges. They understood the impact a significant change to the forum would have on the community. This included the viability of continuing to maintain an aging system. Long story short, it was clear that a new platform was the only feasible solution, even if it fell just a few features short of being an agreeable one for all users.
Soon after I was introduced to the volunteer moderators and informed of our forum update plans, I wanted to ensure that the community's voice would be represented through them as much as possible until we could publicly discuss it with you all. We collaborated to announce our migration intentions in all key forum areas. Everything unfolded quickly from that point, with the successful launch of the new platform in early November of this year.
Thankfully, the community showed great patience while we completed the migration, despite having concerns. Post-launch support has included gathering your ideas and suggestions on how we can further improve the forums. With just a few 'bug' type issues remaining, we are now moving on to addressing style improvements. These include the need to make notification indicators and forum index feeds easier to read.
Community initiatives in 2025
While the forum improvements continue, there are many other ways we can work together to develop exciting programs that drive interest across the forums. As a first step, I've reached out to several community leaders (volunteer moderators, frequently active posters, etc.) to ask them what they would like to see activated in the community for content and fun initiatives. If you weren't one of them, please feel free to reach out to me at any time as well.
So far, since July of this year, we've implemented the following content and programs:
I've barely scratched the surface of hearing from all of you, so please let me know what you think of the initiatives we've introduced so far.
There's one more significant community initiative we're testing this month on YouTube that hasn't been published yet, but will in just a few days. Be sure to keep watch in the forums for it!
Exciting plans for 2026
Our team has some super exciting plans to launch for you all in 2026. We are eager to continue the AMAs as a regular series about digital photography and your favorite camera gear. We'll keep the Question of the Week series going as well. And about that YouTube initiative you'll find out about in just a few more days, well, we hope you enjoy watching it and want more of that, too.
Thank you, community, for everything you've developed for one another. The DPReview team is here to provide support, so please don't hesitate to reach out anytime you need it.
Meanwhile, I hope you all have a safe and happy holidays!
When you use DPReview links to buy products, the site may earn a commission.
Photo: Mitchell Clark
There's been a lot of talk about the Sony a7 V's dynamic range performance since PhotonsToPhotos released its data on it, showing that it, like the Panasonic S1II, combines the readouts of its low and high gain steps when using the mechanical shutter. We've had the opportunity to test the dynamic range for ourselves with the studio scene to see how it performs, and we can confirm: it is very impressive.
Image Comparison
This widget is not optimized for RSS feed readers. Click here to open it in a new browser window / tab.
To start, this may be one of the most ISO invariant cameras we've seen to date when shooting with the standard, mechanical shutter mode. That means you have a lot of room to preserve highlights by shooting at lower ISOs, then brightening the image in post (a workflow that also translates well to shooting with HDR in mind). In our tests, we saw essentially no shadow cost to an image shot at ISO 400, brightened to match an image shot at ISO 6400 with the same exposure settings.
The results are comparable in electronic first curtain shutter mode, where the two reads of the sensor at different gain modes can be combined after the mechanical second shutter has closed.
Image Comparison
This widget is not optimized for RSS feed readers. Click here to open it in a new browser window / tab.
The a7 V's exposure latitude is also very good, so you can dig quite deep into the shadows when processing your Raws. In mechanical shutter mode, it's a bit better than the a7 IV and peers like the Canon EOS R6 III and Nikon Z6III, and roughly on par with the Panasonic S1II.
As expected, its performance isn't as good in e-shutter mode, where it has less time to read out the sensor and therefore can't do it twice, as it can in its mechanical shutter mode. However, its peers' dynamic range performance also suffers in e-shutter mode, so none of the cameras end up with any particular advantage. Of course, the main reason to shoot in their e-shutter modes is to utilize their highest burst rates, where achieving maximum DR performance is less of a concern anyway.
While the a7 V's dynamic range advantage over its predecessor and peers isn't earth-shattering, it'll be exciting to those hoping to exploit the shadows in their images, such as landscape photographers, or those who often shoot to preserve highlights. Be sure to tune in after the New Year for more coverage on Sony's latest camera, including the rest of our studio scene results.
Note: these images were produced using a beta version of Adobe Camera Raw. While they're consistent with other testing that we've seen so far, we'll check to make sure the results are consistent with those produced by the final version of ACR once it's released.
Viltrox is rumored to release new lenses for Canon RF mount. I contacted Viltrox directly, and they responded that they recently officially launched new 1.33x anamorphic lenses for Canon RF-mount with an authorized approval. However, licensing for other RF-mount lenses has not yet been officially approved, but they are still working on it. Stay tuned for updates.
Photo: Mathew Anderson and Adam Savage at SXSW 2025 game industry conference track.
When the team asked me to contribute to their Photo of the Year series, I wanted to showcase a scene that would help the community gain a deeper understanding of me as a community manager. I decided that this could be a unique opportunity to share a photo taken while I was working in the computer game industry. I suppose you can think of me as a gaming photographer. While the game industry doesn't exactly have a photography focus, it does deeply respect and appreciate art and the idea of 'capturing the moment'.
A community manager in the computer game industry is responsible for a range of public-facing tasks, from managing all the activity you've come to expect from me in the forums to posting on social media channels and overseeing influencer/creator relations. I've also run live, on-stage international competitions and hosted on-site gatherings to celebrate various anniversaries (a game launch, a company's birthday, a community member's own birthday... the list goes on).
Community managers tend to wear many hats, and since it's often for a broad age range of members, we (or they) frequently do quite literally wear many hats or costumes to celebrate our games...
Photo: Mathew Anderson at PAX East game industry convention, where he's showing booth visitors a new game just launched by his team.
With many years in the game industry, I've also directed press relations and encountered some rather interesting people. The on-site business dealings at various conferences and trade shows inevitably bump you up against a famous person or two, frequently from the TV/Film industry. You may have heard of Adam Savage, a popular TV personality who hosts the show MythBusters. While I was at SXSW 2025 in Austin, TX, I attended a panel he participated in, titled "Prototyping the Future: Imagining the Future We Want."
After the panel concluded, everyone filed out to the snacks and drinks lounge (a typical arrangement at these sorts of press environments where the host wants to schmooze you to write a good article about their presentation). While sipping on a mystery drink, I spotted Adam in the far corner. I was determined to talk with this legend and wouldn't let infinitely long snack tables and unlimited drinks get in my way. Praise be that an ice cream machine at least wasn't present...
And this is how I got my photo of the year
I walked right up to Adam, letting him finish his conversation with his assistant and another gentleman. Adam looked at me briefly, and I knew that was my cue to introduce myself. I thrust out my hand, Adam shook it aggressively with a mix of confusion and mild interest on his face, and off I went, talking about how I could be his next PR guy.
"I was determined to talk with this legend and wouldn't let infinitely long snack tables and unlimited drinks get in my way."
There have been many situations like this where I didn't have a business card on me, or I was so caught up in the experience that I didn't think to capture a photo of it. Always be ready with your camera! I didn't forget this time. After our brief introduction, I whipped out my iPhone (the only camera I had at the time) and asked if it was all right if we took a selfie together. And this is how I got my photo of the year, which you see at the top of the page.
Obviously, my job pitch didn't go as planned, but in its stead, I'm fortunate to have landed at an even more amazing opportunity right here at DPReview. Seriously, I somehow feel like my career has been building up to this next chapter where I can express my love of digital photography, geek out on the latest gear, and still share and participate in my love of games.
If you also geek out on new computer gadgets, such as buying way too many cables and peripherals for one individual to ever possibly use, or perhaps play a computer game or two on occasion, I would love to hear from you.
Meanwhile, I put together a slideshow of some other interesting moments I've had in the computer game industry. You'll want to ensure you scroll to the end. These aren't all from 2025, of course, as I looked much more geeky a few years ago than I think I do now...
Sample gallery
This widget is not optimized for RSS feed readers. Click here to open it in a new browser window / tab.