Vue normale

Fujifilm users can now send film simulations to their camera from their iPhone

Two apps make it easier to manage individual recipes, or even sets of them, from your phone

A Fujifilm X-H2 with a phone leaning against it, running the Fuji X Weekly app.Mitchell Clark

Experimenting with “recipes” that build on Fujifilm’s “Film Simulations” to change the look of your JPEGs – subtly or not so much – has long been a tradition among a certain set of the company’s users. However, actually getting the recipes to your camera has historically been a bit of a pain, requiring you to manually adjust several parameters and save them to a custom profile that you can later recall. Recent cameras from Fujifilm have somewhat improved the experience with a dedicated recipe system, but it’s still a lot of manual data entry.

This month, though, two apps have promised to solve that problem. One from a major player in the Fujifilm recipes field, the other from a scrappy upstart. For both, recipe syncing is only available for iOS devices (there currently isn’t even an Android version of the latter), but are signs of exciting things to come.

Fuji X Weekly

Series of screenshots showing the flow of transferring a recipe to a camera using the Fuji X Weekly app.Mitchell Clark

The first is the Fuji X Weekly app, which is an extension of the popular website that hosts many community created recipes. The app has been around for a while, letting you browse and save recipes that you’d then have to manually enter in on your camera. Now, though, it’s able to download recipes, and then sync them to your camera via a standard called Picture Transfer Protocol. You can do this using the hundreds of recipes in the site’s repository, or with custom ones you’ve entered yourself. 

The process is relatively simple, as it is for the rest of the apps we’ll cover today. You put your camera in USB Raw Conv. / Backup Restore mode, then connect it to your phone with a USB cable. From there, the app should be able to send your selected recipe to whichever custom slot you choose, though the first time you go through this process, you may need to give the app system-level permission to talk to an attached camera. Then, you can select the custom setting mode from your camera (which, in my testing, helpfully already had the name of the recipe in the name field) and start shooting.

Screen grab showing several Custom Settings slots on a Fujifilm camera filled with Film Simulations.
Recipes synced from the app are saved as custom settings, letting you easily switch between them.
Mitchell Clark

While the app is free to use, there is a $20/year subscription that unlocks a few extra features. That list now includes the ability to sync sets of recipes to your camera, rather than having to do them one at a time. Say, for example, you have five recipes you use around town every day, and six that you like to have access to while traveling. Paid members could switch between the two with a press of a button.

FujiShare

Two screenshots showing the FujiShare interface.Mitchell Clark

A newcomer to the scene is an app called FujiShare, which Reddit user Rude_Shoulder_2895 posted about on the FujifilmX subreddit. They said they built the app to make it easier to load sets of recipes to their X100V. It also aims to give you more information about the example photos used for a recipe, to make it easier to distinguish how much of the aesthetic is down to the camera settings, the recipe and the scene. The app also has tools built in to let you load a JPEG from a Fujifilm camera and save the recipe that was used to make it, and to apply frame effects to your photo, making it look like it’s matted or on a film reel.

FujiShare is a sleek app with a modern UI, and it’s undeniably nice to scroll through the recipes on offer, though there seem to be far fewer than on Fuji X Weekly. Otherwise, the actual process of syncing your recipes is much the same as it is using the other app, though users can post packs of recipes as well, letting you just save an entire set of recipes at once, before sending it off to your camera. On that note, FujiShare’s ability to send over multiple recipes at once currently isn’t pay-gated.

Screenshots of the FujiShare app, showing the process of transferring a pack of recipes to the camera.
You can use FujiShare to create “packs” of recipes (or find existing ones in the feed), and transfer them to your camera in a single step.
Mitchell

The FujiShare app is currently in public beta, and being distributed through Apple’s TestFlight system, which will take a bit of setup if you haven’t used it before. The beta is free, but it’s unclear what, if any, monetization scheme the app will use when it launches.

Is this new?

Screenshots of the FujiStyle app running on Android, with the option of sending a recipe to the camera.Mitchell Clark

One thing worth noting about these apps is that they don’t appear to be the first to come up with the idea. About a year ago, the team behind the FujiStyle app announced a very similar feature, letting you sync recipes to your camera’s custom settings slots via USB. It works very similarly to the other apps and, perhaps most excitingly, I’ve confirmed it works with Android. (I did, however, have to dive into the phone’s developer settings to get it working; your mileage will vary depending on what version of the OS you have.) Unlike the other apps, it doesn’t appear to support syncing sets of recipes at a time, but I bet I could sync seven recipes using the app faster than I could input one on the camera manually.

The caveats

Since these apps all seem to use a similar system to sync recipes, they share a lot of the same warnings and asterisks. The biggest one is made explicit by Fuji X Weekly. In the blog post announcing the feature, Ritchie Roesch says: “While there’s not a lot that can go wrong with PTP, there is a minor chance of adverse affects, especially if not handled carefully by the developers.” While Roesch says they tested many ways that things could go wrong, and built several safeguards into the app, there is still a risk. 

“Very importantly, connecting your camera to any unofficial, unlicensed, unsupported program may void your camera’s manufacturer warranty,” Roesch says. “Fujifilm confirmed this with me. I tried very hard to obtain a license from Fujifilm so that it wouldn’t risk voiding your warranty, but ultimately that didn’t work out.”

These apps aren’t universally compatible

The app also makes this clear when you first go to use the feature, making it clear that you’re doing so at your own risk. While the other apps don’t make the warning as explicit, they come with similar warnings, so it’s probably a good idea to approach all of them with a sense of caution.

It’s also worth noting that these apps aren’t universally compatible. They should work with cameras newer than the X-T3 and X-T30, but those cameras and anything older don’t support the system that these apps use to transfer recipes. Likewise, if you have an older iPhone with a Lightning port, it may not be as simple as using a Lightning-to-USB-C cable; Fuji X Weekly reports those won’t work, but that adapters may. 

Finally, there’s the fact that the recipe-transfer feature is only available on iOS for Fuji X Weekly, and the FujiShare app currently only exists for iOS. Both developers have said they’re working on version for Android, but the timetables are to be determined. That’s unfortunate for Android users in the short term, as it means they have fewer options. Hopefully that situation will improve soon, but in the meantime, the FujiStyle app is there to serve Android users in the meantime.

Summary

Among the DPReview staff, there were two reactions to the news of these apps. The first was “this is great, why hasn’t Fujifilm built this into its own app yet?” The second was “Please don’t ask them to complicate things, I just want the app to transfer pictures reliably, nothing more.” While that reaction is understandable, I also suspect there’s been some pressure on Fujifilm to integrate this kind of feature into XApp. Recipes are a relatively well-known part of its brand identity, and other companies, like Panasonic and Nikon, have beaten it to the punch, building systems that allow users to download community-created color profiles to their cameras using an app (and Ricoh has made mention of doing something similar, too). 

Perhaps the existence of these third party options could take some of that pressure off, letting Fujifilm focus on reliability and compatibility. Or perhaps it’ll build it into XApp at some point in the future and, to borrow a phrase from the Apple developer community, Sherlock these apps. Either way, at the moment Fujifilm users have options they didn’t before.

About the Author: Mitchell started taking pictures at 10 and hasn’t stopped since. It’s been a wide-ranging adventure, spanning a wide variety of genres and locales, and occasionally dipping into fascinations with video and filmmaking. They honed their technical knowledge doing documentation, programing and QA, writing for The Verge, and just generally messing around on the computer to see what breaks.

Want to stay up to date on the latest product news and releases? Add DPReview as a preferred source to ensure our independent journalism makes it to the top of your Google search results.

add as a preferred source on google

The ColorChecker, photography’s most important 24 squares, turns 50

Calibrite is marking the anniversary with a virtual museum of the chart’s five decades.

Color calibration chart with 24 colored squares set against a blue background, with gold confetti and ribbons at the top.Calibrite

If you’ve ever held a small card of 24 colored squares up to your subject, you’ve used a piece of imaging history that just hit a milestone birthday. The ColorChecker (also called the Macbeth chart if you’ve been around a while) is turning 50, and Calibrite has marked the occasion with a virtual museum for the little chart that helps photographers keep colors accurate. 

The anniversary hub for the occasion includes a timeline from the founding of the Macbeth Artificial Daylight Company to today, along with fun facts about the card and some of its famous uses. It also breaks down the purpose behind each of the 24 patches and features a quiz to test your knowledge of each color. 

The small chart debuted in a 1976 paper, “A Color-Rendition Chart,” by C.S. McCamy, H. Marcus and J.G. Davidson, written while Macbeth was a division of Kollmorgen. The idea was simple but clever: each patch was locked to a spectral reflectance value instead of a printed ink mix, so the card could be measured, reproduced and trusted across different materials and lighting conditions. 

M-GN-colorchecker_digital_sg
For more demanding work, the Digital SG version offers 140 color squares — including the original 24, a 17-step grayscale ramp and 14 skin-tone targets.
Calibrite

When photography went digital, the ColorChecker came along for the ride. Shoot a Raw file with one in the frame, then feed it into Adobe Lightroom or DxO PhotoLab, and you get a custom camera profile that pulls your colors closer to how the scene actually looked. The ColorChecker Digital SG, though, saw an expansion of color, jumping to 140 squares that include the original 24 colors, a 17-step grayscale for fine tonal control, and 14 dedicated skin-tone patches.

The card has changed hands a few times: Gretag, GretagMacbeth and X-Rite all owned it before Calibrite took over. It’s also changed in size. The original measured roughly 13 by 9 inches, with proportions that closely match a 35mm film frame, and it now comes in a range of sizes, including one barely bigger than a postage stamp for macro subjects. But the patch layout and spectral targets have stayed consistent enough that profiles built around the standard remain interchangeable. Fifty years on, and photographers still reach for this tool for the same reason they always did.

About the Author: Abby Ferguson holds an MFA in photography and blends a fine-art background with extensive editorial and commercial experience. She built and led an in-house imaging program for a large vacation rental company and has served as an associate editor at Popular Photography. She also teaches at a local community college and serves on its Photographic Technology Program Advisory Board, sharing her knowledge and enthusiasm for the medium.

Want to stay up to date on the latest product news and releases? Add DPReview as a preferred source to ensure our independent journalism makes it to the top of your Google search results.

add as a preferred source on google

DxO released PhotoLab 10 (coupon code included)

Par : PR admin
1 septembre 2026 à 18:48


DxO released PhotoLab 10. The new version adds Depth Masks that use AI-generated depth maps to target foreground, midground, or background without embedded depth data; a new color-grading wheel for independent (or linked) shadows, midtones, highlights, and overall balance; expanded AI masks that can isolate every person or individual features such as eyes, hair, lips, eyebrows, iris, sclera, teeth, and facial hair, plus U Point refinement of those masks; RAW-level automatic sensor-dust removal; a Control Brush and elliptical Control Points; one-click send to Affinity for pixel work; and smaller workflow extras including as-shot crop ratios, in-library histogram edits, better database backup, and easier folder relocation.

You can get a DxO discount with promo code RUMORS (new customers only).


Additional information:

DxO PhotoLab 10 delivers a new era of RAW photo editing with depth masks, advanced color grading, and expanded AI-powered tools

New AI editing tools, enhanced U Point™ technology, and one-click pixel editing in Affinity raise the bar for what a RAW workflow can be.

Paris, France: DxO, a pioneering force in photo editing software for more than two decades, has long helped photographers achieve the highest image quality through breakthrough RAW processing, advanced denoising technologies, and market-leading optical corrections. Today, the company announces the launch of DxO PhotoLab 10, the world’s most advanced end-to-end RAW photo editing software. While DxO has traditionally focused on extracting every ounce of quality from a RAW file, Version 10 expands that vision with a new generation of masking tools, powerful color grading capabilities, smarter AI-assisted workflows, and a seamless connection to Affinity for pixel-level editing — giving photographers greater creative control than ever before.

“DxO PhotoLab 10 is about helping photographers work faster, more precisely, and more creatively,” explains Jean-Marc Alexia, VP of Product Strategy. “By combining depth-aware masking, advanced color grading, and smarter AI-assisted tools, we’re removing technical barriers while giving photographers even greater control over their images. For us, AI should help photographers realize their vision, not replace it.”

Depth Masks: a new dimension of selective editing

DxO PhotoLab 10 introduces Depth Masks, a powerful new way to create local adjustments based on distance from the camera rather than shape or color. Using AI to analyze the image and generate a detailed depth map, Depth Masks allow photographers to precisely target foreground, midground, or background elements without requiring embedded depth data.

After applying a filter or adjustment, photographers can use intuitive sliders and adjustable feathering handles to refine exactly where the effect appears within the scene. The result is smooth, natural transitions and highly precise selective edits that would otherwise require complex and time-consuming manual masking.

Advanced color grading for refined creative control

DxO PhotoLab 10 introduces a powerful new Color Grading tool designed to make advanced color work both intuitive and precise. A streamlined interface centered around a single color wheel allows photographers to independently adjust shadows, midtones, highlights, and overall color balance, making it easy to shape the mood and atmosphere of an image.

For even greater creative control, color adjustments can be linked across tonal ranges, preserving their relative relationship while exploring different looks. The result is a faster, more intuitive approach to color grading that offers both flexibility and consistency.

Expanded AI capabilities

DxO PhotoLab 10 expands its AI-powered editing tools to make complex edits faster and more efficient.

Individual people selection

AI Masks can now identify every person within a scene, allowing photographers to create a single mask for all people, combine selected people into one mask, or generate individual masks for as many people — or individual features of people such as eyes, hair, and lips — as needed. This makes group portraits and complex scenes faster and easier to refine.

Face segmentation

Face segmentation brings new precision to portrait editing, adding eyebrows, eyes, iris and pupil, sclera, teeth, facial hair, face skin, and lips to the list of selectable AI Mask categories. Alongside existing options such as sky, subject, background, people, animals, flowers, and vehicles, these new categories help photographers target detailed adjustments more efficiently.

U Point™ functionality in AI Masks

AI Masks can now be refined using DxO’s renowned U Point™ technology, which intelligently selects areas based on color and luminosity. After creating an AI-powered selection, photographers can use the familiar U Point eyedropper to expand or contract the selection, making it easy to fine-tune complex selections without resorting to manual painting.

Automatic sensor dust removal

DxO PhotoLab 10 also introduces AI-powered dust removal at the RAW level, automatically detecting and removing sensor dust and small imperfections before they interrupt the editing process.

Upgraded local adjustment tools

Long before AI-powered masking became commonplace, DxO’s renowned U Point technology gave photographers an intelligent way to create highly precise local adjustments.

DxO PhotoLab 10 expands these capabilities with a new Control Brush and the ability to switch Control Points from circular to elliptical, giving photographers greater flexibility when creating local adjustments. The Control Brush combines the familiarity of traditional brush painting with U Point’s intelligent color- and luminosity-based selection, while elliptical Control Points provide a more natural fit for many subjects.

Combined with AI Masks and the new Depth Masks, these tools allow photographers to choose the most effective selection method for every image, then refine masks using whichever technology best suits the task. Sophisticated local adjustments become faster, more intuitive, and more precise.

A direct path to pixel-level editing in Affinity

DxO PhotoLab 10 introduces a seamless connection to Affinity, the acclaimed professional image editing software. A new button, sitting alongside PhotoLab’s existing export options, sends a photograph directly into Affinity for pixel-level work: retouching, compositing, and fine detail manipulation.

The combination brings together the best of both worlds: DxO’s unrivaled RAW processing, denoising, and optical corrections as the foundation, and Affinity’s powerful pixel-editing toolset for everything beyond. This marks the first step in an evolving integration between the two applications, with further enhancements planned for future releases.

Further workflow improvements

DxO PhotoLab 10 introduces a range of workflow enhancements designed to streamline the editing experience.

New features include support for as-shot crop ratios, histogram adjustments directly within PhotoLibrary, improved database backup and restoration, and simplified folder relocation management, helping photographers work more efficiently when organizing and editing large image libraries.

Price and availability

DxO PhotoLab 10 is available today from the DxO website (shop.dxo.com) for macOS and Windows computers:

– New license $249.99 / 249,99 € / £229.99
– Upgrade from DxO PhotoLab 8 or 9 $129.99 / 129,99 € / £114.99

A 30-day free trial is available.

DxO released new modules for the latest releases from Canon, Sony, Sigma, Panasonic, and Smayang

The post DxO released PhotoLab 10 (coupon code included) appeared first on Photo Rumors.

The Google Photos print store just got a Fujifilm upgrade, with new options coming soon

Fujifilm is now running Google Photos’ US print service, expanding the ways you can see your photos in physical form.

Fujifilm and Google Photos logos on a light teal background, divided by a vertical line.Fujifilm / Google

Fujifilm is strengthening its ties with Google, taking a larger part in the company’s photo printing service. The company announced that it’s taking a “leading” role when it comes to operating and supporting the Google Photos Print Store in the US.

This takes the form of a co-branded store built directly into the Google Photos interface. Once you navigate to the Print Store and select a product to order, you’ll be prompted to connect your Google account to Fujifilm’s services*. From there, Fujifilm will take care of payment, printing, shipping and customer support. Fujifilm also says there are “plans to roll out new features, new products and a more robust user experience.” 

You’ve long been able to get printed products directly from the Google Photos app – I personally have a book I made with the service in 2017 – but the company says this expanded partnership will give users “more ways than ever before to print their memories, including an expanded range of print formats, frames, décor, and gift items, going well beyond the offerings of the previous platform.”

There’s a very good chance that, if you bought prints from Google Photos prior to this announcement, Fujifilm or its equipment were involved in some way. The company is a major player when it comes to photo printing for both consumers and industrial clients. Last year, the company identified “growth in the number of images taken and printing needs due to smartphone proliferation” as one of its key opportunities for mid-to-long-term growth.

We always appreciate people having better and easier access to printing their photos

While this announcement seems like it’s probably a bigger deal for Fujifilm and Google, rather than the people actually printing their photos, we always appreciate people having better and easier access to printing their photos. While it used to be a vital part of the process, it’s an easy one to forget nowadays, especially if you’re part of the younger generations who have grown up with purely digital photography. It’ll be exciting to see if this partnership makes printing smartphone photos that bit more attractive to the people who may use it to see their images rendered in ink on paper for the first time.

* While Fujifilm’s press release says the platform “began rolling out to Google Photos users in the U.S. at the end of August 2026,” it seems that’s still in progress. When I tried it on September 1st, I ended up in the old Google Photos payment flow. 

About the Author: Mitchell started taking pictures at 10 and hasn’t stopped since. It’s been a wide-ranging adventure, spanning a wide variety of genres and locales, and occasionally dipping into fascinations with video and filmmaking. They honed their technical knowledge doing documentation, programing and QA, writing for The Verge, and just generally messing around on the computer to see what breaks.

Want to stay up to date on the latest product news and releases? Add DPReview as a preferred source to ensure our independent journalism makes it to the top of your Google search results.

add as a preferred source on google

The latest version of DxO’s Adobe alternative brings AI depth masking – no subscription required

DxO is bringing its AI-powered Depth Masks to PhotoLab10, along with plenty of other masking updates, automatic sensor spot removal and a new color grading wheel.

Close-up of a woman with dark bangs and closed eyes against a pink background, her lips highlighted in bright green by a PhotoLab 10 AI mask overlay, with mask tool icons visible on the mouth.DxO

DxO has announced PhotoLab 10, the latest version of its subscription-free Raw editor. The new iteration of the app offers more advanced masking tools, a new color grading wheel, automatic sensor dust removal and direct connectivity to Affinity, all under the company’s perpetual license. 

Most of the updates revolve around masking changes. That includes the addition of Depth Masks, which it previously released as part of Nik Collection 9 earlier this year. DxO says the feature uses AI to build a detailed depth map from any Raw file, based on distance from the camera, even without embedded depth data. It allows photographers to independently target the foreground, midground or background for more precise editing. 

A group in the sea, with one person lifting another above the water; both are highlighted in green. An editing software mask creation window appears in the top right corner.
The updated AI Masks feature lets photographers mask all people at once, combine only chosen individuals or isolate each person separately.
DxO

DxO is also expanding some of PhotoLab’s existing AI-based masking tools. The company says that the AI Masks tool can now identify every person in a scene and allows photographers to create a single mask for all people, combine only selected people into one mask or create individual masks for every person. For even more control, the tool even allows photographers to select individual features of people, such as eyes, hair and lips. 

Users can now also select individual features such as eyebrows, eyes (as a whole or breaking out the iris, pupil and whites), teeth, facial hair, face skin and lips from the list of selectable AI Mask categories. It should offer even more fine-tuned control while retouching portraits. The masking updates also include an expanded U Point toolkit, DxO’s approach to creating local adjustments based on the color and luminosity of a sampled point. Users now have access to a brush-based Control Brush and elliptical Control Points alongside the existing circular ones. 

M-GN-Dxo_PhotoLab-10-EN-Color-Grading-01
DxO brought its color grading wheel from Nik Collection 9 into PhotoLab 10, offering tone-zone color control separate from the existing hue-based wheel.
DxO

PhotoLab 10 adds more than masking changes. DxO has brought over the color grading wheel introduced with Nik Collection 9, which puts shadows, midtones, highlights and global color on a single wheel. It’s tone-based grading, distinct from the hue-targeted color wheel that remains in the app. It also added an AI-powered sensor dust removal tool that automatically removes sensor spots on Raw files. Lastly, there is now a new export option for Affinity, Canva’s now-free professional image editing software, so photographers can send images directly to that platform for additional editing. 

PhotoLab 10 is available starting today for macOS and Windows. A new license costs $250, while upgrades from PhotoLab 8 or 9 are $130. A 30-day free trial is available on DxO’s site.

About the Author: Abby Ferguson holds an MFA in photography and blends a fine-art background with extensive editorial and commercial experience. She built and led an in-house imaging program for a large vacation rental company and has served as an associate editor at Popular Photography. She also teaches at a local community college and serves on its Photographic Technology Program Advisory Board, sharing her knowledge and enthusiasm for the medium.

Want to stay up to date on the latest product news and releases? Add DPReview as a preferred source to ensure our independent journalism makes it to the top of your Google search results.

add as a preferred source on google

Xiaomi’s Poco F9 Ultra has megapixels and a mega battery

It’s the first phone in the Poco line that lets you take 200MP images, in certain conditions.

The red Xiaomi Poco F9 Ultra on a color-matched background.Xiaomi

When you use DPReview links to buy products, the site may earn a commission.

Xiaomi has announced the Poco F9 Ultra and the F9 Pro, the latest entries in its series of phones that aim to undercut the pricing of traditional flagship models while offering similar specifications. This time around, the company has included a battery with a massive 8050mAh capacity on the Ultra, and a main camera that can shoot images at up to 200MP on both phones.

That main camera is one of three: the phones also include telephoto and ultrawide options. On the Ultra, the former features a “5x” 120mm equiv. F3 optically stabilized lens and a 50MP sensor. Its ultrawide is a slightly-narrower-than-typical 0.7x 17mm equiv. F2.4 lens, also with a 50MP sensor. Xiaomi doesn’t specify the sizes of these sensors, but they seem to be unchanged from the ones found in the Poco F8 Ultra, which used a Type 1/2.76 (20.4mm2) one for its telephoto and Type 1/2.88 (18.6mm2) for its ultrawide, according to GSMArena. The F9 Pro, meanwhile, has a 50MP 2.5x telephoto camera and an 8MP ultrawide option, again seemingly unchanged from its predecessor.

The camera bump of the Xiaomi Poco F9 UltraXiaomi

The main event, though, is the 200MP wide-angle camera shared by the two models. It has a 24mm equiv. F1.7 stabilized lens. By default, it bins all that resolution down to 12.5MP or 50MP, depending on a setting, but you can access its full resolution via a dedicated mode in the camera app. The pictures take a few seconds to process, and won’t have the HDR effect that you get from the phone’s normal modes, but can show much more detail when shot in ideal conditions; the camera reminds you that the mode works best when there’s plenty of light, for reasons that are obvious if you understand how quad bayer sensors work.

Again, Xiaomi hasn’t said what size sensor its main camera uses, beyond claiming that it uses “2μm 16-in-1 Super Pixels.” That figure shouldn’t be taken literally, though, because to fit 200MP worth of 2μm pixels, you’d need the area of a full frame sensor, which it certainly isn’t. It’s more likely that it’s describing the binned quad bayer pixels, which would put the sensor somewhere around a Type 1/1.56 (50mm2). That would also explain why the company hasn’t advertised the size, when it did for the Poco F8 Ultra, which used a larger Type 1/1.31 (72mm2) sensor for its main camera. We’ve reached out to Xiaomi to ask for specifics, and will update this story if we hear back.

Of course, with flagship cameras the sensor specs aren’t everything, as phones make heavy use of computational photography, stacking multiple frames together. You can see our sample gallery shot using the Poco F9 Ultra below.

Beyond the cameras, the Poco F9 phones have relatively high-end specs. The Ultra uses the Snapdragon 8 Elite Gen 5 chip, while the Pro uses the slightly cut-down “V” variant of that system on a chip. Both feature displays capable of going up to 185Hz, and producing 10,000 nits peak brightness, though the latter figure is only over a 1% region of the screen. More realistic is the 4500 nit peak brightness figure, attainable in a window covering 25% of the display. The Ultra’s display is 6.9″, while the Pro’s is 6.59″.

Both phones have relatively large batteries for their size, thanks to the company’s use of silicon-carbon battery chemistry. The Ultra is rated for 8050mAh, while the Pro is 6330mAh. Whichever one you go with, you can recharge it quickly with the correct equipment; they both have 100W wired and 50W wireless charging. What’s more, they can be used to charge other devices that don’t have the same stamina, with 27W of reverse wired charging and 22.5W of reverse wireless charging.

Finally, the phones feature “Sound by Bose” co-branding. On the Ultra, this means stereo speakers combined with a subwoofer that lives alongside the camera modules on the plateau (though the Pro misses out on that feature). Based on the few songs I listened to, it indeed produces pretty impressive bass for a phone. If you go above around 75% volume you’re liable to hear some peaking, but for personal listening that’ll be plenty loud. 

The F9 Ultra comes in “dark cherry” or black, while the Pro is available in black, white or “aurora green,” with the latter literally glowing in the dark after being exposed to light. The Ultra is available with 256GB of storage and 12GB of RAM for $799 / €1,099, or you can upgrade to 16GB of memory with 512GB  or 1TB of storage for $949 / €1199 and $1199 / €1399, respectively. The Pro, meanwhile, starts at €903 for a version of 12GB RAM and 256GB of storage. The launch is global, but, as is typical for Xiaomi phones, excludes the US.

Please do not reproduce any of these images on a website or any newsletter/magazine without prior permission (see our copyright page). We make the originals available for private users to download to their own machines for personal examination or printing; we do so in good faith, so please don’t abuse it. 

Loading gallery…

About the Author: Mitchell started taking pictures at 10 and hasn’t stopped since. It’s been a wide-ranging adventure, spanning a wide variety of genres and locales, and occasionally dipping into fascinations with video and filmmaking. They honed their technical knowledge doing documentation, programing and QA, writing for The Verge, and just generally messing around on the computer to see what breaks.

Want to stay up to date on the latest product news and releases? Add DPReview as a preferred source to ensure our independent journalism makes it to the top of your Google search results.

add as a preferred source on google

Sigma is filling out its series of high-end large format cinema lenses, going wider and longer

The company has three new entries in its Aizu Prime series.

A 21mm, 100mm and 125mm cinema lens on a gold background.Sigma

Sigma has announced three new entries to its “Aizu Prime” series of cinema lenses: a 21mm, 100mm and 125mm. Like the rest of the lenses in the series, they’re fast at T1.3, and designed for “large format” cameras, with a 46.3mm image circle that could cover the film in a VistaVision camera or the sensor of an Arri Alexa LF Open Gate. (In photography terms, they’re a touch larger than full frame, which has a 43.3mm diagonal.)

The new lenses take the matched series wider and longer than before. Last year, Sigma launched the Aizu Prime brand with eight lenses, ranging from 25mm to 75mm. It also promised that, eventually, there would be 12 lenses in the series. Today’s announcement brings the total up to 11, with only an 18mm option not yet released.

Several Sigma Aizu Prime lenses sitting on a light table.
The Aizu Prime lenses have all the features a cinematographer would expect: geared control rings with long throws, distance markings (which you can get in either feet or meters) and electronic communication for automatic distortion correction.
Sigma

Sigma says the lens’ optical formulas, like the rest of the Aizu Primes, are “developed exclusively for cinema applications,” with an eye towards being sharp, while still retaining character, and having minimal focus breathing and distortion. Sigma also designed them to match the other lenses in the series, sharing similar color, contrast and flare characteristics, sizes and weights (though the 100mm and 125mm are a touch heavier than the rest at 2.2Kg versus 1.6 or 1.7Kg). That’s an important consideration on a busy film set; you don’t want to have to rebalance your gimbal or reset your follow focus and iris control wheels each time you change a lens.

None of this comes cheap, though, as the three new lenses will cost $9799 each, which is a bit of a jump up from the $8300 the rest of the entries in the series cost. That may be a function of their slightly more exotic focal lengths. They’ll be available for PL or Sony E-mount starting in November.

About the Author: Mitchell started taking pictures at 10 and hasn’t stopped since. It’s been a wide-ranging adventure, spanning a wide variety of genres and locales, and occasionally dipping into fascinations with video and filmmaking. They honed their technical knowledge doing documentation, programing and QA, writing for The Verge, and just generally messing around on the computer to see what breaks.

Want to stay up to date on the latest product news and releases? Add DPReview as a preferred source to ensure our independent journalism makes it to the top of your Google search results.

add as a preferred source on google

Zach Snyder’s new movie is about drugs, violence and photography

It seems cameras will play a staring role in The Last Photograph.

A bedraggled man raises a camera with a flash mounted to his eye intently.Zack Snyder, via TIFF

Zack Snyder has directed movies about a lot of things: superheroes, space, ancient Greeks, owls, you name it. With his next film, it seems like we can add photography to that list.

According to the synopsis, the movie, called The Last Photograph, is about a former DEA agent teaming up with a “washed-up junkie war photographer” to try and find his niece and nephew after their parents were murdered. The trailer (and the title) imply that photography will play some role in the story. There are scenes showing a darkroom, photos being taken at a crime scene, a slow-motion shot of a camera exploding, and several moody frames of someone raising a rangefinder to their eye, presumably witnessing horrors off-screen.

Speaking of: we’ll put the trailer below, but heed the warning in the first few seconds. It’s graphic in pretty much every way it can be, including an exceptional amount of violence. Even if you’re fine with that, it’s probably not something to watch at work.

Of course, being a camera site, we were interested in what cameras the characters were using on-screen, especially since Zack Snyder is a known photography buff (he’s reportedly the cinematographer for the movie, too, as he was on 2021’s Army of the Dead, which he shot almost entirely at F0.95 using rehoused vintage optics*). From what we can tell, the photographer character uses Yashica rangefinder – probably an Electro 35CC from the early 70s, based on the markings – and what looks like a Leica M10 Monochrom, a camera Snyder is demonstrably familiar with.

The Yashica isn’t a stranger to the silver screen, either; Andrew Garfield used one in 2012’s The Amazing Spider-Man (back when Spider-Man movies featured the version of Peter Parker who works as a photographer). While the brand wasn’t really known as a go-to for photojournalists, it also wouldn’t be that surprising to hear of a war photographer using a film rangefinder with a fixed 35mm F1.8 lens.

We don’t see a ton of movies about photography, so it’s interesting to be getting a movie from a big-name director that seems to at least feature the art form as an important part of the story. The last film we got like that was Alex Garland’s Civil War, which focused mostly on the role of reporting and war photography (much to people’s surprise, given that it was released during a contentious US election and was set against the backdrop of a fictional second civil war in the country).

Screenshot-2026-08-31-at-09.59.20
What looks to me like a Leica M10 Monochrom (based on the lack of branding) and the Yashica Electro 35CC in a darkroom. Of course, you’d only need to develop film from the later, as the M10 is a digital camera.
Zack Snyder, via TIFF

According to The Hollywood Reporter, it may be a while before we get to see The Last Photograph. It’s set to premiere on September 13 at TIFF (the Toronto International Film Festival), but no one has bought distribution rights to it yet. The film is apparently a passion project for Snyder, who has been kicking the idea around since the mid-2000s. While it certainly seems like it’ll be an intense watch, I’m excited for whenever I do get to see it. In part because of the photography aspect, but also because the cinematography in it looks gorgeous, and it’s always interesting to see a Hollywood director take a big artistic swing.

* The effect is… strange. At times it works and provides a unique aesthetic, at others it borders on distracting. I actually didn’t know about the creative choice when I started watching the movie, but pretty early into it I turned to a friend and said something along the lines of “what is going on with this cinematography?”

About the Author: Mitchell started taking pictures at 10 and hasn’t stopped since. It’s been a wide-ranging adventure, spanning a wide variety of genres and locales, and occasionally dipping into fascinations with video and filmmaking. They honed their technical knowledge doing documentation, programing and QA, writing for The Verge, and just generally messing around on the computer to see what breaks.

Want to stay up to date on the latest product news and releases? Add DPReview as a preferred source to ensure our independent journalism makes it to the top of your Google search results.

add as a preferred source on google

Tilta will also increase prices on September 1st

Par : PR admin
31 août 2026 à 01:45


In addition to Fujifilm, Tilta will also increase prices on September 1st (check their products at B&H Photo and the official website). Here are the details:

Product Old Price Adjusted Price
Tilta Boulder Camera Cart XL – Black $1,599 $1,699
Tilta Boulder Camera Cart – Gray $1,199 $1,399
Tilta Boulder Camera Cart Indie Kit – Gray $1,499 $1,699
Cable Management Storage Bin for Boulder Camera Cart – Black $19 $29
IGT Plate Expansion Module Kit for Boulder Camera Cart – Black $219 $249
Dual IGT Plate Kit for Boulder Camera Cart – Black $22 $29
IGT Outdoor Expansion Module for Boulder Camera Cart – Black $199 $229
Cable Hook for Boulder Camera Cart – Black $19 $25
Dual Accessory Mounting Bracket for Boulder Camera Cart – Black $45 $49
Sunshade for Boulder Camera Cart Extended Umbrella (2 Panel) – Black $49 $79
Motorized Control Kit for Boulder Camera Cart (US) – Black $699 $799
1/4”-20 Mounting Strap for Boulder Camera Cart – Yellow $5 $9
1/4”-20 Mounting Strap for Boulder Camera Cart – Purple $5 $9
1/4”-20 Mounting Strap for Boulder Camera Cart – Gray $5 $9
Compact Hook for Boulder Camera Cart – Black $5 $9
Desktop Mounting Adapter for Boulder Camera Cart Accessories (40mm) – Black $49 $69
Organizer Bin for Boulder Camera Cart – Black $39 $49
Metal Pegboard for Boulder Camera Cart – Black $49 $59
Monitor Mounting Kit for Boulder Camera Cart – Black $249 $299
Fluid Head and Steadicam Mounting Kit for Boulder Camera Cart – Black $185 $199
150mm Fluid Head Ball Mount Adapter Kit for Boulder Camera Cart – Black $109 $129
Monitor Mount for Boulder Camera Cart Mounting Bar – Black $129 $139
Monitor Mounting Bracket for Boulder Camera Cart – Black $199 $219
Expansion Mounting Bracket Kit for Boulder Camera Cart – Black $139 $149
Top Drawer with Lock for Boulder Camera Cart – Black $139 $159
150mm Fluid Head Ball Mount for Boulder Camera Cart – Black $59 $69
75/100mm Fluid Head Ball Mount for Boulder Camera Cart – Black $89 $99
Khronos Focus PD Handle for iPhone – Space Gray $99 $149
Khronos Focus PD Handle for iPhone – Titanium White $74 $149
Khronos Focus PD Handle for iPhone – Black $99 $149
Hydra Alien Mini Car Mounting System – Titanium Gray $119 $149
Hydra Alien Mini Electronic Suction Cup Kit – Titanium Gray $149 $189
Hydra Alien Mini Master Kit – Forest Green $199 $249
Hydra Alien Mini Master Kit – Desert Beige $199 $249
Hydra Alien Mini Biking Kit – Titanium Gray $139 $169
Hydra Alien Mini Handheld Kit – Titanium Gray $109 $139
Hydra Alien Mini Ultimate Kit – Forest Green $169 $209
Hydra Alien Mini Ultimate Kit – Desert Beige $169 $209
Nucleus Auto Focus Adapter Base Kit (E to PL) $299 $399
Nucleus Auto Focus Adapter Dual Nano II Motor Kit (E to PL) $499 $599

Current Pricing Ends August 31st

Thank you for your continued support and trust in Tilta gear. Due to sustained increases in raw material, production, and international logistics costs, we will be revising the pricing on select products starting September 1, 2026.

This update will primarily affect the Nucleus Auto Focus series, Boulder Cart, and Hydra Alien Mini lines.

To ensure a smooth transition for our community and partners, all existing and pending orders for the Nucleus Auto Focus placed prior to September 1 will be honored at their original rates. In addition, current pricing across all affected items will remain active through August 31, 2026.

The post Tilta will also increase prices on September 1st appeared first on Photo Rumors.

Reminder: another Fujifilm price increase is coming next week

Par : PR admin
30 août 2026 à 16:52


Next week, on September 1, Fujifilm will increase prices in Germany and most likely in other markets as well.

Fujifilm already had several price increases last year

If you are planning to buy any new Fuji gear, now would be a good time to do so – check the current prices and availability at B&H Photo, Foto Erhardt, and WEX Photo.

Here are the new Fujifilm prices published by a German store:

Model designation Color Old RRP New RRP
FUJIFILM X100VI Black €1,799.00 €1,999.00
FUJIFILM X100VI Silver €1,799.00 €1,999.00
FUJIFILM X-E5 Housing Black €1,549.00 €1,649.00
FUJIFILM X-E5 Housing Silver €1,549.00 €1,649.00
FUJIFILM X-E5 Kit XF23mmF2.8 R WR Black €1,799.00 €1,899.00
FUJIFILM X-E5 Kit XF23mmF2.8 R WR Silver €1,799.00 €1,899.00
FUJIFILM X-T50 Housing Black €1,499.00 €1,599.00
FUJIFILM X-T50 Housing Silver €1,499.00 €1,599.00
FUJIFILM X-T50 Housing anthracite €1,499.00 €1,599.00
FUJIFILM X-T50 Kit XF16-50mmF2.8-4.8 R LM WR Black €1,899.00 €1,999.00
FUJIFILM X-T50 Kit XF16-50mmF2.8-4.8 R LM WR Silver €1,899.00 €1,999.00
FUJIFILM X-T50 Kit XF16-50mmF2.8-4.8 R LM WR anthracite €1,899.00 €1,999.00
FUJIFILM X-T50 Kit XC15-45mmF3.5-5.6 OIS PZ Black €1,599.00 €1,699.00
FUJIFILM X-T50 Kit XC15-45mmF3.5-5.6 OIS PZ Silver €1,599.00 €1,699.00
FUJIFILM X-T50 Kit XC15-45mmF3.5-5.6 OIS PZ anthracite €1,599.00 €1,699.00
FUJIFILM X-S20 Housing Black €1,399.00 €1,499.00
FUJIFILM X-S20 Kit XC15-45mmF3.5-5.6 OIS PZ Black €1,499.00 €1,599.00
FUJIFILM X-S20 Kit XF16-50mmF2.8-4.8 R LM WR Black €1,799.00 €1,899.00
FUJIFILM GFX100 II Housing Black €7,999.00 €8,499.00

Another Fujifilm price increase is coming

The post Reminder: another Fujifilm price increase is coming next week appeared first on Photo Rumors.

6 photographers share the mistakes they’re glad they made

From missed focus and accidental overexposure to a caption error, six image-makers share the mistakes that resulted in something good.

A golden retriever lies on a dark tiled floor, lit by a narrow beam of sunlight, with a second dog visible in the shadows behind it.Nancy Borowick

Mistakes are part of life as a photographer or videographer. I’ve messed up too many times to count, forgetting to pack an extra battery, showing up to a shoot with a full memory card and botching my settings badly enough that the images were unusable.

Most of those just cost me lost photographs or some added stress. But sometimes a mistake leads somewhere better than the plan. While attending Sony’s Kando event, where Sony invited me along with fellow press and other image-makers, I asked six photographers and videographers about a mistake they’re glad they made. Here’s what they said.

These conversations happened on the fly at the event, so most of the creatives didn’t have the specific image handy. The photos below are from their portfolios, with the exception of Nancy Borowick and Jabin Botsford.

Sarina Soriano

Sarina Soriano (@sarinasoriano_)is a senior producer and director of photography (DP) for the San Francisco 49ers, where she’s a nine-time regional Emmy winner and was the first woman in the role, as well as one of the first Latina cinematographers in the NFL.

Her mistake was a setting she didn’t intend to be shooting at. “A mistake that I made that ended up actually turning out well was that I put a high shutter on one of my videos, but was able to really slow it down in DaVinci, and it looked absolutely epic,” she said.

Nate Luebbe

Nate Luebbe (@nateinthewild) is a landscape, wildlife and adventure photographer and a member of Sony’s Alpha Imaging Collective, with a portfolio built around grizzlies, northern lights and remote wilderness.

Luebbe’s mistake was accidentally using too slow a shutter speed for wildlife, which ended up being a visual tool that he likes utilizing. “Every now and then, a little bit of motion blur can tell a good story about an animal that’s moving fast,” he said.

He pointed to an image he took in Katmai National Park as an example of where the approach works: shooting the bears at the top of the falls in low light, he kept his shutter slow rather than pushing his ISO. “I ended up getting some motion on the water, but the bears were standing still. It looks kind of cool, and you can still see what’s going on. It added a little more depth to it.”

Nancy Borowick

A cozy kitchen with warm lighting and yellow walls; one person stands by the stove with two dogs nearby, while another sits at a table drinking.
An incomplete caption led Borowick to these women, who invited her into their home to photograph them with their dogs, which turned into the start of a long-term project called Part of the Pack.
Nancy Borowick

Nancy Borowick (@nancyborowick) is a documentary photographer, author and Sony Artisan of Imagery who has worked regularly with The New York Times since 2013 and whose work often centers on health and relationships.

Borowick’s mistake was a missing caption. Early in her career, she was photographing the Westminster Kennel Club Dog Show, which she describes as “the most fun in the entire world,” she said. When prepping to send images to her editor, she realized one frame’s caption was incomplete. “I had asked the name of the dog, because we were at a dog show, but I never asked the name of the human, and I felt like that was important to have,” she said.

So she went looking online. “All the champion dogs have these Facebook pages, naturally,” she said, and the dog’s page led her to its owner, who, as it happened, was also named Nancy.

Two hours of messaging later, they were friends. That turned into permission to photograph the woman, her wife and their pack of golden retrievers at home, which has now become a long-term project called Part of the Pack, a series dedicated to photographing the relationship between dogs and those who breed, own and show them. “Caption information is so important, especially getting it right,” Borowick said, “but on occasion, mistakes lead to happy accidents and long-term projects.”

Jabin Botsford

Jabin Botsford is a Pulitzer Prize-winning photojournalist who spent 11 years on staff at The Washington Post covering politics, breaking news and, since 2014, Donald Trump.

Botsford’s mistake was a moment of missed focus. In 2020, he was in the Rose Garden for one of many Trump press conferences, this one running well past its expected length. “While the rest of my colleagues were just filing and hiding in the shade, I went around the side and shot all these photos with a 400mm,” he said. He noticed a fly circling the president and fired off a long burst. In one frame, his autofocus locked onto the fly rather than Trump, right when the insect flew in front of Trump’s open mouth. “It looked kind of like it was coming out of his mouth,” he said.

Dani Hamm

An example of Hamm’s high-key work, not the original frame that she mentioned.

Dani Hamm (@danigoinghamm) is an adventure, wildlife and nature photographer. Her portfolio is filled with stunning portraits of animals, from tiny birds to massive buffalo. 

When I asked about a mistake that turned out for the better, she instantly had an answer: “Overexposing an image and it ending up being a really cool high-key photo.” The blown-out background stripped away context and left just the animal, and she now creates high-key images on purpose.

Allison Anderson

Allison Anderson (@photoallison) is a travel and lifestyle photographer, videographer and Sony Alpha Ambassador who documents her solo trips all over the world.

Anderson’s mistake took a decade to pay off. Very early on in her photography path, she shot everything as JPEGs, mostly because she didn’t like how much space Raw files took up on cards and hard drives. Then she took a trip to Italy. “When I got home, I went to import all my photos, and I realized that somehow the camera had gotten set to shooting in Raw. And I was so annoyed because the file sizes were enormous,” she said.

She dumped them on a hard drive and forgot about them. “Ten years later, I went back, and I went through the hard drive again, and everything I’d shot at that time was mostly in JPEG except for this one trip that was all in Raw.” Because of that, she was able to edit the file, and one of those images is now printed large and hanging over her fireplace.

About the Author: Abby Ferguson holds an MFA in photography and blends a fine-art background with extensive editorial and commercial experience. She built and led an in-house imaging program for a large vacation rental company and has served as an associate editor at Popular Photography. She also teaches at a local community college and serves on its Photographic Technology Program Advisory Board, sharing her knowledge and enthusiasm for the medium.

Want to stay up to date on the latest product news and releases? Add DPReview as a preferred source to ensure our independent journalism makes it to the top of your Google search results.

add as a preferred source on google

DPReview mini-challenge begins on September 1 to celebrate Save Your Photos Month

Each day in September, we will announce a new theme for the month’s photo album mini-challenge. Share your photos, and they may be selected for a special spotlight article.

Photo collageGetty Images

We’re celebrating Save Your Photos Month in September with a new type of photo-taking mini-challenge. We’d love for you to participate to show off your photography.

Save Your Photos Month is all about treasuring life’s moments and experiences captured in your photography, whether they are mundane, magical or melancholic. Expect this mini-challenge to support this idea throughout the month as we reveal daily challenge updates.

Here’s how it will work

Every 48-hours this September, we’ll announce a new photo theme. Your challenge: shoot and upload a matching photo to our community album before the period ends. At the end of the month, we’ll feature our favorite photos in a front-page DPReview spotlight.

The photo album we create at the start of the mini-challenge will be the same one you use for submitting each period’s themed photo. As soon as we announce the update for the new period, submissions will no longer be possible. Think of it as an advent calendar of sorts, where we reveal the next period’s theme every 48-hours.

We will reveal the next theme at 8pm PDT / 3 am UTC, 48-hours after the prior one (see schedule below).

Steps to share your photos

  • Stand by for the 48-hour’s announcement here on this post (see the schedule below).
  • Take a photo that supports the theme. It must be taken during that period.
  • Upload that photo to the shared album with at least a one-sentence caption. Feel free to write more if you have a story to tell.
  • Feel free to announce your photo upload and discuss the mini-challenge below (but please only share the actual photo in the album).

Notice: If you are a new forum member, you need TWO normal posts before you can upload photos to the album.

That’s it!

To share your photos outside of the forums and on social media, be sure to use the hashtag #SaveYourPhotosMonth. DPReview has an Instagram channel you can mention as well (thank you).

Daily theme reveals

Watch here daily at 7 pm PDT / 3 am UTC to see the next 48-hour’s theme announced.

We’ve already revealed the opening theme, so you can prepare to upload once the album opens on that morning:

  • September 1: What’s on your dinner plate
  • 3: Something interesting on or around the outside of your home
  • 5: When the light hits just right (indoor photo of an amazing lighting and shadow scene)
  • To continue…

We’re excited to see your photos, so get ready for Tuesday’s mini-challenge kick-off. Have fun!

About the Author: Mathew Anderson is a proud Community Manager for the technology industry and a past visitor to DPReview.com for all his camera needs. He is currently the lead of DPReview’s community and primary communication link between the community and DPReview’s team.

Want to stay up to date on the latest product news and releases? Add DPReview as a preferred source to ensure our independent journalism makes it to the top of your Google search results.

add as a preferred source on google

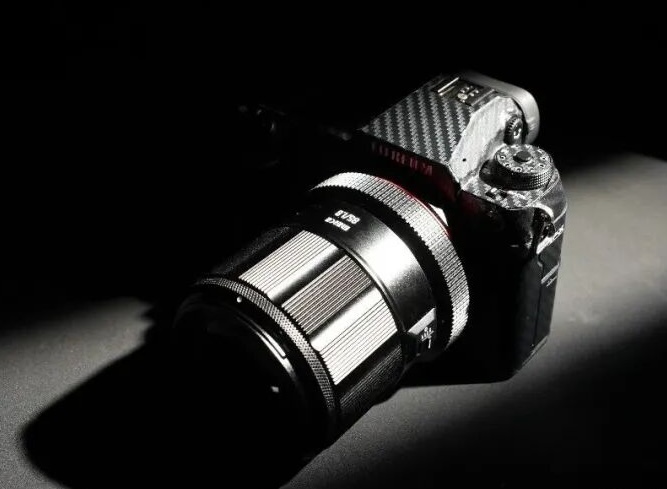
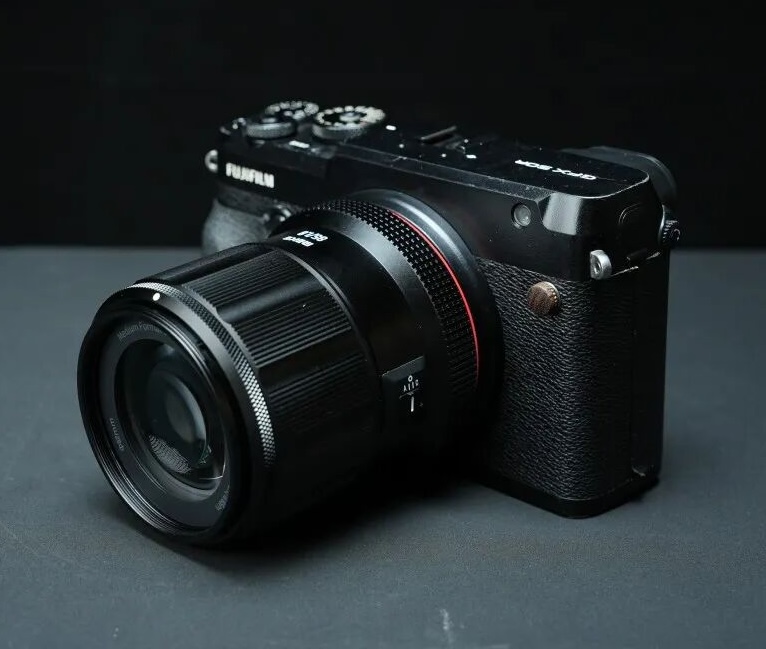
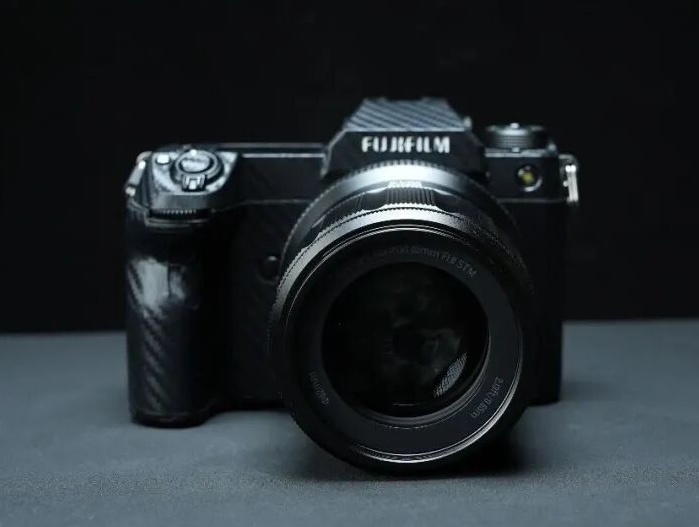
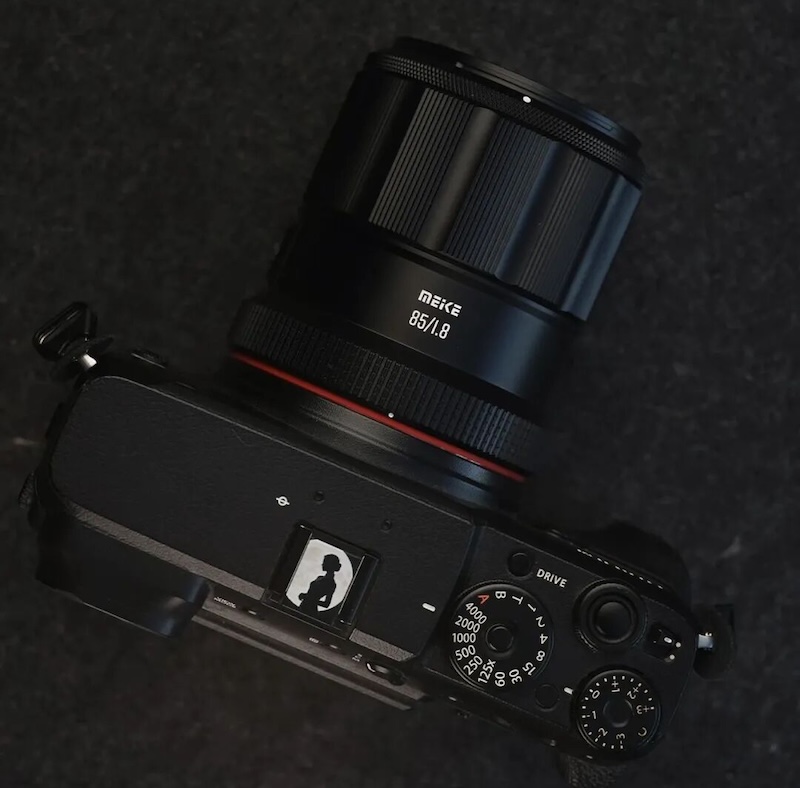
The Meike AF 85mm f/1.8 lens for Fujifilm GFX-mount is now available for pre-order

Par : PR admin
30 août 2026 à 01:14


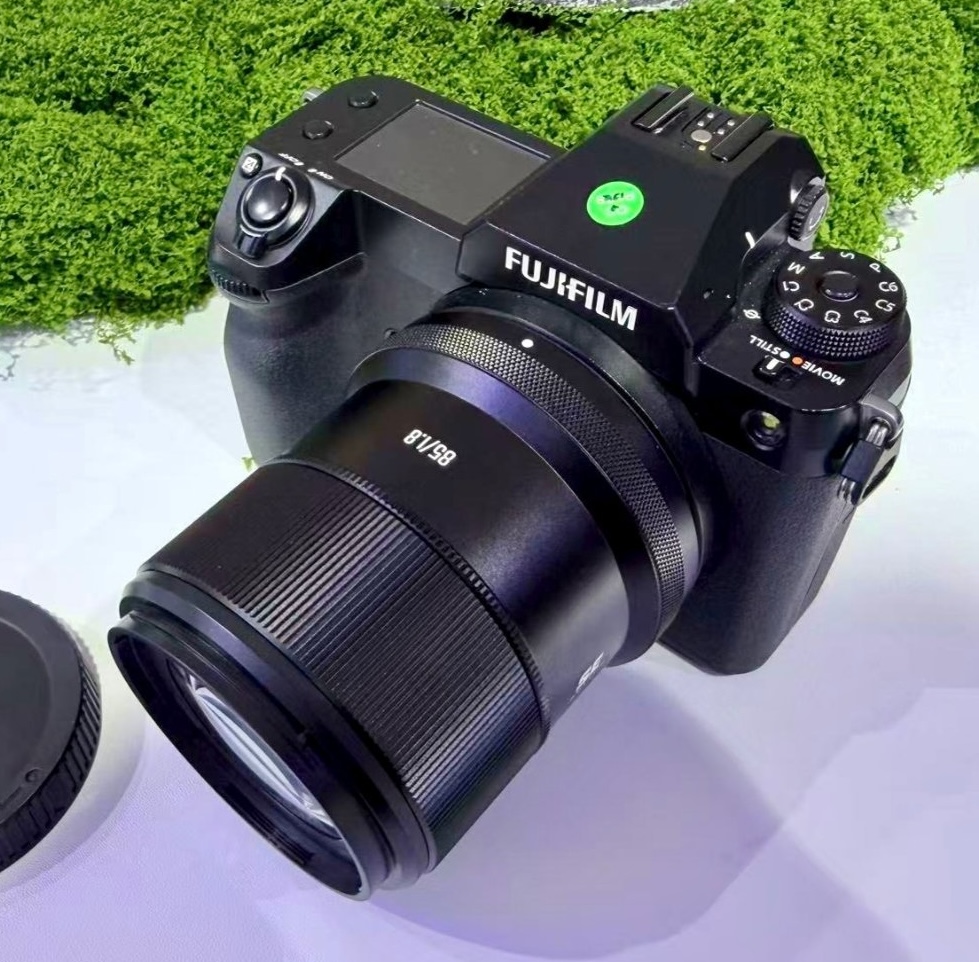
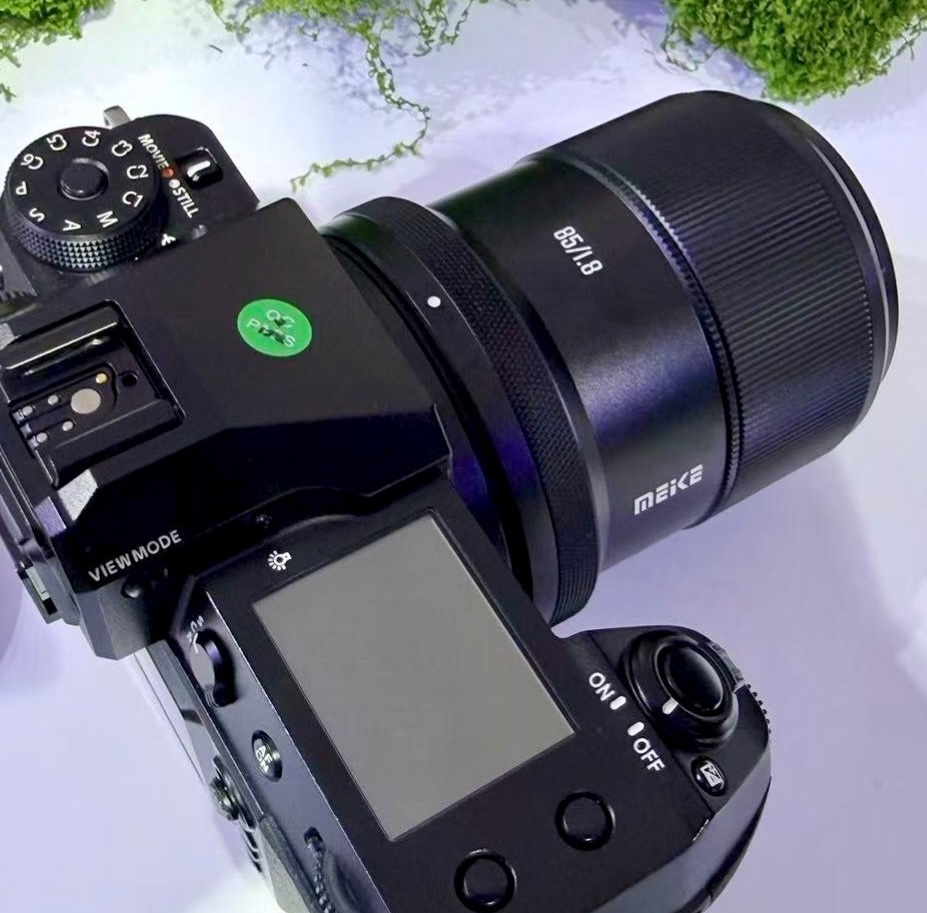
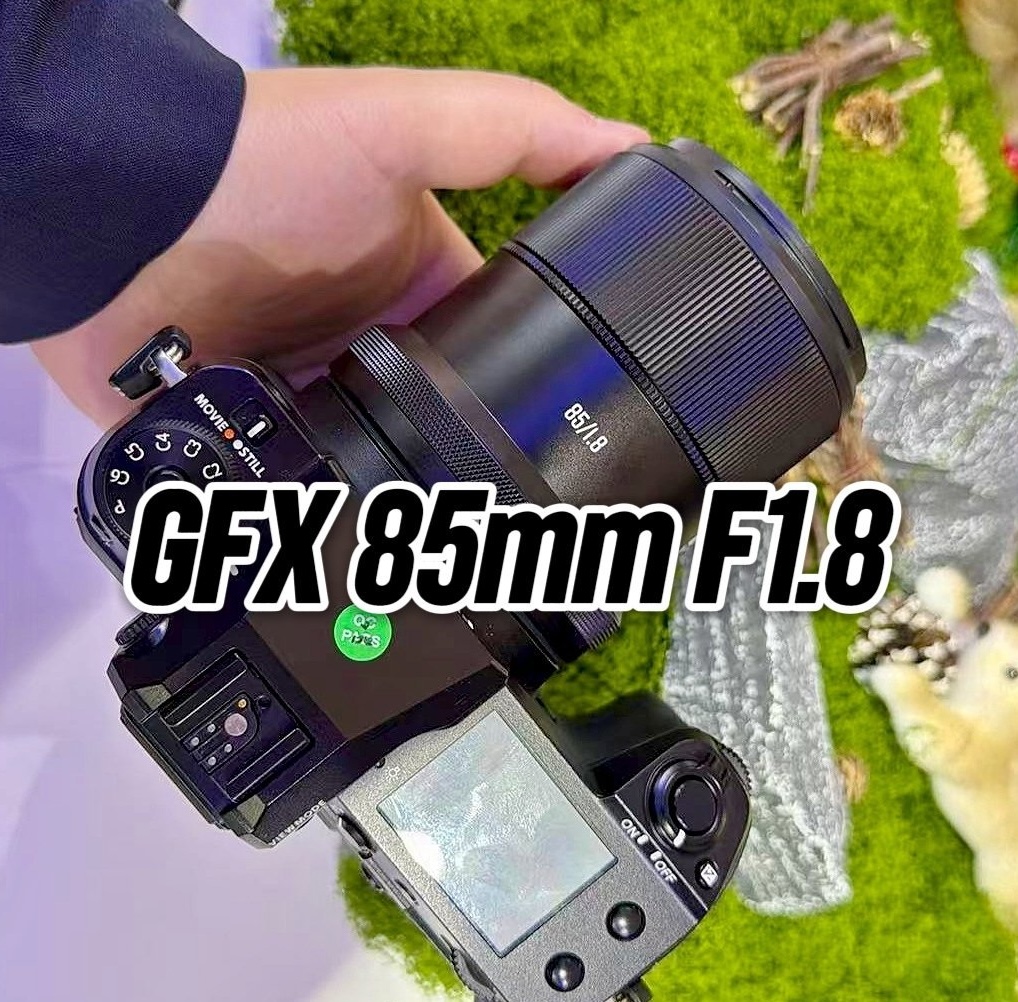
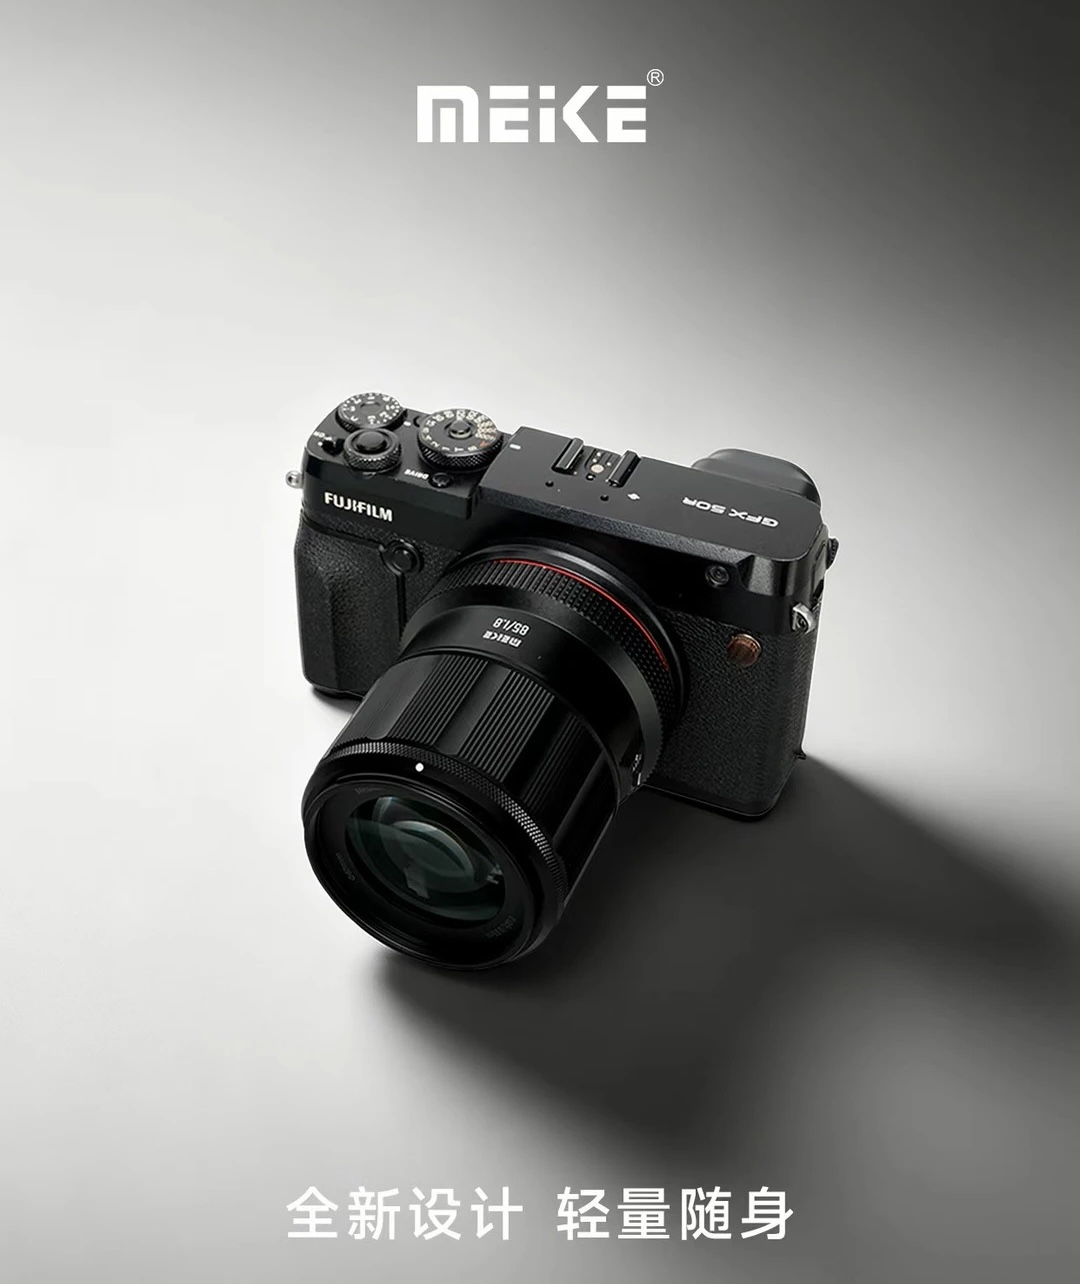
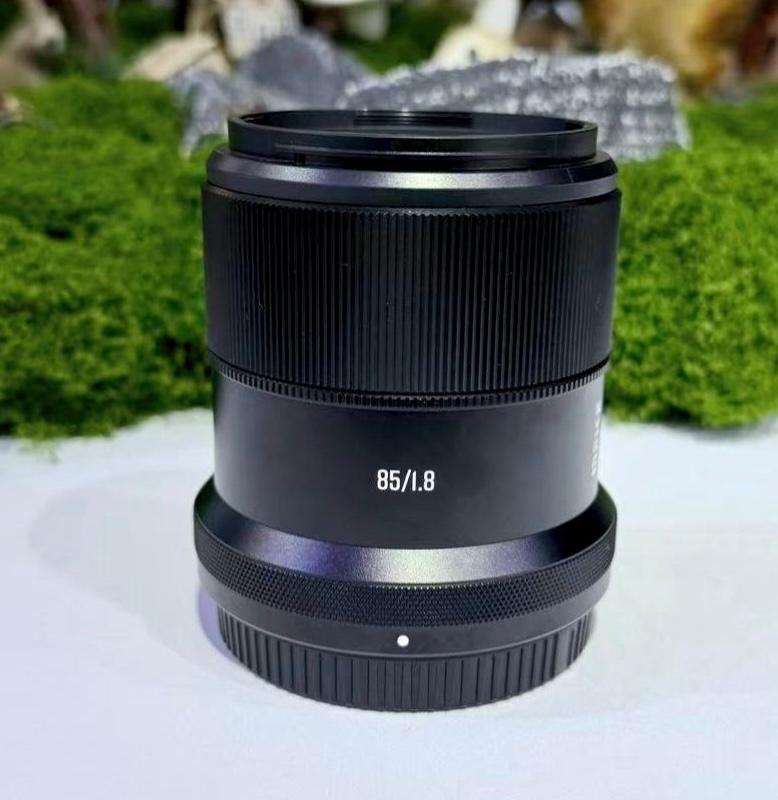
The Meike AF 85mm f/1.8 lens for Fujifilm GFX-mount (previously covered here) is now available for pre-order at:

Meike is rumored to announce new AF 65mm f/1.8 & AF 110mm f/2 lenses for Fujifilm GFX mount

Meike lens roadmap: new autofocus zooms & fast f/1.2 primes

Additional information on the new Meike AF 85mm f/1.8 lens for Fujifilm GFX-mount:


  • Format: Medium format
  • Focal length: 85mm
  • Lens construction: 11 elements in 7 groups |
  • Aperture blades: 11
  • Magnification: 0.17x
  • Minimum focusing distance: 0.65m
  • Autofocus motor: STM stepping motor (in-house developed)
  • Filter size: 62mm
  • Net weight: Approx. 406g (excluding lens cap)
  • Additional pictures:


Via FujiAddict

The post The Meike AF 85mm f/1.8 lens for Fujifilm GFX-mount is now available for pre-order appeared first on Photo Rumors.

The latest Leica news and rumors: new Summicron-M 66 f/2 lens coming next week

Par : PR admin
29 août 2026 à 16:28

How visiting a car show made me feel better about the future of photography

On being surrounded by people with cameras who aren’t necessarily part of the photography tribe.

A person carrying a camera with a large lens over one shoulder, with another camera strap slung over the other shoulder.Mitchell Clark

Last week, Canon was kind enough to give me the opportunity to attended a Formula Drift event, featuring a high-horsepower competition and a car show with a lot of really interesting vehicles. The shooting experience was highly informative for some upcoming reviews – stay tuned – and I came away with several pictures that I’m really proud of. But I also got something I didn’t expect: a renewed hope for the future of photography.

As a lifelong photographer and someone whose job is writing about cameras, it’s been a bit easy to fret over the future of the artform. Sales of dedicated cameras are recovering, sure, but they’re still far from what they once were. And while phone photography is just as legitimate, the culture at large treats it as cheap and disposable. Even the most meaningful, carefully considered and composed image becomes another piece of content to look at for half a second while scrolling Instagram.

But walking through the car show in the evening, I found myself surrounded by people with cameras, ranging from DSLR kits that could’ve been purchased at Costco to serious pro photography and video rigs. And while the latter were typically used by professionals and content creators (or people hopeful to join those ranks), plenty of others were people who just really liked cars, and who wanted to take cool photos of them to share with their fellow enthusiasts.

I asked one person walking around with a camera what they were taking photos for, and they said it was basically for their personal enjoyment adding with a laugh that they also post to their 200 followers on Instagram. That’s righteous; as someone who’s successfully turned their hobby into a job, I wish I could occasionally just shoot photos for the love of the game like they were.

A drift car sliding down a track with smoke pouring out from its back tire.
At Formula Drift, shutter drag was the name of the game. But I’ll admit, as an elder Gen Z I might not have thought to try it myself had I not seen all the drift-first photographers doing it.
Canon EOS R1 | RF 70-200mm F2.8 L IS USM Z | 200mm | F18 | 1/40 sec | ISO 100
Mitchell Clark

Even photographing the Formula Drift event itself, the trend held. Several of the people I talked to in the official media pit had started with a love of drift racing, which eventually turned into using photography or video to tell the story of it. Folks there were just as excited about who was winning as they were about the amazing shots they got. That kind of passion is infectious, and they had a lot to teach me. When you start doing photography within a niche, you have a much deeper understanding of what that subculture values, and can push at the edges in a way that a generalist photographer won’t know to.

Not everyone who gets into photography tangentially will think of themselves as a photographer

I suspect there’s actually a pretty strong tie between camera and car culture, and I know that many hobbies have this effect. People will get into something entirely unrelated, want to share it, and discover that the mediums of photo and video are great ways to do it. There’s a storied history of actors, athletes and musicians (yes, including Taylor Swift) picking up photography, and my coworker Abby Ferguson has talked to several photographers with a similar journey in her Behind the Photo series. In it, she showcases people creating amazing work, some of whom started out as VFX artistscellists or divers. Not everyone who gets into photography tangentially will think of themselves as a photographer, but if they’re out there taking pictures, what else should we call them?

Photo of a car drifting around a corner, visible between several people in lime green reflective vests.
The photo pits at the race were filled with image-makers of all stripes. Professional photographers and videographers, drift experts capturing the race, and fans of the sport who had purchased the Photo Experience (and who later shared their very impressive photos in the official media Discord channel). People were using everything from top-end pro cameras, to enthusiast APS-C models; I even saw one person with a Rolleiflex.
Canon EOS R1 | RF 70-200mm F2.8 L IS USM Z | 95mm | F2.8 | 1/400 sec | ISO 8000
Mitchell Clark

I’ll admit that sometimes it’s easy to get a bit high-and-mighty about photography as an artform, as someone who started doing it for its own sake. This person bought an EOS R5C to take photos? Don’t they know there are so many better options? Those Gen Alpha kids are getting into compacts? Don’t they know about all the downsides, and are they even learning the fundamentals?

Whenever I catch myself thinking things like that, I try to take a step back because that attitude is deeply unhelpful. I should be glad whenever anyone picks up a camera and tries to learn it, and realize that shaming people for not knowing everything – even if they’ve been doing it for decades – is going to hurt the medium, not help it.

So snap on. Whether you’re the most dyed-in-the-wool, capital P Photographer, or whether you just picked up a camera to try and show your friends your latest skateboard trick, finished knitting project, favorite car, or anything else. We’re all doing the same thing here: trying to capture the world as we see it, and share that vision with others.

About the Author: Mitchell started taking pictures at 10 and hasn’t stopped since. It’s been a wide-ranging adventure, spanning a wide variety of genres and locales, and occasionally dipping into fascinations with video and filmmaking. They honed their technical knowledge doing documentation, programing and QA, writing for The Verge, and just generally messing around on the computer to see what breaks.

Want to stay up to date on the latest product news and releases? Add DPReview as a preferred source to ensure our independent journalism makes it to the top of your Google search results.

add as a preferred source on google

WhatCable, a free Mac app, diagnoses your USB-C cable mess (and catches counterfeits)

Plug in any cable and see its real speed, wattage, and certification status in seconds – including whether it’s been mislabeled.

Four USB-C cables with silver connectors are arranged side by side next to a slim laptop keyboard on a light blue surface, positioned near the laptop's ports.

When you use DPReview links to buy products, the site may earn a commission.

We live in the USB era. Almost everything that connects to our computer these days goes through an interface so ubiquitous that the word “universal” appears in its name – the Universal Serial Bus. USB has been a godsend in many ways, replacing all manner of connectors encountered in earlier technologies.

Simple, right? Well, not so much.

The problem with USB-C

Standards are great. Except when they’re not. USB-C, introduced in 2014, is the closest thing we have to “one plug to rule them all.” The problem is that despite supporting a wide range of standards, all USB-C cables look pretty much the same. A cable that supports the latest and greatest technology can look identical to a dumb charging cable. 

And, as if things weren’t complicated enough, ThunderBolt has used the same-shaped connector since ThunderBolt 3, despite being vastly more capable than standard USB.

Which is why I recently found myself staring into the abyss – in this case, a drawer in my office – trying to figure out which of the dozen or so USB-C cables in front of me was the right one to use with an SSD. I doubt I’m alone in this, and I suspect most photographers or content creators have a similar drawer or box full of cables. That’s the exact problem a Mac app called WhatCable is built to solve.

SanDisk portable external SSD with a textured dark surface and rounded edges, connected to a USB-C cable, resting on a dark background.
Most USB-C cables don’t include any visible information about what specs they support, so it’s worth giving credit where it’s due: This Sandisk SSD arrived in our office with a cable that clearly labels its specs (40Gpbs, 240W).
Mitchell Clark

Hoping for the best, I grabbed a cable that looked new, plugged it in, and got on with finding the photos I needed. It seemed to work, so I didn’t stop to check whether I was actually getting the fastest speed the SSD could support. 

Sound familiar?

WhatCable to the rescue

I tried WhatCable on my MacBook Pro and was immediately hooked. While it’s not specifically designed for photographers or content creators, it solves a very real problem for anyone who manages lots of SSDs and card readers: ensuring the cables you use deliver maximum performance. Because if they don’t, you’re going to spend a lot more time waiting around while files transfer.

I tried WhatCable on my MacBook Pro and was immediately hooked.

When you plug a USB device into your Mac, WhatCable will tell you everything you need to know about the cable: the generation of USB the cable supports, the speed the connected device is running at, its power delivery capabilities, and, if available, details like the manufacturer and whether it has an e-marker chip (more on that in a bit).

To my surprise, the cable I’d grabbed for my SSD not only supported its native USB 3.2 Gen 2 (10 Gbps) speed, but was actually a USB4 cable capable of up to 40 Gbps. I’d ordered some of these faster cables, thinking they’d be future-proof for a while, but since there’s no visual way to tell them apart from my older ones, I’d had no idea which was which.

Computer window showing USB 3.2 Gen 2 port details at 10 Gbps speed with an attached Extreme Pro 55AF device; cable properties and connection status are included in the information.
WhatCable reports a cable’s USB generation, connection speed, power delivery capability and manufacturer details when you plug it in.

Analyzing the cable connecting my MacBook Pro to my Dell display is even more revealing, and gives a sense of how much detail WhatCable can report, including specifics about the built-in USB hub. You can see the details in the screenshot below.

Screenshot of the WhatCable app interface displaying a USB-C charger with video functionality, showing 90W power output, video support indicators, USB 3.2 Gen 2 compatibility, multiple USB speeds, diagnostic messages, and detailed cable specifications.
The report for the cable that connects my MacBook Pro to my monitor is particularly detailed, including info about its built-in USB hub.

Elsewhere, the results ran the other way. When I plugged in a Samsung T7 SSD with yet another USB-C cable – short, and similar to the ones that ship in the box with many portable drives – WhatCable informed me that it could only manage USB 2.0 speeds. My guess is that it’s actually a charging cable that came with some other device.

Computer screen showing the WhatCable window with a notification about a slow USB connection or charge-only cable, highlighting that only USB 2.0 (480 Mbps) is active, and listing a connected Samsung PSSD T7 Shield external drive.
WhatCable revealed that a cable I attached to an SSD was only rated as USB 2.0, despite looking just like the short cables that ship with many SSDs. It was probably a charging cable that came with another device.

WhatCable also includes widgets for the macOS desktop, letting you see at a glance what speed all your connected devices are running at; clicking one takes you straight to that device’s report in the app. You can also park WhatCable in the menu bar for one-click access to all your USB info.

A system window displays connected devices: a display with 10G speed, 90W power, and 8 layers, plus two USB devices (one at 10G and one at 5G), each showing one connection.
The app includes a variety of MacOS desktop widgets that allow you to monitor USB info in real-time.

Suspicious cables

USB cables include an e-marker, a microchip embedded in the connector that acts as a kind of ID card and safety controller. It reports information such as how much power the cable can deliver, its data transfer rates, and its video capabilities, which helps your computer negotiate speed and power at levels that are safe for the connected device.

WhatCable checks whether a cable’s e-marker claims are consistent with USB-IF certification data and flags cables whose reported specs look implausible. The company’s product page describes this trust-checking feature in detail, noting that it can help surface mislabeled or counterfeit cables – a real concern when buying inexpensive cables online.

Four USB-C cables—three black and one white—lined up parallel to each other on a light blue background.
Has one of your cables gone rogue? WhatCable flags cables whose reported specs look implausible, which can help surface mislabeled or counterfeit cables.

System requirements and download

WhatCable requires a Mac with Apple Silicon (M1 or later) and running MacOS Sonoma or later. The free version is open source under the MIT license, promises no ads or tracking, and doesn’t report any analytics or telemetry back to the developer. It’s also available in 19 languages, making it broadly accessible. It can be downloaded directly from the developer.

For real nerds, there’s WhatCable Pro, which adds features like the ability to name individual cables and track their performance history, live power metering, display diagnostics, Thunderbolt link analysis, and more. It’s a one-time purchase of £9.99 (about $14) and covers up to two Macs.

So next time you find yourself staring into that abyss, not knowing which cable to grab, you know what to do. One warning: WhatCable is addictive. I found myself testing every USB-C cable in the house, and most of the DPReview staff succumbed to the same temptation after I shared it in our Slack channel. You’ve been warned.

About the Author: Dale Baskin is a professional photographer, writer, and filmmaker based in the Pacific Northwest. He is the Managing Editor of DPReview.com.

Want to stay up to date on the latest product news and releases? Add DPReview as a preferred source to ensure our independent journalism makes it to the top of your Google search results.
add as a preferred source on google

❌