Vue normale

Reçu aujourd’hui — 14 juillet 2025Photo

Fujifilm X half review: frivolous fun with definite drawbacks

When you use DPReview links to buy products, the site may earn a commission.
Fujifilm X 3 quarter view
Sample gallery
This widget is not optimized for RSS feed readers. Please open this article's permalink in a browser to view this content.

All product photos: Richard Butler

The Fujifilm X half is a JPEG-only compact camera with a fixed focal length and a vertically orientated sensor, designed to mimic the experience of shooting with a half-frame film camera. It prioritizes fun over technical excellence.

Key features

  • Vertical 18MP, 8.8 x 11.7mm CMOS sensor
  • 32mm equiv F2.8 lens
  • JPEG-only output
  • 2-in-1 mode combining sequential shots into a 3:2 image
  • Tunnel-style optical viewfinder
  • Film Camera mode simulates the film camera experience
  • 10 Film Simulations, 18 Filters
  • Twin touchscreen interface
  • Date stamp option
  • 880 shot per charge rating when using OVF
  • 'Film advance' lever
  • Direct printing to Instax printers
  • UHS-I SD card slot

The obvious reference point will, no doubt, be Fujifilm's own X100 series cameras, and we doubt Fujifilm will dislike the comparison, given their popularity. But, whereas the X100 cameras look a lot like miniature Leicas, the cute, boxy X half looks more like a Rollei 35.

The X half has a recommended price of $849 and is available in black, charcoal or silver. There's no obvious precedent for a camera like this and the uncertainty around the cost of importing items from China into the US makes it a little hard to make sense of, but it seems like a lot for a camera that's putting more effort into being fun than functional.


Index:

  • May 22: Initial review published
  • Jul 14: Film camera mode section amended, image quality, smartphone section and conclusion added. Sample gallery expanded.

What is it?

Fujifilm X half front

The Fujifilm X half is a fixed-lens camera built around an 8.8 x 11.3mm sensor. Those dimensions may not sound familiar but it's essentially a 4:3 crop from a 20MP 3:2 Type 1 sensor, turned on its side.

So, when Fujifilm talks in terms of half frame, it's talking about the 3:4 shooting experience you get from shooting half a frame of 135 film, not about mimicking the same capture area that would give.

It has a 10.8mm F2.8 prime lens, and that sensor's 2.94x crop factor means this gives a 32mm equivalent field of view and an F8.2-equiv maximum aperture.

DSCF0162

Flicking the film advance lever just after you've taken a shot (or when you're reviewing an image in playback mode) lets you combine that shot with the next one you take.

Left image: Provia film sim | F2.8 | 1/800 sec | ISO 200
Right image: Provia film sim | F2.8 | 1/1600 sec | ISO 200
Photos: Richard Butler

You can shoot individual 3:4 vertical images, swiping on the Film Simulation window on the back of the camera to change your virtual film stock. Alternatively, if you flick the film advance lever after taking a shot, you can combine your previous and next images to create a side-by-side diptych. Both individual images are saved to the memory card, in addition to the combined version.

Film Camera mode

Fujifilm X half film select

The X half is best understood through its Film Camera mode. Engage the mode and you'll be asked how many exposures you want on your virtual film: 36, 54 or 72. If those second two numbers look unfamiliar, remember that this is styling itself as a half-frame camera, so you can fit 72 shots on a '36 exposure' film.

"Once you start shooting, you'll have to use the film advance lever after each shot: the camera won't take another photo until you do"

When in film camera mode, you lose the live view on the back of the camera and have to compose via the optical viewfinder. You also lose the ability to swipe to change Film Simulation or filter: you're using a single roll of 'film,' after all.

And, once you start shooting, you'll have to remember to use the film advance lever after each shot: the camera won't take another photo until you do. Annoyingly there's a distinct lag after each shot before the film advance lever becomes active, so there's no point trying to develop a fast winding shooting style: the camera will ignore your input then wait for you to wind the roll on again.

Film Sim mode
The film camera mode interface is simplified, with a four-step zone focus option, if you select manual focus. Sadly the film advance lever, while feeling pretty solid, doesn't give any sense of mechancal feedback and it won't recognize your input if you try to 'wind-on' too soon after each shot.

Once you've taken all your photos, you can connect your camera to the app and transfer the photos, at which point you get to see a contact sheet and watch the images 'develop.' That contact sheet image, complete with sprocket holes, frame numbering (with the images numbered as 01, 01A, 02, 02A and so forth), can also be downloaded.

If you lose interest in a project before the end of the roll, you can double-tap the film window screen and the camera will 'rewind' the roll, leaving you with a partially-complete film strip. Fujifilm also warns that removing the memory card or the battery can result in film camera mode being abandoned.

we found the Film Camera mode to be fun, but the entertainment value waned quickly

In use we found the Film Camera mode to be fun, but the entertainment value waned quickly. 36 shots is a lot to combine as a single, cohesive project but if we were shooting over an extended period, the way you might have with real film, the temptation to swap filmstocks or regain live view so that we would tell what we were focusing on meant we abandoned most 'films,' mid-roll.

Filters and Film Simulations

One of the X half's main selling points is likely to be Fujifilm's film simulation modes, and the camera includes ten of the most popular ones.

  • Provia / Standard
  • Velvia / Vivid
  • Astia / Soft
  • Classic Chrome
  • Reala ACE
  • Classic Neg.
  • Nostalgic Neg.
  • Eterna / Cinema
  • Acros (with Red, Yellow or Green filter)
  • Sepia

The X half also has a range of Filter modes, including Toy Camera, Vignetting, Light Leak, Halation and Expired Film. These give more extreme looks than the film simulations, but include some fun options such as giving the expired film mode a green or red tint, or the light leak mode that applies a one of a selection red/yellow bursts across each image at random, which are only visible in the final image. Filters can't be combined with Film Simulation modes.

ISO and Autofocus

The camera's base ISO is 200 and there are three pre-defined Auto ISO settings, you choice is essentially whether the camera stops at ISO 800, 3200 or 12,800. All three settings try to maintain a shutter speed of at least 1/125 sec, good for movinging subjects but much quicker than needed for static or slow-moving ones, meaning you end up with lower image quality that you could get, in those situations.

In terms of autofocus, you have a choice of two AF area modes: a large central point or an AF area that can be moved to one of nine positions. There are eye and face detection options on top of this, and the camera will prioritize faces in your scene, regardless of the AF position.

Autofocus is somewhat laggy and distinctly slow, though, so we found the camera to be much more dependable in AF-S mode. This is not a camera for action or moving subjects, really.

Video

The X half can shoot up to 1080/24 footage at up to 50Mbps, captured in a 3:2, 1080 x 1440 format. It can also shoot 2x slowmo footage. These video clips can be combined with still images in 2-in-1 diptychs, output as 2160 x 1440px MOV files. There's a 3.5mm-to-USB-C lead in the box, but this is for attaching headphones (?!?) rather than an external mic, as is the case on other Fujifilm models.


Body and handling

Fujifilm X half and lens cap

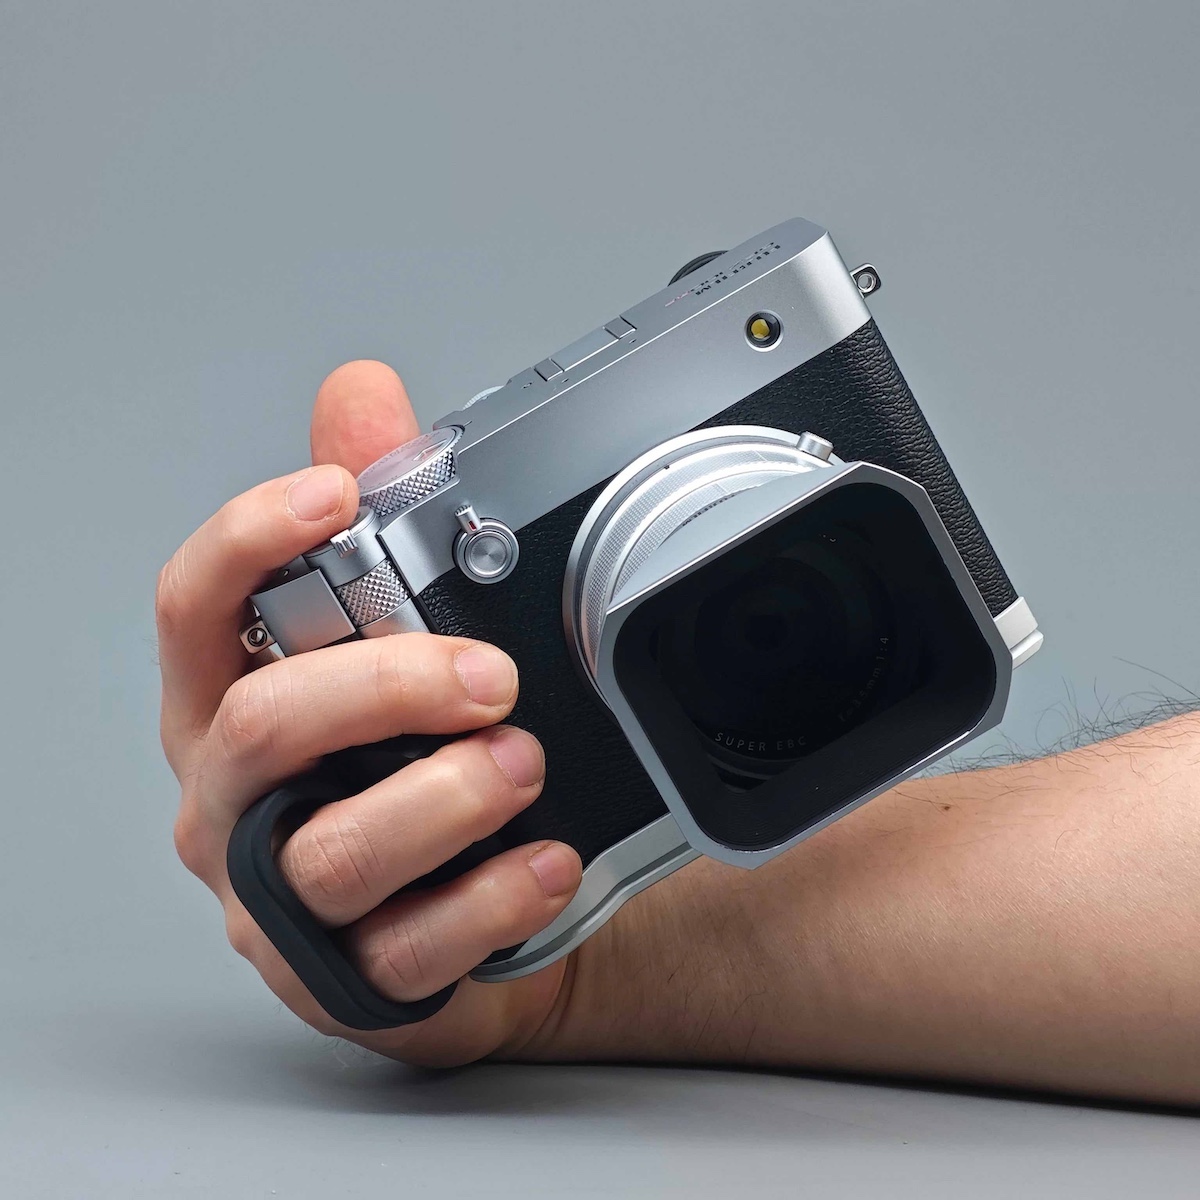
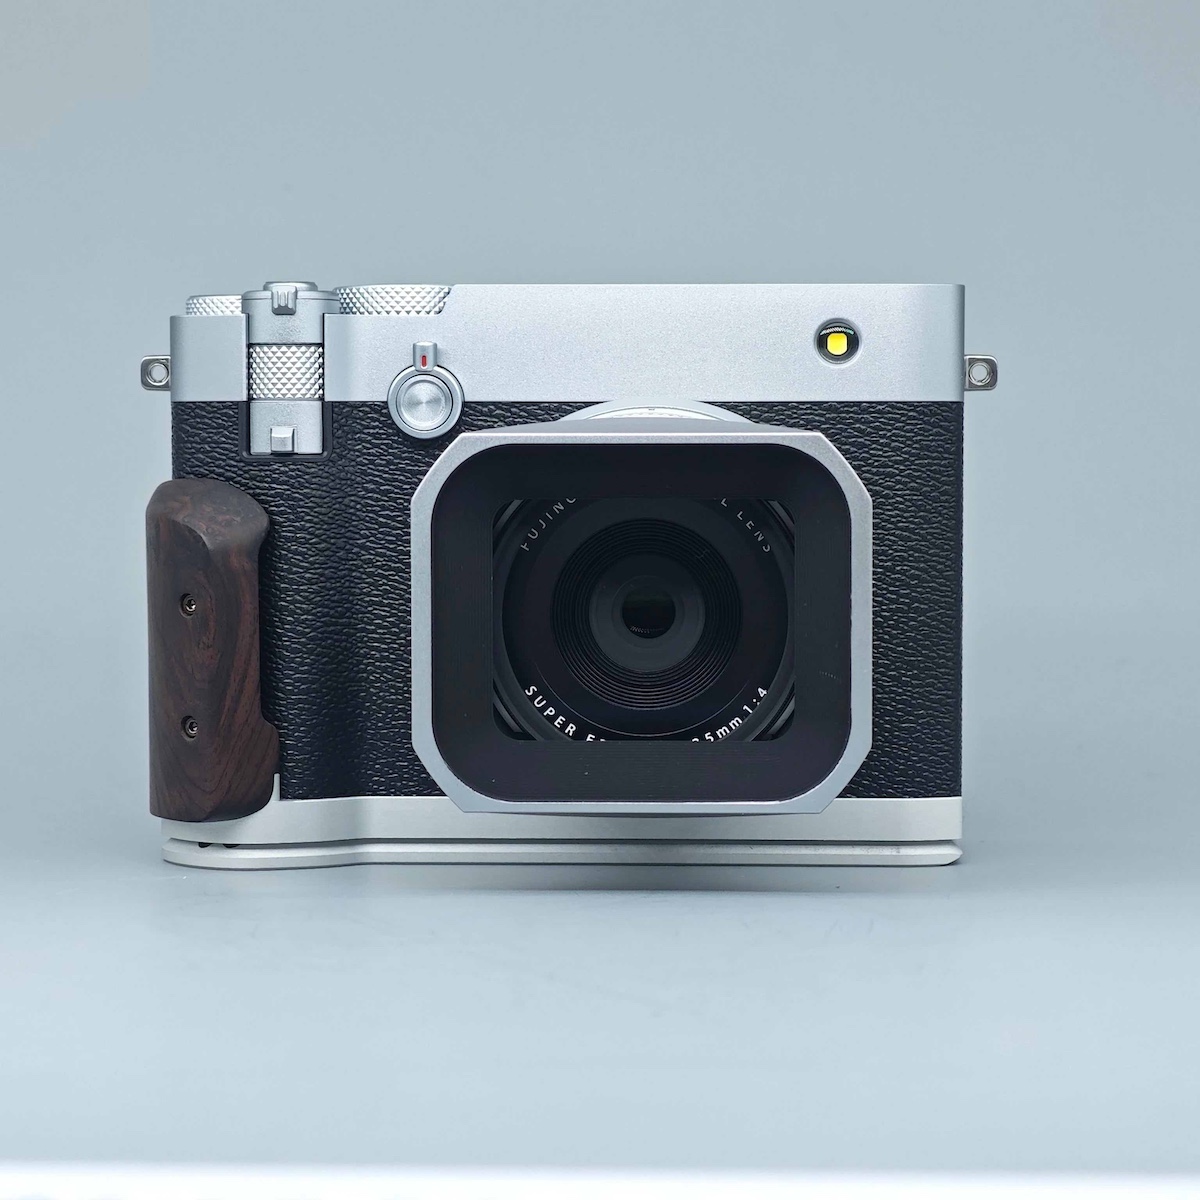
The X half is small, boxy and really rather cute: both its size and looks attract attention. It's also pretty well built. It feels like a lot of it is plastic but it's thick enough that the camera doesn't feel flimsy. It's small enough to fit in a coat pocket, despite the protruding lens.

The lens has an aperture ring around it, controllable in whole stops and with an 'A' position at one end, passing control back to the camera body. There is no other control dial on the camera, so there's no way to gain 1/3EV control of the aperture.

The camera's shutter tops out at 1/2000 sec, so in bright light you'll need to remember to stop down; especially if you're using the viewfinder, where there's nothing to indicate that your shots will be overexposed.

There's a narrow ring around the front of the lens that can be used for manual focus. The ring moves quite freely and the stepping of focus distances isn't very fine-grained, but it's there if you want it.

The lens is covered with a soft plastic lens cap. It's not the prettiest or most convenient feature, but ends up highlighting a benefit to the lens design: it doesn't change length. As such you never have to worry about stripping the gears or damaging a motor if you turn the camera on in your pocket or with the cap still attached.

Fujifilm X half top view

The top of the camera is decidedly simple: a large exposure comp dial, that photo advance lever and an power switch, which releases the level from its stowed position. There's also a cold shoe slot in the middle of the camera. We're not really sure why.

The whimsy continues on the back, with a film-window-style rounded LCD panel that displays the currently active Film Simulation mode or Filter effect. It's a touchscreen, so you can swipe up or down to change mode (unless you're in Film Camera mode).

Next to this is the main display, a small, portrait-orientation 2.4" 640 x 480px touchscreen. In regular shooting mode this shows a live view display, just as you'd expect. Swiping your finger across the screen brings up one of four menus.

Swipe right

Fujifilm X half swipe down

Swipe down

Swipe right

Swipe up

Swipe left

Swiping down gives you the choice between connecting to a smartphone and entering Film Camera mode.

Swiping right lets you select whether you're in Film Simulation or Filter mode. There are icons at the bottom of the screen to let you determine which of these modes applies to stills or video shooting. You don't select which of the simulations of filters you're using, just which mode the camera is in.

Swiping up brings up a quick menu, detailing eight of the camera's core settings:

  • Exposure mode (P, S, A, M)
  • Image size (L, M, S)
  • Face/Eye detection setting
  • Portrait enhancer
  • Focus mode (MF, AF-C, AF-S)
  • Self-timer (2s, 10s, Off, Continue)
  • Grain (Roughness / Size)
  • White balance

Finally, swiping left brings up the camera's main menu. It's a much-simplified variant of the one from other Fujifilm cameras, divided up into seven catagories: Shooting settings, Movie settings, IQ settings, AF/MF settings, Audio settings, Set up and Networking/USB settings. These catagories are navigated by swiping up and down on the film window, next to the main LCD.

The film advance lever

Fujifilm X film advance lever

One of the only physical controls on the whole camera is the film advance lever. In normal camera mode its job is to engage 2-in-1 diptych mode, in Film Camera mode it acts as the film advance lever it mimics. Push the lever in towards the body in normal shooting mode and the camera will show you the last image you took, while the lever is held in. Again, we're not entirely sure why.

Battery

Fujifilm X NP-W126S battery

The X half takes the same NP-W126S battery as Fujifilm's other small cameras. It's a relatively large battery for such a small camera, making up something like 1/7th of the camera's volume. This helps power the camera to a rating of 880 shots per charge, if you use the OVF. We've not seen a figure for shooting with live view.

This is enough that you'll essentially never have to worry about charging the battery. The camera can charge over its USB-C socket, so all you need to do is remember to plug it in from time-to-time.


Image quality

This isn't the most sensible way to assess the X half's image quality, but we wanted to check how it compares to other cameras on the market. Our test scene is designed to simulate a variety of textures, colors and detail types you'll encounter in the real world. It also has two illumination modes to see the effect of different lighting conditions.

Image Comparison
This widget is not optimized for RSS feed readers. Click here to open it in a new browser window / tab.

Ultimately, the X half isn't a camera where we think absolute image quality it critical to its appeal (most of its fun/retro rivals have much, much smaller sensors and consequently much noisier images with lower image quality). But it doesn't do terribly, in this regard, compared to enthusiast compacts. It doesn't pull as much detail out of its files as the likes of the Sony RX100 V. The Sony uses the full 116mm² of it Type 1 sensor, rather than the 103mm² crop used by the Fujifilm, but a 12% diffence isn't especially significant, as can been seen by looking at the high ISO images.

We'd suggest thinking about how and where you're likely to use the X half's images, then upload or output them via that medium and see how they look, rather than worrying about the nth degree of pixel-level performance. Or look at the sample gallery and ask yourself "could I have fun with that?"


Smartphone app and connectivity

One of the great paradoxes of modern compacts is that they exist as an alternative to smartphone cameras, yet need to be able to connect to them easily, and be used in conjunction with them.

The X half achieves this with its own, dedicated app. At its core, it seems to essentially be a version of the company's X app but with a simpler pairing system because there's only one model it has to know how to connect to. This means there's no ambiguity about how to pair the devices and little risk that updated to support future models will break its existing function.

X half app screengrab-001
The dedicated X half app lets you download images from the camera, 'process' the results of Film Camera mode or combine 2-in-1 diptychs. Click to see the full image.

Once connected, the X half app maintains a constant Bluetooth connection and is able to fire up Wi-Fi when you need to transfer images. The app itself lets you combine images into diptychs, just as the camera does, with a choice of the width, style and color of the divider between images. Unlike the camera you can also flip each image horiztonally, if that improves the composition. You can then select which images to share beyond the app, with the option to crop a central square from the each picture. It's all very straightforward.

The other function the app performs is 'processing' the output of the camera's Film Camera mode. You can't view any of the images taken in Film Camera mode until you've transfered them to the smartphone and waited for them to 'develop.' The images are then copied to your phone and seemingly deleted from the camera (though you can re-import and process the film if you wish: the images are still on your SD card, just placed in a different folder.

Finally, there's the option to connect directly to one of Fujifilm's Instax printers, which feels like one of the core ways they expect the X half to be used.


Conclusion

What we like What we don't
  • Stylish, fun camera
  • Better image quality than most point-and-shoots
  • Film simulations and filter modes make the pictures look interesting but still attractive
  • Film sim 'window' touchscreen is [chef's kiss]
  • Exposure comp dial gives direct access to the most important setting
  • Optical viewfinder for shooting outdoors
  • Good battery life
  • X half app is simple and works well
  • Expensive
  • Touchscreens are a bit laggy
  • AF is a bit slow and unreliable for people pictures or shooting in low light
  • Film advance lever doesn't have any mechanical resistance
  • Delay between taking a shot and the film advance lever being usable
  • Viewfinder and rear screen give only a rough idea of what you're going to capture
  • Auto ISO uses very high min shutter speed, reducing IQ when you don't need 1/125 sec shutter
  • LED 'flash' has minimal effect

The more we use the X half, the more it confirms our initial impression: it's profoundly silly, and also a lot of fun. But absolutely inherent to its appeal is that it doesn't take itself seriously, so you shouldn't, either: doing so both misses the point and the appeal.

If you think the idea of swiping a 'film window' to select which retro filmstock the camera mimics is cute, then you're likely to be delighted by the way it takes cool-looking snaps whenever the whim takes you. If you are frustrated about its lack of Raw-shooting capability or fretting over how its images might look in a large print, you'd be better off with almost any other camera from Fujifilm's lineup.

Fujifilm X half rear Provia
If you look at the film window touchscreen on the back of the camera and think 'that's adorable' then the X half might be for you. If you're weighing it up against enthusiast compacts, you're barking up the wrong tree. Possibly in the wrong forest.

The X half is good-looking and handily small, making it a ready companion. It takes attractive images and has a well-judged touchscreen interface with mercifully few options to interact with. Most of the time, you'll need to set only exposure compensation and film simulation.

The Film Camera mode feels exactly like the design study that it started as: an amusing diversion that it's hard to imagine wanting to use too often, once the initial interest has waned. But if it helps inspire a photo project or two, then why not? After that, the faux film winder becomes a quick way to interact with the camera's diptych feature, which felt like something with more staying power, to us.

In purely objective terms, the X half isn't an especially good camera. The images are much better than most run-of-the-mill compact cameras, due to it having a much larger sensor, and its color rendering options are excellent, but it's not going to win any prizes if you start pixel peeping. It's also a fairly slow camera, with some touchscreen swipes being ignored and the laggy, simplistic and somewhat unreliable AF system undermining its appeal as a social camera.

Fujifilm X half in coat pocket
It's good looking and easy to carry around with you.

The cost is also a concern. That larger sensor means it has to be more expensive than most of its 'just a bit of fun' peers, but the asking price, particularly the preemptively tariff-adjusted US one, is steep.

As a knowingly frivolous, endlessly entertaining carry-everywhere lifestyle accessory, the X half is great. And it's better than most second-hand point-and-shoots from yesteryear, in just about every respect: easier to use, more fun, better color. But the price tag requires quite a lot of commitment to the bit.

The things that makes the X half so endearing aren't the sorts of things measured by our scoring system, and trying to view it through that lens would be to take the camera (and ourselves) too seriously. Our awards, which are based on looking at the product from the perspective of the would-be buyer, still feel apt. Unfortunately, much as we enjoyed it, lack of dependability of face and eye detection detracts a little too much to let us award the camera a Silver.

Sample gallery

Please do not reproduce any of these images on a website or any newsletter/magazine without prior permission (see our copyright page). We make the originals available for private users to download to their own machines for personal examination or printing (in conjunction with this review); we do so in good faith, so please don't abuse it.

Sample gallery
This widget is not optimized for RSS feed readers. Click here to open it in a new browser window / tab.

Fujifilm X-E5 studio scene: a premium body with familiar internals

When you use DPReview links to buy products, the site may earn a commission.
Fujifilm X-E5 Sensor
Photo: Mitchell Clark

On the surface, Fujifilm's recently announced X-E5 looks like a very familiar setup in a new body. Its combination of 40MP BSI CMOS sensor and processor has shown up in several previous Fujifilm cameras, such as the X-T5, X-T50, X-H2 and X100VI. Theoretically, that means it should provide very similar results, but since we like to be thorough, we put a production copy in front of our test scene so we could make sure.

Our test scene is designed to simulate a variety of textures, colors, and detail types you'll encounter in the real world. It also has two illumination modes, full even light and low directional light, to see the effect of different lighting conditions.

Image Comparison
This widget is not optimized for RSS feed readers. Click here to open it in a new browser window / tab.

As expected, the X-E5's Raw detail capture is identical to Fujifilm's other 40MP cameras, and it outperforms the 24MP Nikon Z5II and 26MP Sony a6700. Its images also have more detail than those from its 26MP predecessor, the X-E4.

Its base ISO noise performance is on par with the rest of the current-gen APS-C competition, and it's a bit cleaner than the X-E4; no surprise, given that its base ISO is 125 while its predecessors was 160. The full-frame Z5II, however, provides around a stop improvement in noise, which follows its increased sensor area.

These trends continue at mid to high ISOs, and the X-E5's lead in detail slips away past around ISO 1600.

The camera's JPEG engine isn't quite as good as its competitors at emphasizing fine details, even at base ISOs, so its lead isn't as apparent as it is in Raw. However, it continues Fujifilm's tradition of offering pleasing colors and does a decent job of retaining details even while reducing noise at higher ISOs, though its performance does suffer a bit in low-contrast areas.

Dynamic Range

This sensor has always offered excellent dynamic range with low read noise, and it's no different in the X-E5.


Exposure Latitude | ISO Invariance


This means it offers plenty of room to bring up shadows in post, so you can make the most of its maximum dynamic range at base ISO. Its design also lets you choose to extend dynamic range when shooting in low-light scenes, as long as you're willing to use a lower ISO to reduce blown highlights.


As expected, the X-E5 doesn't offer anything new in terms of image quality, though that's not necessarily a bad thing. Fujifilm's current generation of cameras have long been strong contenders in that department, and if you're trying to decide between them you only have to consider form factor and feature sets. If you don't prefer the rangefinder-styling, you're not giving up image quality by going with an X-T50 or X-T5 instead.

Reçu hier — 13 juillet 2025Photo

What genres do DPReview staff like to photograph?

five photographs in a grid

One of the great things about photography is how diverse the medium is. There are countless subjects and genres to focus on, offering opportunities for everyone to create images with their unique perspective. That's no different here at DPReview. Our photographic experiences and styles vary greatly, with each of using finding photography in different ways. We've previously shared what gear we take when traveling, but today, we're giving you a look into the genres and subjects that drive each of us.

Mitchell Clark

DSC08132

Someone didn't read the sign.

Photo: Mitchell Clark

I'm not entirely sure what to call my favorite genre of photography, but I always love capturing things that are out of place or in some other way ironic. Think a "no graffiti" sign in front of a thoroughly tagged wall, a drinking cup precariously perched on a piece of architecture or a machine that's obviously malfunctioned.* Essentially, it's anything that makes you tilt your head and go "huh!"

DSCF4752

Graffiti and a piece of electrical equipment? My lucky day.

Photo: Mitchell Clark

A close second: infrastructure. High-tension power lines are one of my favorite subjects for reasons unknowable even to myself, but I'm also fond of capturing pipes, wires, pumps, junction boxes and the million other often-overlooked pieces of equipment that help our world run the way it does.

* Of particular interest: public displays or checkout stands whose computers have obviously crashed.

Richard Butler

a woman wearing a large white scarf smiles lightly on a sidewalk in a city

My first 'ask someone if I can take their photo' portrait.

Photo: Richard Butler

The need to constantly shoot images for galleries means it's difficult to find the time to develop any sort of specialism. I never know what sort of camera or lens I'll be using next, so it's hard to focus on one particular style, genre or technique. However, I have developed a real enthusiasm for everyday portraits. It started with a camera launch in New York, during which I had a couple of hours to shoot as varied a gallery as possible. Eventually, I plucked up the courage to ask a stranger if they'd mind me taking their photo and, amazingly, they said yes.

a man with a gray winter hat gazes into the distance on a sidewalk in a city
Photo: Richard Butler

I still have an awful lot to learn and am always looking for an opportunity to practice, but I love the fact that a lot of portraiture has nothing at all to do with gear or technical knowledge: it's about your interaction with the subject. I was first drawn to photography because it combined the technical, which I can just learn with the aesthetic, where there's always room to improve. Ad hoc portraiture is a great example of that, and there's nothing more satisfying than a subject you don't know emailing you back to say that they like the shot you took.

Matt Waller

a streak of sun illuminates a building corner and person walking on the street
Photo: Matt Waller

My love of photography started late in life, meaning I'm still in the phase of bouncing around and trying different genres. But the main driver for me has been black-and-white street photography. Certainly, this has taken my wandering feet to far-flung cities and even a couple of workshops (which incidentally I recommend as a great way to explore a city and meet like-minded souls).

At home in Seattle, my work for DPReview is part-time, and my second job, in a downtown skyscraper office, led me to find a weird street photography outlet of taking telephoto shots downward of roofs, streets and alleys. Is this a sub-genre? Do any other frustrated office-bound photographers do this?

a Heron flies across a blue Sky
Photo: Matt Waller

Speaking of my telephoto lens, I've put it to more traditional use by dabbling in bird photography. I find this a great way to get out into nature and a fun (and very challenging) form of photography.

Finally, in the last few years, I've started doing some corporate event photography. Though this obviously has "third job" potential, I think I want to keep my photography on the amateur side – so I can keep bouncing around and trying different genres!

Dale Baskin

The northern lights illuminate the sky in the sub-arctic

The aurora borealis reflects off a lake in Canada's Northwest Territories.

Photo: Dale Baskin

As a photographer, I've captured nearly everything under the sun, but my favorite subject reveals itself at night: the aurora borealis. I've been photographing the aurora from northern latitudes for over a decade, and I never tire of seeing Mother Nature's own fireworks. The sheer variety of shapes, patterns and colors never ceases to amaze me. There's only one thing I love more than shooting the aurora: taking other photographers on the adventure and teaching them how to shoot it, too.

While the northern lights are a passion of mine, I've recently been drawn to photographing something entirely different: rodeo. I'll let you in on a little secret – getting good photos of riders in a rodeo arena isn't that hard. With a fast telephoto lens, a camera with a fast burst rate and a clear sightline, you're bound to get some keepers.

A rodeo rider struggles to stay on a bucking bronco

A cowboy tries to mount a restless bronco at a small town rodeo in western Montana.

Photo: Dale Baskin

However, I quickly discovered that the real story of rodeo isn't in the center of the arena, but in places that spectators don't usually get to see. So instead, I started using a wide-angle lens, working behind the scenes to capture the soul of the rodeo, like riders prepping for their events, rodeo clowns applying makeup or cowboys just hanging out and trading stories.

However, my favorite place to shoot is right up against the chutes, the small pens where riders saddle up for their eight seconds of insanity. Working just inches from a snorting bull or a kicking bronco, you feel a sense of raw power, and the explosion of energy as a rider bursts out of the gate can almost knock you off your feet. It's the most intense, adrenaline-pumping photography I've ever done. And I'm absolutely hooked.

Abby Ferguson

a blur of overlapped glass objects sit on a black table

My graduate thesis involved multiple exposure images of staged still life scenes. These were then printed on transparency film and either mounted to plexiglass or suspended from the ceiling on red string.

Photo: Abby Ferguson

If you had asked me this question a few years ago, I would have been able to answer easily. Yes, like most photographers, I've shot a wide range of genres. However, for a very long time, I focused my personal work on conceptual still life imagery, either found or staged. My graduate thesis was entirely still life related, and that subject, along with light and shadow, remained important to me for a long time.

Lately, though, I've been going through a bit of a crisis with my photography, and identifying a clear genre is more difficult. I haven't been photographing many formal still life scenes, partly due to space constraints, partly due to motivation. My conceptual work has also largely fallen by the wayside (though I've had the itch to pick it back up). Instead, my photography has been a lot less focused on one specific area as of late.

a shadow of a staircase is projected onto a building
Photo: Abby Ferguson

Light and shadow remain favorite subjects though. I love capturing unique natural light on small, often overlooked details no matter the genre. If those details are broken things, like shattered glass or a rundown building, even better. So while I don't necessarily find myself gravitating towards a clear, well-defined genre these days, I do still see a consistent thread throughout much of my work.

The DJI Osmo 360 camera is rumored to be announced on July 29

13 juillet 2025 à 02:50

Here are some newly leaked pictures and detailed specifications of the upcoming DJI Osmo 360 camera that is expected to be officially announced on July 29 (previous coverage  can be found here):

  • Revolutionary 8K 360° Camera
  • 1-Inch 360° Imaging
  • Stunning Low-Light Performance
  • Camera type: 360 Camera
  • Definition: 8K (UHD)
  • Sensor: CMOS (1 inch)
  • MegaPixels (Sensor Resolution): 120 Million pixels
  • Video resolution: 4K/120 fps
  • Camera functionality Waterproof, Photo Mode, Image Stabilizer
  • Wireless communications Wi-Fi 6.0
  • Memory card format Micro SDHD
  • Video Recording Formats: 4K, 2.7K, Full HD 1080p
  • Screen resolution: 314 x 556
  • Screen size in cm: 5.08 cm
  • 10-Bit D-Log M
  • Native 8K 360° Video
  • Direct Microphone Connection via OsmoAudio™
  • 4K/120fps Video with 170° Ultra-Wide Angle
  • Gesture and Voice Control
  • Magnetic Quick-Release Osmo Ecosystem
  • Third-Party Sports Data Integration
  • Invisible Selfie Stick
  • High Frame Rate 360° Video
  • Extended Runtime
  • HorizonSteady 360°

More leaked DJI Osmo 360 camera pictures

More DJI Osmo 360 camera leaks

DJI Osmo 360 camera mockup and size comparisons

Coming soon: new DJI Osmo 360 camera

Via dronexl

The post The DJI Osmo 360 camera is rumored to be announced on July 29 appeared first on Photo Rumors.

Four new Chinese lenses coming soon

12 juillet 2025 à 23:51


Here is the next round of upcoming Chinese lenses:

Brightin Star AF 35mm f/1.8 ASPH lens (check website for updates):


Meike AF 24mm f/1.4 lens (check website for updates):


TTartisan will soon announce a new APS-C AF lens for Sony E-mount:


7Artisans will announce a new AF 50mm f/1.8 FE lens:


ZY Optics is expected to announce a new autofocus full-frame lens in the second half of the year:


The post Four new Chinese lenses coming soon appeared first on Photo Rumors.

Reçu avant avant-hierPhoto

Do you need a dedicated camera bag?

two backpacks sit against a white fence on green turf
Photo: Abby Ferguson

Photographers are often told that they need a specialized camera bag to carry their gear. There's certainly no shortage of options these days, with a long list of brands and styles available. And while it's important to keep your expensive camera gear safe even when out and about, a dedicated camera bag isn't necessarily the only way to do that.

Can you put a camera in a backpack?

a black camera instert sits partially inside a red backpack placed on green turf

A camera insert can allow you to use any backpack as a camera bag.

Photo: Abby Ferguson

Simply put, a dedicated camera bag isn't necessary for many people and situations. They are often bulky and heavy. They typically don't work well if you need to bring a lot of things other than camera gear, making them challenging to travel with. They can also be conspicuous, raising the risk of theft. Plus, it can be hard to get the fit right, and spending a lot of money on a bag just to avoid using it because it's uncomfortable is far from ideal.

Most people already have a backpack or bag that they like carrying around, and may have occasionally even used it to carry cameras that have been carefully wrapped in a jacket or other articles of clothing. While we wouldn't recommend that too often, and would strongly advise against just tossing your camera loose inside a pack, the bag you already have could serve your camera bag needs with a simple accessory. Instead of buying a new bag that can only be used with your cameras, you could buy a much more affordable camera insert that goes inside your favorite pack.

Many companies, including Peak Design, Wandrd, Lowepro, and more, make padded inserts allowing you to safely store your camera in any bag. They are easy to move around to different bags as needed, giving you much more flexibility. Plus, you can take it out and use your backpack or bag without any camera gear. Just be sure you aren't packing the insert at the bottom of your bag with a lot of weight on top; they offer padding for protection, but aren't crushproof.

a green sling sits open on a wood table with an old camera inside

For casual outings when I'm traveling light, a small sling is plenty for my camera.

Photo: Abby Ferguson

If you only have a small compact camera, an insert is likely more than you need. As long as you carefully consider where you are packing your camera in your bag, you should be okay without a specific case. Just ensure it won't have too much weight on it and that it won't get hit when setting the bag down or moving around.

When should you use a dedicated camera bag?

a camera backpack sits open with cameras and lenses inside

For lots of gear, a dedicated camera bag or case is often a must.

Photo: Abby Ferguson

Inserts in everyday bags work well for many people, but a dedicated camera bag is a smart move for some. Wedding and event photographers who need multiple bodies and a full kit of lenses, for example, should invest in a camera bag. After all, inserts are generally smaller and not made to handle a lot of gear.

All that gear will also be heavy, and you want a pack that will allow you to distribute the weight well, saving your back over time. Camera backpacks are typically made with that weight in mind (the good ones, at least), making them more comfortable when loaded up. That is especially useful if you'll be wearing the bag for long periods, too.

If you're a professional photographer, you likely need plenty of accessories when you head to shoots as well. You need to find a home for things like extra batteries, filters, a cleaning kit, flash and, of course, snacks. Camera backpacks often have better organization options than standard packs, helping you keep all your gear organized and easy to find.

a camera is in a yellow camera insert in a blue backpack

The back panel on this bag provides faster access to my camera than a typical backpack with an insert would.

Photo: Abby Ferguson

Many dedicated camera bags have another advantage over regular bags with inserts: quick access. An insert inside a bag requires you to take the bag off your back and open two things, potentially with some digging involved. Dedicated camera bags, though, typically make it easier to access your gear fast. Some even offer side access to get your camera out without even taking the pack off. So, if you need to keep your camera tucked away but still have easy access, a dedicated camera bag is the way to go.

Consider how you'll be using the bag

Whether or not you need a dedicated camera bag depends on your gear, where you'll be using it and your preferences. For travel and casual day trips, a camera insert in a normal backpack is likely a good move. However, a dedicated, well-designed camera bag will make a significant difference in comfort and organization for those carrying a lot of equipment, especially for long periods.

Additional information on the two upcoming Sony professional video cameras

12 juillet 2025 à 00:36


Additional information on the two upcoming Sony professional video cameras I reported a few days ago:

Sony will release the Z380 in August and a new 12K sensor full-frame interchangeable lens video camera during IBC 2025 in September

Sony Z380

  • The Sony Z380 is a newly developed 3CMOS BIONZ XR XDCAM camcorder that features internal variable ND, which supports 4K120p recording in all RGB Tricolor.
  • The image quality of the Z380 is significantly higher than that of the Sony Z280, thanks to the BIONZ XR, AI unit, and new high-speed, high-saturation, and high-sensitivity Exmor RS 3CMOS.
  • Based on test information, the image quality of the PXW-Z380 is superior to that of the PXW-Z200. It has a low base ISO and a high sensitivity mode ISO, which is consistent with the FX6.
  • The Z380's autofocus performance is a vast improvement over the previous generation Z280, relieving the operator of the pressure of focusing and allowing them to shift their attention entirely to composition and following the subject.

Sony FX8

  • The New full-frame product, named FX8, will feature a resolution of 12K, which is four times that of the FX9. It uses a 16:9 cropped 12K full-frame (3:2 aspect ratio, 96M total pixels) CMOS image sensor.
  • It doesn't have internal RAW or X-OCN recording capabilities. Like the FX6, it outputs full-frame crop 3.8K 16-bit RAW to a third-party recorder via SDI at a maximum of 120fps.
  • The only recording format available is XAVC, which offers 8K30p or 4K60p recording in full-frame and S35 modes. And the full-frame crop 3.8K mode provides 4K120p recording.
  • The readout specifications are not as good as the URSA Cine 12K, as the processor limits it, but it is still a reliable and easy-to-use camcorder that offers high-speed 4K (for FX6 users) and full-frame/Super35 dual-format 8K30p/4K60p (for FX9 users) for creative freedom.

Sony is rumored to announce two new professional video cameras

The post Additional information on the two upcoming Sony professional video cameras appeared first on Photo Rumors.

How Ryo Minemizu captures the hidden wonders of the ocean at night

a larval angler fish is sourrounded by blackness

Larval smooth angler fish.

Photo: Ryo Minemizu

Underwater photography is a challenging genre to tackle. But the complexity is significantly amplified when you add subjects that are only a few millimeters large, and pitch-black nighttime conditions. Yet that's exactly what photographer and diver Ryo Minemizu is doing with his nighttime dives, also called blackwater dives. Minemizu took the time to answer some questions while on a sailboat in the Pacific Ocean, providing insight into how he captures incredibly unique creatures in the ocean.

When Minemizu started taking photographs while diving, he simply wanted to capture beautiful underwater landscapes and life forms easily visible to the naked eye. Eventually, though, he became more interested in what wasn't obvious, seeking out things that were often overlooked and fleeting moments that didn't get attention. "I was drawn not only to their beauty, but also to the strength and skill required for survival, and the deep significance of life itself," he said.

a Polka dot ribbonfish is illuminated in black water

Polka dot ribbon fish.

Photo: Ryo Minemizu

To find those fleeting moments, Minemizu has to dive in locations and times when most aren't venturing into the sea. Night dives opened up a new perspective, allowing him to capture creatures in, quite literally, new light. Minemizu also decided to focus on creatures that don't typically get attention. But that makes for tricky photographic scenarios. "Blackwater dive photography is arguably one of the most challenging and relatively new frontiers in the world of underwater macro photography," he said.

"Blackwater dive photography is arguably one of the most challenging and relatively new frontiers in the world of underwater macro photography"

The dark conditions are perhaps the most obvious challenge. Minemizu says that for blackwater dives, a rope with multiple lights attached is suspended beneath a buoy, but its main purpose is safety-related, not for photography. In fact, "lights suspended from the buoy should be as dim as possible to avoid any negative impact on the natural environment," he explains. Instead, he said that divers mainly search for subjects in complete darkness, only using handheld underwater lights as they find them.

a diver floats next to a vertical line of lights in dark water

A string of lights hangs from a buoy, but only for safety reasons.

Photo: Ryo Minemizu

When it is time to light up a subject, Minemizu relies on five lights: two Marelux Apollo III 2.0 strobes for ultra-high-speed flash photography, two RGBlue (Super Natural Color) lights with high color rendering for use as target lights and for video recording in the dark ocean, and one INON LE-250 light used to illuminate subjects that exhibit phototaxis (when an organism moves in response to light). He uses the maximum flash sync speed to freeze movement, since the tiny creatures are constantly in motion. But it's not a set it and forget it situation. "Both the exposure and flash intensity are manually adjusted on site to suit the transparency of each subject," he explains.

While light is necessary in pitch-dark conditions, it can also have negative impacts. "Each subject has its own unique characteristics and behaviors," Minemizu explained. "For example, some would close their fins and begin to swim away the moment a light is pointed at them or quickly vanish into the darkness." As a result, he has to anticipate the subject's next move, rapidly assess how it will react to light and how it might behave, and make on-the-spot decisions about lighting. "This involves choosing the right color tone, the best angle for illumination and the appropriate light intensity," he said.

The size of his subjects is another significant challenge. Minemizu is primarily focused on photographing plankton, fish larvae and other minuscule creatures that only measure a few millimeters to a few centimeters. To show them at a large enough scale, Minemizu has to get very close to them. But the water between the lens and the subject adds more complexity. "Even small currents created during movement can disturb the subject’s posture, especially when operating near the minimum focusing distance," he explained.

a blue scarlet shrimp larvae floats in dark water

Zoea larva of the scarlet shrimp.

Photo: Ryo Minemizu

The constant motion also makes it difficult to find and track subjects. "One of the most important tasks is to find the subject through the viewfinder and keep track of it without losing sight," Minemizu said. To help with that, he explains that a standard macro lens with a shorter focal length (around a 50 to 60mm equiv lens) is more effective than longer lenses. Focus is also a unique challenge. Keeping an animal's eye in focus while it moves around on dry land can be difficult, but imagine keeping that critical focus on a tiny subject floating around in the dark while underwater. After all, both Minemizu and the subject are moving in the current, so he only gets a brief window to engage.

Naturally, there's the gear component to consider as well. Minemizu uses Nauticam housing and the Canon EOS R5 with the EF-EOS R converter. For lenses, he sticks with the EF-S 35mm F2.8 Macro IS STM and EF-S 60mm F2.8 Macro USM lenses. He's opted for APS-C lenses because the equivalent focal lengths are ideal for his subject matter, especially the 35mm lens. He says he's eagerly awaiting an "RF-mount standard macro lens that fully takes advantage of a full-frame sensor’s capabilities," however.

a camera in underwater housing with lots of attachments sits in front of water

Minemizu's setup weighs 14kg (31lbs), but is perfectly balanced for working underwater.

Photo: Ryo Minemizu

Minemizu says that on land, his setup weighs 14 kilograms (about 31 pounds). To manage that heft underwater, he adjusts the balance and weight using float arms so the camera is perfectly level and neutrally buoyant, meaning it isn't sinking or floating. Those float arms are attached to the top and bottom, making it easier to rotate the camera vertically.

Beyond all the technical challenges, blackwater dives introduce physical risk. For safety reasons, Minemizu says he limits his dives to 25 meters (82') at night, though most are between 10 and 20 meters (32.8 to 65.6'). Occasionally, the subject he's photographing will begin to descend to deeper water, and he'll need to decide whether to follow or not. "Following it too far can become dangerous," he said. "In such cases, I need to maintain discipline and accept that there are moments I must let go."

a blue larval margined flying fish swims in black water

Larval margined flying fish.

Photo: Ryo Minemizu

While Minemizu's images are beautiful, they also contribute to science. Some of the subjects he's photographed are entirely new scientific observations. "In order to recognize such cases on the spot, it is essential for me to have a broad knowledge of plankton, acquired through my own study," said Minemizu. He is working in collaboration with scientists from the Smithsonian Institution and conducting joint studies with universities and specialists studying jellyfish, cephalopod larvae, crustacean larvae and the larvae of various other invertebrates.

You can see more of Minemizu's incredible images on his website.

Sample gallery
This widget is not optimized for RSS feed readers. Click here to open it in a new browser window / tab.
Photos: Ryo Minemizu

Panasonic S1II video stills: so many options

When you use DPReview links to buy products, the site may earn a commission.
Panasonic S1II with microphone
Photo: Richard Butler
Image Comparison
This widget is not optimized for RSS feed readers. Click here to open it in a new browser window / tab.

With the S1II, Panasonic continues the tradition of offering "open gate" recording that uses the entire sensor area, which, like with the S5II, produces a roughly 6K 3:2 image (though the S1II's rolling shutter is substantially faster). This mode provides great levels of detail and more flexibility in post; if you're working on a 4K timeline, you have a fair amount of room to reframe a shot, and you can use the same footage for both landscape and vertical output.

The camera also has a 5.1K open gate mode with a little less resolution and detail. That cuts down on its flexibility, but allows for a first for full-frame Lumix cameras: open gate recording at 60p. The 5.1K 24p and 60p modes apparently have the same level of detail.

The camera's 4K modes are all oversampled from 6K capture, and have similar levels of detail to those of competitors like the Z6III and EOS R6 II, even at up to 60p. The S1II can't quite manage full-width 4K 120p, but the mode only requires a 1.24x crop, rather than a 1.5x crop like with the Z6III. So while there's some reduction in detail compared to the slower framerates, it does capture a tad more detail than the Nikon, and will come with a smaller change to your field of view.

If you don't prefer oversampling, the S1II also offers a 16:9 5.9K capture mode and a 1.89:1 5.8K capture mode, both of which are available at up to 60p. The extra resolution offers a bit more detail and more flexibility in post, though not quite as much as the 6K open-gate mode.

Raw video

Like the S1RII, the S1II can record ProRes Raw internally, capturing a native 5.8K region of the sensor at up to 30p, or a native DCI 4K region at up to 60p. This mode may be useful for those on professional shoots that need the utmost control over their footage, but for reasons we explained in the S1RII writeup, Raw video isn't something that most shooters will likely find useful. In short, it doesn't offer the same benefits that stills shooters expect from Raw images versus JPEG ones, and it will require a lot of post-processing work, especially if you're using modern mirrorless lenses that have geometric distortion correction as part of their optical formula, as Panasonic's implementation of ProRes Raw doesn't embed them.


The S1II is absolutely bursting with video modes, so this overview is far from comprehensive. Our chart detailing them in our initial review covers 166 different options, and it isn't even a complete list of all the configurations you can have. However, our testing shows that it's very capable of producing high-quality footage, even at fast framerates. Combine that with all the video assistance features that Panasonic includes, and it's one of the most flexible hybrid shooters we've seen.

OM System is still considering a Pen F camera successor

11 juillet 2025 à 04:21


Thephoblographer reports that OM System is still considering a Pen F camera successor:

“We have the need from the market regarding the range finder style (camera) with viewfinder…it’s great feedback for us. And now we are considering what new PEN series model we can offer as OM SYSTEM. Yeah, of course, we cannot say more…but of course, we are thinking.”

OM SYSTEM on a new PEN camera: “The PEN series is a core part of the OM SYSTEM lineup, and we are actively exploring the possibility of a successor“

Via 43addict

The post OM System is still considering a Pen F camera successor appeared first on Photo Rumors.

DPReview Intro to photography: What is shutter speed?

This video is part of our Intro to Photography series, where we break down some of the fundamental concepts of the image-making process. You can find a written version below.

What is shutter speed?

Shutter speed, along with aperture value, is one of the fundamental properties of exposure: ie, how much light your camera gets exposed to. A faster shutter speed helps freeze action, whereas a slower one lets in more light but can result in blurred movement.

How do I choose my shutter speed?

There are two important factors to consider when choosing a shutter speed: how fast is my subject moving? And if that's not a concern, how steadily can I hold the camera?

For sports and action, you'll need a very high shutter speed. For portraits of a subject who's posing, you can get away with something much slower, but in low light, there'll be a limit to how long you can hold the camera without shaking it, even if your camera or lens has image stabilization.

Waterfall low shutter speed High shutter speed freezing motion
Left: a photo shot at a 30-second shutter speed. Right: a photo shot at a 1/1600 shutter speed

Working at the other extreme, long exposures can give some interesting creative effects: blurring the motion of crowds or traffic, or conveying a flowing effect with water, rather than freezing its movement.

Much of the time, you're more likely to want to set your shutter speed (or let your camera set the shutter speed) in response to your choice of aperture value and the light level in your scene.


We'll be continuing this series with more discussions on the fundamentals of exposure and photography. Check back soon for links to more entries!

Panasonic S1II studio scene: how does the speedy Lumix perform?

When you use DPReview links to buy products, the site may earn a commission.
Panasonic s1ii sensor
Photo: Richard Butler

With the release of the S1II, Panasonic became the second company to market a camera with a "Partially Stacked" sensor, which uses more sophisticated readout circuits to get data off the sensor faster than possible with existing BSI designs. (Though not nearly as fast as fully Stacked designs allow.) We've had the chance to put it in front of our studio test scene to see how it performs in terms of image quality and dynamic range.

Our test scene is designed to simulate a variety of textures, colors, and detail types you'll encounter in the real world. It also has two illumination modes, full even light and low directional light, to see the effect of different lighting conditions.

Image Comparison
This widget is not optimized for RSS feed readers. Click here to open it in a new browser window / tab.

The S1II performs well at shooting our test scene, providing great image quality. Looking at base ISO Raws, the S1II captures similar levels of detail as the other 24MP full-frame cameras on the market*, though Panasonic's JPEG engine doesn't seem to get rid of quite as much moiré artefacting as Nikon or Canon's.

Speaking of that JPEG engine, we've been pleased with Panasonic's colors for a while now, and the S1II is no exception; like the rest of its competition and the company's previous cameras, its colors are solid.

At mid ISOs to high ISOs the S1II's noise levels are competitive. Its JPEG engine does an admirable job of reducing noise while still retaining detail.

* The S1II's price puts it in competition with much slower, but higher-resolution cameras like the Sony a7CR and Panasonic's own S1RII; if you care more about image quality than speed, that's worth noting.

Dynamic Range

The S1II provides a good amount of dynamic range, giving you room to pull your shadows up without the detail being overwhelmed by noise. However, given the lack of chroma noise visible in our tests, it seems like there may be some noise reduction going on, either in ACR or in-camera. Either way, there's plenty to be squeezed out of the files, with no nasty surprises, though you will see the effects of a little extra read noise if you're shooting at base ISO to maximize dynamic range.


Exposure Latitude | ISO Invariance


This is still a relatively new sensor, but it seems like Panasonic is getting a lot out of it. The S1II's image quality is very similar to other 24MP full-frame cameras with much slower burst rates and less capable video specs. Speaking of, be sure to stay tuned: tomorrow we'll be taking a look at video stills from the S1II.

New Sigma ART 35mm f/1.2 DG DN II lens leaked online

10 juillet 2025 à 15:56

Sigma will soon announce a new ART 35mm f/1.2 DG DN II lens for Sony E and Leica L mount (replacement for the current Sigma 35mm f/1.2 DG DN Art):


On the leaked picture, the new lens is on the bottom - it will be significantly smaller and probably more expensive. Stay tuned for more updates.

The post New Sigma ART 35mm f/1.2 DG DN II lens leaked online appeared first on Photo Rumors.

❌